• Home
  • Recipes
  • About
  • Contact

Search

  • Home
  • Recipes
  • About
  • Contact

Subscribe for EASY meals!

  • Appetizers
  • Breakfast
  • Sides
  • Dinner
  • Salads
  • Soups
  • Skip to primary navigation
  • Skip to main content
  • Skip to primary sidebar
Lena's Kitchen

Lena's Kitchen

easy, elevated and approachable simple recipes for the everyday home cook

  • Weeknight Meals
  • Sides
  • Salads
  • Appetizers
  • Sweets

keto

Healthy Taco Bowls

Posted: August 8, 2025 by lena gladstone | Updated: August 19, 2025

This Healthy Taco Bowls recipe is my go-to when I want something fresh, filling, and customizable. The seasoned beef, crisp veggies, and creamy lime yogurt make every bite satisfying. Bonus: it doubles as meal prep!

Jump to Recipe
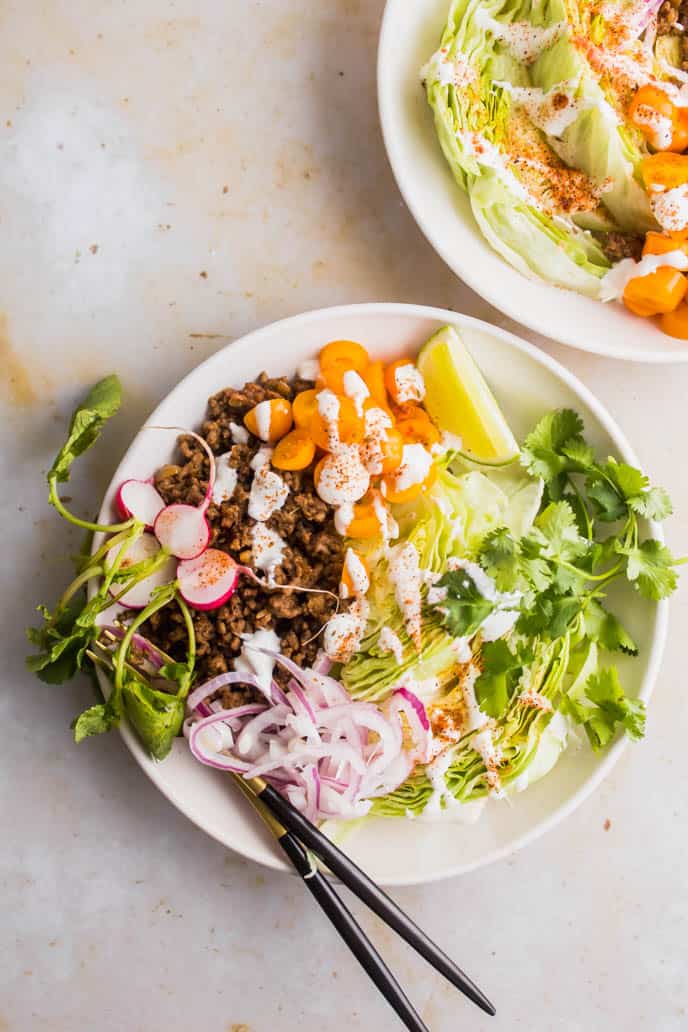
Healthy Taco Bowls With Mexican Beef and fresh tomatoes, lettuce, lime, cilantro, and onion

Why This Recipe Works

This Healthy Taco Bowls recipe is one of my favorite ways to make a fresh, satisfying meal that works for any night of the week. Here’s why I love it:

  • Fresh, Crisp, and Flavorful: Every bite has crunchy lettuce, juicy tomatoes, and herby toppings that balance the seasoned beef perfectly.
  • So Versatile: I swap in ground chicken, turkey, tofu, or even beans depending on what I have on hand. It always works.
  • Perfect for Meal Prep: I make a big batch of the beef and yogurt lime crema, then assemble bowls all week for easy lunches. It’s just as easy to make as my Korean Ground Beef Bowls.
  • Light but Filling: With protein, veggies, and a zesty drizzle of crema, it’s hearty enough for dinner but still feels light.
  • Family-Friendly: Everyone builds their own bowl with the toppings they like, and it always ends up being a hit at the table, a lot like this Egg Roll Bowl.
Healthy Taco Bowls With Mexican Beef. Served with yogurt crema, onion, tomatoes, lettuce, lime, radishes, and cilantro.

If you enjoyed this recipe, please come back and give it a rating. I ❤️ hearing from you!
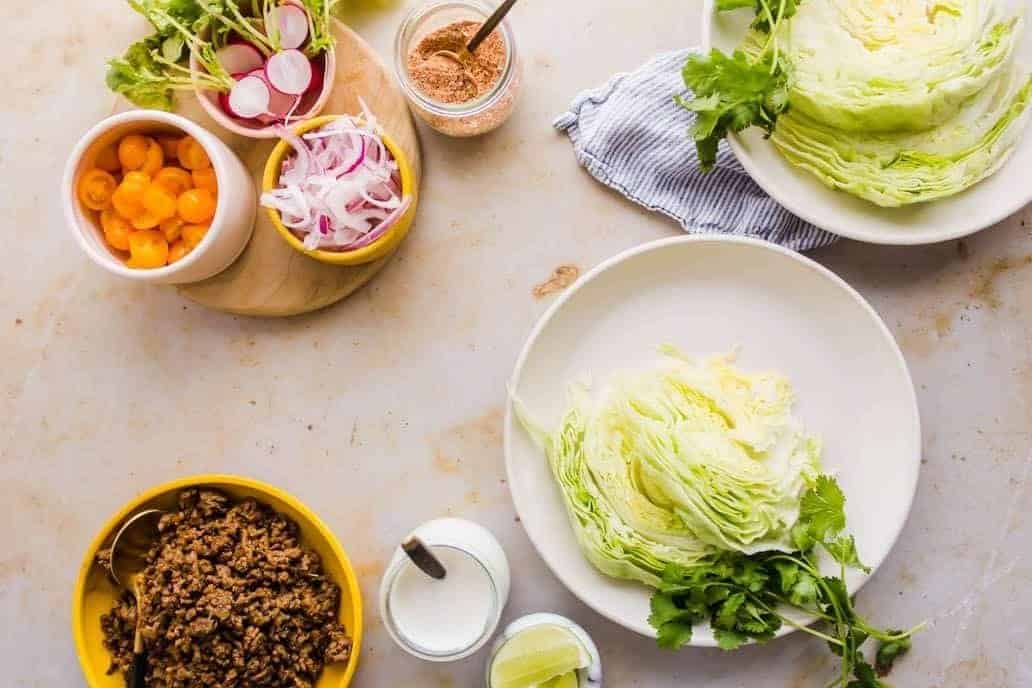
Toppings for the Healthy Taco Bowls With Mexican Beef. Tomatoes, lettuce, lime, cilantro, taco seasoning, and onion.

Ingredients

  • Ground Beef – Hearty and flavorful, ground beef is the protein base of this bowl. It’s cooked with onions, garlic, and homemade taco seasoning for bold, savory flavor. You can also swap in ground turkey, chicken, or plant-based alternatives.
  • Onion and Garlic – These aromatics add depth and richness to the meat mixture. Sautéing them first builds the flavor foundation for the whole dish.
  • Easy Homemade Taco Seasoning – A custom blend of spices gives the beef its smoky, zesty flavor. It’s naturally gluten-free and easy to batch prep.
  • Iceberg Lettuce – Crisp and refreshing, iceberg lettuce adds crunch and freshness to balance the richness of the meat and crema.
  • Tomatoes, Radishes, Cilantro, and Pickled Onions – These toppings bring color, texture, and brightness. Pickled onions add a tangy bite, while fresh cilantro gives the bowls a herby finish.
  • Yogurt Lime Crema – Made with Greek yogurt, lime juice, and garlic powder, this creamy sauce is light, tangy, and perfect for drizzling. It ties everything together and can be customized with dairy-free yogurt if needed.

For full list of ingredients and instructions, see recipe card below.

Instructions

  1. Make the Crema: In a bowl, whisk together Greek yogurt, lime juice, salt, garlic powder, and water until smooth. Set aside.
  2. Sauté the Veggies: Heat olive oil in a large pan over medium heat. Sauté chopped onion for 5–7 minutes, then add garlic and cook for 1 more minute.
  3. Cook the Meat: Add ground beef to the pan and break it up with a spatula. Cook until browned, about 7 minutes, then stir in taco seasoning and cook for 3 more minutes.
  4. Prep the Toppings: Chop lettuce, tomatoes, radishes, and cilantro. Set out pickled onions or any additional toppings you like.
  5. Assemble and Serve: Layer lettuce in bowls, top with taco meat, veggies, and crema. Finish with extra taco seasoning or fresh herbs if desired.

For full list of ingredients and instructions, see recipe card below.

Substitutions & Variations

Here are some of my favorite substitutions and variations:

  • Protein Swaps: I usually go with ground beef, but ground chicken, turkey, or even tofu all work well. If you want a plant-based option, try seasoned garbanzo beans.
    Seasoning Options: My homemade taco seasoning keeps it bold and balanced, but store-bought works in a pinch.
  • Crema Alternatives: I like using Greek yogurt for the base, but sour cream or dairy-free yogurt both work well. Or swap in chimichurri, romesco, or your favorite salsa.
Healthy Taco Bowls With Mexican Beef. Served with yogurt crema, onion, tomatoes, lettuce, lime, radishes, and cilantro.

What to Serve with Healthy Taco Bowls

Main Dishes

  • These healthy taco bowls are packed with flavor and filling enough to stand alone, but they’re also a great base for serving alongside Carne Asada, Shrimp Tostadas, or Grilled Cilantro Lime Chicken Thighs for a bigger spread.
  • For a casual taco night, pair these bowls with mini quesadillas or Pork Lettuce Wraps using the same toppings and beef mixture.

Other Sides

  • These bowls are even better when served with a few fresh, colorful sides. We love them with Crispy Roast Potatoes, grilled corn on the cob, or a scoop of Cilantro Lime Rice.
  • Add extra crunch with Air Fryer Tortilla Chips and Simple Guacamole, or keep it light with a side of mango black bean salad or quick pickled jalapeños.
  • To round out the meal, a bowl of Mexican Street Corn Salad or pineapple cucumber slaw makes the perfect refreshing bite.

FAQs

What kind of meat works best for taco bowls?

Ground beef is classic, but ground turkey, chicken, pork, or even plant-based crumbles or seasoned chickpeas work just as well. You can easily tailor the protein to fit your dietary needs.

Can I make this recipe vegetarian or vegan?

Yes. Swap the meat for seasoned black beans, lentils, tofu, or roasted vegetables. Use a dairy-free yogurt for the crema or replace it with salsa, guacamole, or chimichurri.

What toppings go well with taco bowls?

Taco bowls are super versatile. Try chopped tomatoes, avocado, pickled onions, radishes, cilantro, jalapeños, peppers, or roasted veggies. You can mix and match based on what you have.

Is the yogurt lime crema necessary?

It adds a nice creamy, tangy element, but you can skip it or replace it with another sauce like chipotle mayo, tahini dressing, or one of your favorite salsas.

How long do taco bowls keep?

The cooked beef will keep in the fridge for up to 4 days when stored in an airtight container. Store your toppings separately to keep everything fresh and crisp, then assemble your bowls just before eating.

More Bowl Recipes You’ll Enjoy

  • Grain Bowl – Featuring tender chicken, creamy avocado, roasted sweet potatoes, and zesty chipotle sauce, this dish is perfect for a wholesome lunch or a light dinner.
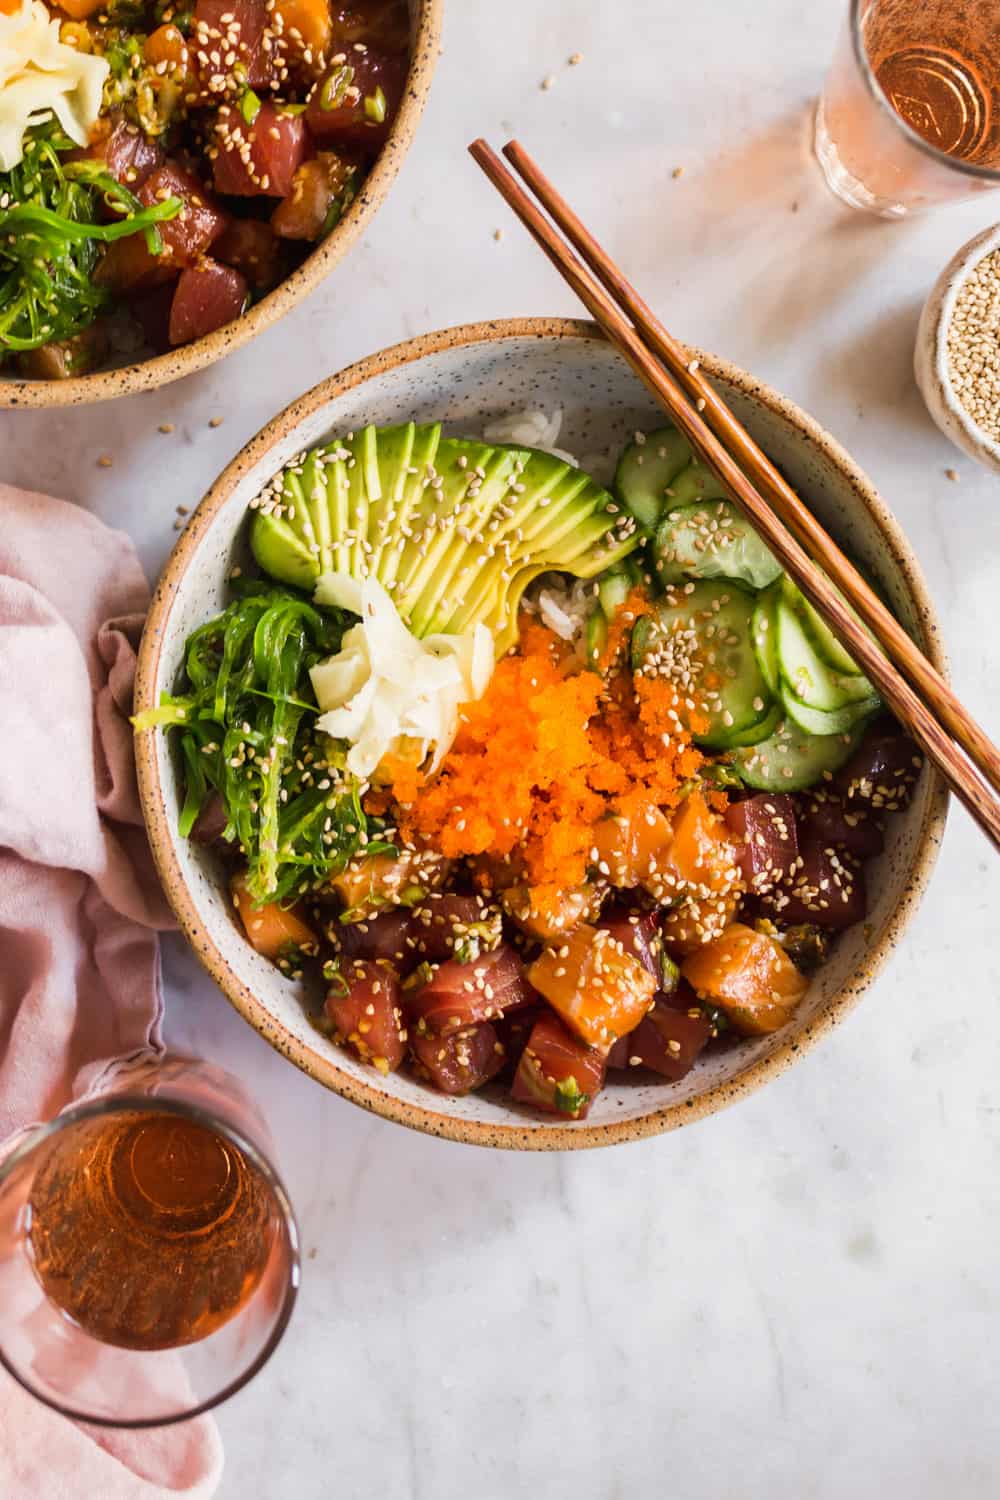
  • Salmon Sushi Bowl – If you love ordering sushi for takeout, you’ll love this Salmon Sushi Bowl even more. It’s loaded with marinated and baked salmon, crisp vegetables, rice, and a vibrant dressing.
  • Pan-Seared Miso Salmon Rice Bowls – Marinated in a savory and sweet miso glaze, these Pan-Seared Miso Salmon Rice Bowls are loaded with tender salmon, marinated cabbage, hearty sauteed vegetables, and brown rice.
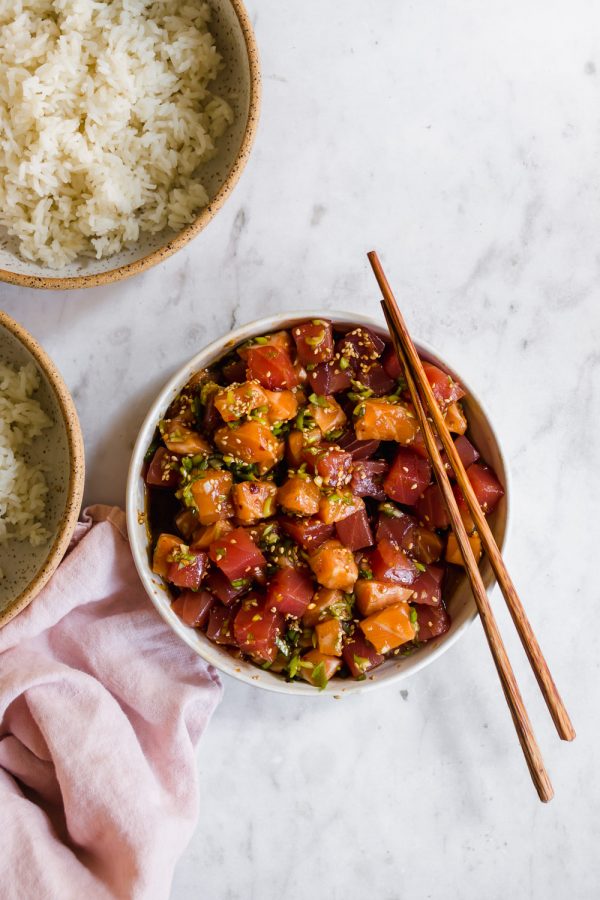
  • Easy Sushi Poke Bowls – Easy Sushi Poke Bowls are loaded with raw fish, tons of fresh vegetables, and Asian-inspired flavors. Whip up this easy meal in just 15 minutes!

If you try this Healthy Taco Bowls recipe, let me know what you think! Rate and review this recipe in the comments below. Don’t forget to take a picture and tag me on Instagram @lenaskitchenblog!

Print Recipe
4.94 from 15 votes

Healthy Taco Bowls

This Healthy Taco Bowls recipe is my go-to when I want something fresh, filling, and customizable. The seasoned beef, crisp veggies, and creamy lime yogurt make every bite satisfying. Bonus: it doubles as meal prep!
Prep Time15 minutes mins
Cook Time15 minutes mins
Total Time30 minutes mins
Course: Dinner, Lunch
Cuisine: Mexican
Keyword: beef, dinner, easy dinner, easy meal, gluten free, keto, keto dinner, low carb, low carb dinner, mexican food, veggies
Servings: 6 servings
Calories: 461kcal
Author: Lena Gladstone

Ingredients

Meat Mixture

  • 2 lbs 80/20 ground beef or any ground meat
  • 1 large onion chopped
  • 3 cloves garlic finely chopped
  • 2 tbsp olive oil
  • 6-8 tbsp Easy Homemade Taco Seasoning
  • Salt as needed

Salad & Toppings

  • 1 head of iceberg lettuce
  • tomatoes cut into pieces
  • Lena's Kitchen Pickled Onions
  • cilantro
  • radishes

Yogurt Lime Crema

  • 1/2 cup plain Greek yogurt or sour cream
  • 1/2 lime juiced
  • 1/2 tsp sea salt
  • 1 tsp garlic powder
  • 1-2 tbsp water to thin out the sauce

Instructions

Yogurt Lime Crema

  • Add all ingredients to a bowl and whisk to combine. Set aside until you're ready to assemble your taco bowls.

Healthy Taco Bowls With Mexican Beef

  • Sauté the onion in a large frying pan for 5-7 minutes on medium heat. Add garlic and sauté another minute.
  • Add meat to the pan and break it down using a spatula. Sauté until no red meat is visible, about 7 minutes.
  • Stir in the taco seasoning and cook for another 3 minutes to combine the flavors.
  • Assemble the taco bowls: cut the lettuce into wedges, and add the meat. Top with chopped tomatoes, radishes, and cilantro, then drizzle yogurt lime crema overtop. Finish with a sprinkle of taco seasoning.

Notes

  • Use any ground meat you prefer, such as beef, chicken, turkey, or plant-based alternatives like tofu or seasoned chickpeas.
  • For meal prep, cook a large batch of the meat mixture and store it in the fridge for up to 4 days.
  • Store chopped vegetables and toppings in separate containers to keep them fresh throughout the week.
  • Customize your bowls with your favorite toppings like avocado, jalapeños, roasted veggies, or pickled onions.
  • Thin the crema with a little water until it reaches a pourable consistency, then drizzle over the bowls.
  • Leftovers also work great in tacos, taco salads, burrito bowls, or chili.
 
If you enjoyed this recipe, please come back and give it a rating. I ❤️ hearing from you! 

Nutrition

Calories: 461kcal | Carbohydrates: 6g | Protein: 29g | Fat: 35g | Saturated Fat: 12g | Cholesterol: 108mg | Sodium: 312mg | Potassium: 597mg | Fiber: 2g | Sugar: 3g | Vitamin A: 451IU | Vitamin C: 6mg | Calcium: 70mg | Iron: 3mg

You might also like:
Grilled Salmon Kabobs
Panko chicken on a bed of greens.Panko Chicken
A bowl of hummus topped with spiced ground meat, pickled onions, pine nuts, fresh herbs, and a hand holding a spoon, with side dishes visible around the bowl.Hummus with Meat
Extra Crispy Air Fryer Wings with celery and homemade ranch sauce on plate being picked up with hand. lenaskitchenblog.comAir Fryer Wings
LENASKITCHEN PICKLED ONIONSPickled Onions Recipe
Steelhead Trout Recipe
Three slices of buffalo chicken pizza topped with red onions, green onions, and cheese are arranged on parchment paper, next to a bowl of dipping sauce.Buffalo Chicken Flatbread
Three cheddar bay biscuits on a plate, one split open with butter melting inside. A butter knife with butter rests on the plate, garnished with parsley.Cheddar Bay Biscuits

Smoked Fish Dip Recipe

Posted: July 2, 2025 by lena gladstone | Updated: August 3, 2025

This Smoked Fish Dip Recipe is what I bring to parties when I want something a little different. It’s creamy, rich, and loaded with lemon, dill, and smoky whitefish.

Jump to Recipe
overhead view of white creamy fish dip in a bowl surrounded by cucumbers and crackers

Why This Recipe Works

This Smoked Fish Dip Recipe is one of my favorite easy appetizers. Here’s why I always have it on hand for parties or weekend snacks:

  • Creamy, Tangy, and Packed with Smoky Flavor: The mix of cream cheese, mayo, lemon, and smoked fish gives this dip a rich, bold flavor that’s balanced and crave-worthy.
  • Easy to Whip Up in Minutes: Everything comes together fast in a food processor. I pulse it just enough to keep some texture, but you can make it totally smooth if that’s your thing. It’s just as easy to make as my Artichoke Dip.
  • Versatile for Every Occasion: I serve it with crackers, fresh veggies, or crostini for parties. Leftovers go straight onto sandwiches or inside lettuce wraps for a quick lunch, like this Trader Joe’s Buffalo Chicken Dip.
  • Customizable with Your Favorite Add-Ins: Sometimes I mix in capers, chopped jalapeños, or a spoonful of sour cream. This dip handles flavor upgrades really well.
  • Even Better After It Sits: If you can make it ahead and chill it for a few hours, the flavors deepen and come together beautifully. It’s even better the next day.

If you enjoyed this recipe, please come back and give it a rating. I ❤️ hearing from you!

individual white bowls holding smoked fish, cream cheese, vegetables, mayonnaise, and seasonings

Ingredients

  • Smoked Whitefish – This tender, flaky fish brings bold smoky flavor to the dip. It doesn’t taste as salty or fishy as cured smoked fish, like cold smoked salmon. Instead, smoked whitefish tastes mild and savory, and pairs well with extra flavor enhancers.
  • Whipped Cream Cheese – Creamy and light, whipped cream cheese forms the smooth base of the dip. It blends easily and adds rich texture without feeling heavy.
  • Mayonnaise – Just a small amount of mayo adds tang and helps round out the creaminess of the dip.
  • Lemon Juice and Zest – Fresh lemon adds brightness and cuts through the richness of the dairy. The zest boosts the citrus aroma for extra freshness.
  • Worcestershire Sauce – A splash of this savory sauce brings umami depth and a subtle tang that complements the smokiness of the fish.
  • Smoked Paprika – This adds a warm, slightly sweet smokiness that enhances the flavor of the fish and gives the dip a pretty pop of color.
  • Red Onion and Dill – Finely chopped red onion gives a little crunch and bite, while dill adds a fresh, herby finish that ties everything together.

For full list of ingredients and instructions, see recipe card below.

Instructions

  1. Blend the Base: In a food processor, combine cream cheese, mayonnaise, lemon juice, lemon zest, Worcestershire sauce, and smoked paprika until smooth.
  2. Add the Fish: Remove any skin and bones from the smoked fish. Add it to the processor with chopped red onion and dill, then pulse until just combined (leave it chunky or blend smooth, if preferred).
  1. Transfer and Garnish: Scoop the dip into a serving bowl and top with a sprinkle of smoked paprika and fresh dill fronds.
  2. Serve: Enjoy with crackers, fresh veggies, or toasted baguette. Refrigerate leftovers for up to 1 week.

For full list of ingredients and instructions, see recipe card below.

Substitutions & Variations

Here are some of my favorite substitutions and variations:

  • Fish Options: I usually use smoked whitefish, but any smoked white-fleshed fish works well. Try trout, halibut, mackerel, or even smoked salmon if that’s what you have available.
  • Add Veggies: For extra texture and freshness, try folding in finely diced celery, green bell pepper, or chopped jalapeños. These mix-ins add a nice crunch and a little heat if you like things spicy.
  • Creamy Base: The combo of whipped cream cheese and mayo creates a smooth, tangy base. For a different flavor or texture, you can mix in sour cream, Boursin cheese, or plain Greek yogurt.

What to Serve with Smoked Fish Dip Recipe

Sides

  • Pair this dip with simple, fresh sides to let the smoky flavor shine. Serve it with fresh cut veggies, Salt Roasted Potatoes, or Sweet Potato Fries In Air Fryer for a mix of textures.
  • It’s also great alongside Loaded Hummus, Baba Ganoush, or Greek Pita as part of a Mediterranean-inspired spread.

Crackers, Dips, & Chips

  • This creamy smoked fish dip is made for dipping. We love it with Air Fryer Tortilla Chips, buttery crackers, or toasted crostini.
  • It’s also great with seeded flatbreads, pita chips, or served on a charcuterie board with olives, cheese, and fresh herbs.

FAQs

What kind of fish works best for this dip?

Smoked whitefish is traditional and has a mild, buttery flavor that pairs well with the creamy base. If you can’t find it, you can use other types of smoked white fish like trout, bass, or halibut.

How chunky should the dip be?

That’s up to you. Pulse the mixture just a few times if you like it chunky, or blend it longer for a smooth and creamy consistency.

What are some tasty add-ins?

Try mixing in chopped jalapeños, pepperoncinis, celery, green bell peppers, capers, or even a little Boursin cheese. A sprinkle of smoked paprika or salmon roe on top adds great flavor and presentation.

How long does smoked fish dip keep?

Store it in an airtight container in the fridge for up to 1 week. Let it chill for at least 4 hours before serving to help the flavors meld. Freezing is not recommended, as the texture changes once thawed.

More Light Seafood Recipes You’ll Enjoy

  • Ahi Tuna Poke Nachos – Try Wonton Nachos with ahi tuna poke for a unique fusion of two classic favorites! Fried wonton chips are loaded with sesame-crusted tuna, creamy avocado cubes, and spicy mayo. 
  • Roasted Salmon Nicoise Salad – This French Roasted Salmon Niçoise Salad with Lemon Vinaigrette is an elegant choice for brunch or lunch.
  • Lox and Bagel Brunch Board – Serve this creative and flexible breakfast with lox, bagels, herbed cream cheese, and fresh toppings when you want to impress guests or celebrate special occasions.
  • Garlic Grilled Shrimp Skewers – This delectable and satisfying Garlic Grilled Shrimp with Mediterranean Salad is the perfect summer meal.

If you try this Smoked Fish Dip recipe, let me know what you think! Rate and review this recipe in the comments below. Don’t forget to take a picture and tag me on Instagram @lenaskitchenblog!

Print Recipe
3.92 from 90 votes

Smoked Fish Dip

This Smoked Fish Dip Recipe is what I bring to parties when I want something a little different. It’s creamy, rich, and loaded with lemon, dill, and smoky whitefish.
Prep Time10 minutes mins
Total Time10 minutes mins
Course: Appetizer, Side Dish, Snack
Cuisine: American
Keyword: smoked fish dip
Servings: 4 servings
Calories: 349kcal
Author: Lena Gladstone

Ingredients

  • 8 oz smoked whitefish or smoked fish of choice
  • ¼ cup mayonnaise
  • 8 oz whipped cream cheese at room temperature
  • ½ tsp Worcestershire sauce
  • ½ tsp smoked paprika
  • 1 tbsp fresh lemon juice
  • 1 tsp lemon zest
  • 3 tbsp red onion finely chopped
  • 2 tbsp dill finely chopped

Instructions

  • Remove the skin and bones from the fish.
  • In a food processor, add cream cheese, mayonnaise, lemon juice and zest, Worcestershire sauce, smoked paprika and blend until smooth.
  • Add fish, finely chopped red onion and freshly chopped dill and pulse until combined. You want it to stay a little chunky or make it smooth if you prefer that consistency.
  • Remove to a bowl, top with a sprinkle of smoked paprika and dill fronds. Serve with veggies, crackers or toasted baguette.

Notes

  • Remove all skin and bones from the smoked fish before blending to ensure a smooth, pleasant texture.
  • Use whipped cream cheese at room temperature so it blends easily with the other ingredients.
  • Blend the base ingredients first, then pulse in the fish, onion, and dill to control the final texture. You can leave it slightly chunky or blend it smooth depending on your preference.
  • Let the dip chill in the fridge for at least 4 hours or overnight to allow the flavors to fully develop.
  • Store leftovers in an airtight container in the refrigerator for up to 1 week. Do not freeze, as the texture will change.
  • Serve the dip with crackers, toasted baguette slices, or fresh vegetables like snap peas, carrots, and celery.
  • It makes a great addition to charcuterie boards and works well as an appetizer for barbecues or dinner parties.
  • Use leftovers in sandwiches, lettuce cups, or wraps for an easy, flavorful lunch.
  • For a beautiful presentation, top the dip with smoked paprika, dill, salmon roe, or roasted garlic before serving.
  • Optional add-ins for extra flavor and texture include chopped jalapeños, pepperoncinis, celery, green bell pepper, Boursin cheese, capers, avocado, chives, sour cream, or a pinch of cayenne.
 
If you enjoyed this recipe, please come back and give it a rating. I ❤️ hearing from you! 

Nutrition

Calories: 349kcal | Carbohydrates: 4g | Protein: 15g | Fat: 31g | Saturated Fat: 13g | Polyunsaturated Fat: 7g | Monounsaturated Fat: 8g | Trans Fat: 1g | Cholesterol: 97mg | Sodium: 308mg | Potassium: 281mg | Fiber: 1g | Sugar: 3g | Vitamin A: 910IU | Vitamin C: 3mg | Calcium: 67mg | Iron: 1mg

You might also like:
Beef Carpaccio Recipe
A pile of savory pastry pinwheels garnished with herbs on a white surface, next to a knife, parsley sprigs, and a small bowl of dark dipping sauce.Ham and Cheese Puff Pastry Pinwheels
Hands pulling apart a round loaf of bread filled with melted cheese and herbs on a white plate, with ingredients like garlic and parmesan nearby.Cheesy Garlic Pull Apart Bread
A hand holds a piece of toasted bread topped with cheese and fresh fig, with more similar brie and fig crostini arranged on a white platter.Brie and Fig Crostini
Bacon-wrapped dates stuffed with cheese on a plate, with honey being drizzled over them using a honey dipper.Bacon Wrapped Dates with Goat Cheese
Puff pastry brie bites being drizzled with honey.Puff Pastry Brie Bites
A stack of golden-brown zucchini fritters topped with a dollop of sour cream and a sprig of dill, served on a white plate with green garnish.Zucchini Fritters Recipe
Loaded Hummus

Caesar Dressing Recipe

Posted: June 25, 2025 by lena gladstone | Updated: September 2, 2025

A small glass jar of creamy homemade Caesar Dressing with a wooden spoon, placed on parchment paper alongside half a lemon.

This Caesar Dressing Recipe is a staple in my fridge. It’s easy to blend up using just 7 ingredients, tastes way better than store-bought, and works on everything from salads to grilled chicken.

Jump to Recipe
A small glass jar of creamy homemade Caesar Dressing with a wooden spoon, placed on parchment paper alongside half a lemon.

Why This Recipe Works

This Caesar Dressing Recipe is one of my kitchen essentials. Here’s why I keep making it over and over again:

  • Creamy, Tangy, and Packed With Flavor: This dressing has everything I love. It’s rich from the mayo and Parmesan, bright from fresh lemon juice, and loaded with garlicky, salty goodness. It’s perfectly tangy like my Lemon Vinaigrette Dressing.
  • Anchovies Add Real Flavor: I promise it doesn’t taste fishy. The anchovies add a deep, savory backbone that makes this taste like real Caesar, not just another vinaigrette.
  • Ridiculously Easy to Make: All I do is toss the ingredients into a jar and blend for 20 seconds. It comes out perfectly smooth and emulsified every time.
  • So Much Better Than Store-Bought: This homemade dressing is worlds ahead of the bottled kind. It’s fresher, more balanced, and I can tweak it exactly how I like, like my Homemade Ranch Dressing.
  • Perfect for More Than Salad: I drizzle it over grilled chicken, dip veggies into it, and sometimes even spoon it onto roasted potatoes. It’s creamy, tangy, and works with just about everything.
A small glass jar of creamy homemade Caesar Dressing with a wooden spoon, placed on parchment paper alongside half a lemon.

If you enjoyed this recipe, please come back and give it a rating. I ❤️ hearing from you!

Overhead shot of ingredients to make classic homemade Caesar dressing recipe at home.

Ingredients

  • Mayonnaise – This creates a rich, creamy base that mimics the texture of traditional Caesar dressing without needing raw eggs.
  • Parmesan Cheese – Freshly grated Parmesan adds salty, nutty depth and helps give the dressing its classic, savory flavor.
  • Garlic – Just a couple of cloves bring sharpness and a little bite that cuts through the creamy base, balancing the overall taste.
  • Lemon Juice – Fresh lemon juice brightens the dressing and adds a touch of acidity that lifts all the flavors.
  • Dijon Mustard – A small spoonful of Dijon brings gentle heat and complexity, tying everything together.
  • Anchovies or Anchovy Paste – These give the dressing its signature umami depth. They don’t make it taste fishy but instead add savory, salty richness that’s hard to replicate.
  • Kosher Salt – A pinch enhances all the other flavors and ensures the dressing is perfectly seasoned.

For full list of ingredients and instructions, see recipe card below.

Instructions

  1. Add Ingredients: Place mayonnaise, Parmesan, garlic, lemon juice, Dijon, salt, and anchovies in a mason jar.
  2. Blend: Use an immersion blender, moving it up and down, until the dressing is smooth and emulsified (about 15–30 seconds).

For full list of ingredients and instructions, see recipe card below.

Substitutions & Variations

Here are some of my favorite substitutions and variations:

  • Anchovy Options: I usually add anchovy filets or paste for the best savory depth, but you can replace them with 1 teaspoon of capers for a similar salty, briny note. If you decide to skip anchovies altogether, add an extra teaspoon of Dijon mustard or Worcestershire sauce to help maintain that rich umami flavor.
  • Egg-Free Base: Classic mayonnaise gives this dressing its rich texture, but you can use plain Greek yogurt or even soft tofu for a lighter option. These swaps still keep it creamy and are great if you’re looking to skip raw eggs.
  • Cheese Choices: Freshly grated Parmesan blends right into the dressing, but if you’d like a sharper, saltier taste, try Pecorino Romano. Always grate it yourself for the best texture.
Caesar salad in a tray with Classic Homemade Caesar Dressing.

What to Serve with Caesar Dressing Recipe

Salad Options

  • This creamy Caesar dressing is the perfect finishing touch for all kinds of salads. We love it drizzled over a Slow Roasted Rib Eye Steak With Veggies and Grilled Caesar Salad for a hearty, satisfying meal.
  • It’s also great tossed with a Kale Caesar Salad, a Radicchio Caesar Salad, or folded into a Chicken Caesar Pasta Salad for a more filling option.

Other Sides

  • Caesar dressing isn’t just for salads. Try serving it as a dip with Crispy Air Fryer Potatoes, alongside Air Fryer Chicken Nuggets, or even with Sweet Potato Fries In Air Fryer.
  • For a fun snack board or appetizer spread, set out this Caesar dressing with Air Fryer Tortilla Chips or a platter of fresh cut veggies like carrots, cucumbers, and bell peppers.

FAQs

Do I really need to use anchovies?

Anchovies give Caesar dressing its classic salty, savory flavor. They do not make it taste fishy. If you prefer, you can swap them for capers, or add a little extra Dijon mustard and Worcestershire sauce to get a similar depth.

Can I use pre-grated Parmesan cheese?

Freshly grated Parmesan makes a big difference. It melts into the dressing and creates a smoother, creamier texture. Pre-grated cheese tends to be drier and won’t blend as well.

What if I don’t have an immersion blender?

A regular blender or small food processor works perfectly. If you don’t have either, grate the garlic and cheese, finely mince the anchovies, then whisk everything together by hand in a bowl until smooth.

Is this dressing keto-friendly?

Yes, this homemade Caesar dressing is naturally low in carbs and works well for keto. It’s delicious on salads, grilled meats, or as a dip.

How long does Caesar dressing keep?

Store the dressing in an airtight container in the fridge for up to 2 weeks. You can also freeze it in ice cube trays, then thaw a few cubes overnight in the fridge when you’re ready to use it.

More Sauce Recipes You’ll Enjoy

  • Pineapple Dressing Recipe – This Pineapple Dressing recipe is my go-to when I want to brighten up a salad. It’s sweet, tangy, and bursting with tropical flavor.
  • Chimichurri Sauce – This vibrant green sauce packs a punch with its unique combination of fresh herbs, citrus, and a hint of saltiness from capers.
  • Mushroom Sauce for Steak – This 15-minute Mushroom Sauce for Steak showcases earthy baby bella mushrooms, savory aromatics, and tangy Dijon mustard bathed in a rich and cheesy sauce.
  • Burger Sauce Recipe – This Burger Sauce recipe is my go-to for leveling up homemade burgers. It’s creamy, tangy, and full of flavor with just the right kick. 

If you try this recipe, let me know what you think! Rate and review this recipe in the comments below. Don’t forget to take a picture and tag me on Instagram @lenaskitchenblog!

A small glass jar of creamy homemade Caesar Dressing with a wooden spoon, placed on parchment paper alongside half a lemon.
Print Recipe
4.56 from 27 votes

Caesar Dressing Recipe

This Caesar Dressing Recipe is a staple in my fridge. It’s easy to blend up using just 7 ingredients, tastes way better than store-bought, and works on everything from salads to grilled chicken.
Prep Time5 minutes mins
Total Time5 minutes mins
Course: Salad
Cuisine: American
Diet: Gluten Free
Keyword: caesar dressing recipe
Servings: 4 servings
Calories: 159kcal
Author: Lena Gladstone

Equipment

  • Immersion blender or blender

Ingredients

  • ⅓ cup mayonnaise
  • ¼ cup Parmesan cheese freshly grated
  • 2 cloves garlic or more to taste
  • ½ large lemon juiced
  • 1 ½ teaspoons Dijon mustard
  • ½ teaspoon kosher salt
  • 2 filets anchovies or 1 ½ teaspoons anchovy paste

Instructions

  • Add all of the ingredients to a large mason jar.
  • Use an immersion blender to blend all of the ingredients together. Pull the blender up and down until the dressing has emulsified. Blending will only take around 15-30 seconds.
  • Stir the dressing, and taste to adjust the seasoning if needed. Tasting is key to achieving the perfect taste. You may want a little more anchovy, salt, or lemon.
  • Serve with romaine lettuce, croutons, and your choice of protein (such as grilled chicken). Keep the dressing refrigerated and eat within 2 weeks.

Notes

  • Use high-quality, freshly grated Parmesan for the best flavor and a rich, creamy texture.
  • Don’t worry about the anchovies making it taste fishy. They add a balanced, salty depth that’s essential to true Caesar dressing.
  • Taste the dressing after blending and adjust with more lemon, salt, or anchovy to suit your preference.
  • This dressing is easiest to make with an immersion blender directly in a jar. You can also use a regular blender or small food processor.
  • If you don’t have a blender, grate the garlic and cheese, finely mince the anchovies, then whisk everything together in a bowl.
  • For a lighter version, try replacing the mayo with plain Greek yogurt or soft tofu.
  • If you want to skip anchovies, use 1 teaspoon of capers or add extra Dijon and a splash of Worcestershire sauce to help replace the savory notes.
  • Keep the dressing stored in an airtight container in the fridge for up to 2 weeks.
  • It can also be frozen in ice cube trays, then thawed in the fridge overnight for easy single servings.
  • This dressing is perfect on a classic Caesar salad, with grilled chicken, or even drizzled over baked sweet potatoes for a savory side.
 
If you enjoyed this recipe, please come back and give it a rating. I ❤️ hearing from you! 

Nutrition

Serving: 0g | Calories: 159kcal | Carbohydrates: 2g | Protein: 3g | Fat: 16g | Saturated Fat: 3g | Polyunsaturated Fat: 8g | Monounsaturated Fat: 4g | Trans Fat: 0.04g | Cholesterol: 12mg | Sodium: 531mg | Potassium: 39mg | Fiber: 0.5g | Sugar: 1g | Vitamin A: 66IU | Vitamin C: 8mg | Calcium: 84mg | Iron: 0.2mg

You might also like:
Penne Alla Vodka Sauce Recipe
A glass jar filled with yellow pineapple dressing sits on a matching saucer, surrounded by pineapple chunks and pineapple leaves.Pineapple Dressing Recipe
A bowl of simple guacamole, garnished with tortilla chips, is surrounded by fresh cilantro, lime, and tortilla chips on a marble surface.Simple Guacamole Recipe
Tomato gravy in a bowl.Tomato Gravy (Podliva)
Trader Joe's buffalo chicken dip.Trader Joes Buffalo Chicken Dip
Crab spinach artichoke dip.Crab Spinach Artichoke Dip
Mushroom sauce for steak.Mushroom Sauce for Steak
Cottage cheese dip.Cottage Cheese Dip

Air Fryer Artichoke Hearts with Garlic Aioli (Keto and Low Carb)

Posted: January 25, 2022 by lena gladstone | Updated: January 31, 2022

Air Fryer Artichoke Hearts are a simple, yet delicious low carb appetizer! They’re ready to eat in 10 minutes, made without breadcrumbs, and served with homemade garlic aioli for dipping.

Jump to Recipe
fried artichoke hearts in a parchment paper lined baking dish with a bowl of creamy pink sauce.

Air fryer artichokes recipe

Keto-friendly appetizers always show up at my parties. Platters of baba ganoush and veggies, baked meatballs, and cheeseburger stuffed mini peppers are put out and gone within minutes! Air Fryer Artichokes with Garlic Aioli are one of the newest additions to the party and always a hit with guests.

Coated in a low carb garlic and parmesan “breading”, these crispy air fried artichokes are not only a healthy appetizer but a delicious one as well! Canned water-packed artichoke hearts are drained, then tossed in a garlic powder, salt, and parmesan coating before being cooked in the air fryer. Dip them in the homemade garlic aioli when they’re done and enjoy!

Tools you need for these Air Fryer Artichokes

  • Airfryer
  • Cutting Board
  • Sharp Knife
  • Measuring Spoons
  • Measuring Cup
  • Microplane
small white bowls holding mayonnaise, oil, cheese, spices, and artichoke hearts.

Ingredient notes

  • Canned artichoke hearts – Pick up 2 cans of artichoke hearts packed in water. Oil-packed or marinated artichoke hearts aren’t an ideal choice because of the added flavors and oil but can be used if that’s all you have at home. Just dry them really well with paper towels before tossing them in the garlic powder and parmesan.
  • Olive oil – Coating the artichoke hearts in a little oil will help them crisp in the air fryer and keep the seasonings and parmesan from falling off.
  • Garlic powder – Mixed with salt to give the artichoke hearts a delicious savory flavor.
  • Parmesan cheese – Freshly grated parmesan crisps up in the air fryer, giving the artichokes a subtle crunch and saltiness without needing breadcrumbs.
  • Garlic aioli – This is my favorite dip to pair with artichokes! It’s easy to make at home using keto mayonnaise, paprika, garlic, lemon juice, and lemon zest. Plus, you can make it up to 5 days ahead of time and store it in the fridge so it’s ready to enjoy at a moment’s notice.

How to make air fryer artichoke hearts with garlic aioli

This 10-minute keto appetizer is tossed in a breadcrumb-free coating and then air fried! It’s so easy to make and ready after 4 simple steps:

  1. Prepare the artichoke hearts.

    Drain the excess water from the canned artichoke hearts. If they’re whole, cut them in half. Dry them well with paper towels.

  2. Coat the artichokes.

    Toss the halved artichoke hearts with olive oil in a bowl. Next, toss them in the garlic powder and salt. Finish by coating them in freshly grated parmesan cheese.

  3. Air fry the artichoke hearts.

    Place the coated artichokes in an even layer in the air fryer basket (work in batches if needed). Cook for 5 minutes, flip, and air fry for another 5 minutes.

  4. Make the aioli, then serve.

    While you wait for the artichokes to cook, stir the mayonnaise, smoked paprika, grated garlic, lemon zest, and juice together in a small bowl. Serve the fried artichokes on a serving platter with the garlic aioli and enjoy!

Mix up the flavors!

There are so many available variations to this recipe, so have fun mixing up the flavors!

  • Instead of artichoke hearts – Make this recipe with any vegetable! Coat broccoli, cauliflower, asparagus, potatoes, or any other veggie you like in the garlic and parmesan, then air fry to crispy perfection.
  • Mix up the seasonings – Add paprika, cumin, Italian seasoning, red chili flakes, Cajun seasoning, or anything else you like to the coating.
  • Keto breading options – Toss the artichoke hearts in a little bit of almond flour (mixed with the spices and cheese) or a 1:1 mix of almond flour and coconut flour before frying. The flour will crisp up when cooked and give the fried artichokes an extra crunch.
  • Dipping sauce options – Instead of the garlic aioli sauce, dip the fried artichoke hearts in hummus, ranch dressing, cilantro lime crema, yogurt feta sauce, or Caesar dressing. 
  • Toppings – Top the air fried artichokes with more parmesan, mozzarella cheese, fresh herbs, or a drizzle of hot sauce.

Frequently asked questions

How long do you air fry artichoke hearts?

The coated artichoke hearts only need to be cooked for 10 minutes in a 400ºF air fryer. You’ll know they’re ready to eat when the cheese is golden brown and the artichokes look tender and crispy.

Can you make this with frozen artichoke hearts?

Frozen artichoke hearts can be cooked in the air fryer, but should be thawed and patted dry first. This keeps the seasonings and parmesan from falling off.

Can you bake artichoke hearts instead?

Absolutely! Coat the artichoke hearts before laying them on a wire rack over top of a baking sheet (to keep the air circulating and ensure crispy baked artichokes). Bake in a 400ºF oven for about 18 to 20 minutes or until the cheese is golden brown.

womans hand dipping a fried artichoke heart in a creamy pink dip.

Looking for more air fryer appetizers?

  • Extra Crispy Air Fryer Chicken Wings
  • Loaded Baked Sweet Potatoes
  • Asian Pork Meatballs
  • Easy Keto Chicken Tenders

If you give these Air Fryer Artichoke Hearts with Garlic Aioli a try, let me know what you think! Leave a comment and don’t forget to take a picture and tag it with #lenaskitchenblog on Instagram. I love seeing what you come up with!

Print Recipe
4.13 from 81 votes

Air Fryer Artichoke Hearts with Garlic Aioli (Keto and Low Carb)

Air Fryer Artichoke Hearts are a simple, yet delicious low carb appetizer! They’re ready to eat in 10 minutes, made without breadcrumbs, and served with homemade garlic aioli for dipping.
Prep Time5 minutes mins
Cook Time10 minutes mins
Total Time15 minutes mins
Course: Appetizer, Snack
Cuisine: American, Mediterranean
Keyword: 20 minute recipe, air fryer, appetizer, healthy snack, keto, keto recipe, low carb, snack, vegetarian
Servings: 4 servings
Calories: 212kcal
Author: Lena Gladstone

Ingredients

Air Fryer Artichoke Hearts

  • 1 teaspoon garlic powder
  • ¼ teaspoon kosher salt
  • 2 tablespoons olive oil
  • ½ cup Parmesan cheese freshly grated
  • 2 14 oz cans artichoke hearts halved in water
  • cooking spray for air fryer

Garlic Aioli

  • ¼ cup mayonnaise
  • ½ teaspoon smoked paprika
  • ¼ teaspoon kosher salt
  • 1 clove garlic large, grated
  • 2 tbsp lemon juice
  • 1 teaspoon lemon zest

Instructions

Air Fryer Artichoke Hearts

  • Preheat the air fryer to 400ºF degrees.
  • Remove the artichokes from the can, drain well. If they are whole, cut in half. Then using a few paper towels, dry them on the paper towel, gently pressing down.
  • In a bowl, add artichokes and olive oil, toss gently to coat the artichokes.
  • Then add garlic powder and salt, toss gently to coat. Add Parmesan cheese, toss to combine.
  • Spray air fryer basket with oil. Add artichokes and air fry for 5 minutes.
  • Flip and air fry for another 5 minutes.
  • Remove to a serving platter. Serve with aioli sauce to dip.

Garlic Aioli

  • Add mayonnaise, smoked paprika, grated garlic, lemon zest and juice into a small bowl.
  • Whisk to combine and add to a serving platter with artichokes. Enjoy.

Nutrition

Calories: 212kcal | Carbohydrates: 2g | Protein: 5g | Fat: 21g | Saturated Fat: 5g | Polyunsaturated Fat: 7g | Monounsaturated Fat: 8g | Trans Fat: 1g | Cholesterol: 14mg | Sodium: 583mg | Potassium: 41mg | Fiber: 1g | Sugar: 1g | Vitamin A: 231IU | Vitamin C: 4mg | Calcium: 153mg | Iron: 1mg

You might also like:
Beef Carpaccio Recipe
A pile of savory pastry pinwheels garnished with herbs on a white surface, next to a knife, parsley sprigs, and a small bowl of dark dipping sauce.Ham and Cheese Puff Pastry Pinwheels
Hands pulling apart a round loaf of bread filled with melted cheese and herbs on a white plate, with ingredients like garlic and parmesan nearby.Cheesy Garlic Pull Apart Bread
A hand holds a piece of toasted bread topped with cheese and fresh fig, with more similar brie and fig crostini arranged on a white platter.Brie and Fig Crostini
Bacon-wrapped dates stuffed with cheese on a plate, with honey being drizzled over them using a honey dipper.Bacon Wrapped Dates with Goat Cheese
Puff pastry brie bites being drizzled with honey.Puff Pastry Brie Bites
A stack of golden-brown zucchini fritters topped with a dollop of sour cream and a sprig of dill, served on a white plate with green garnish.Zucchini Fritters Recipe
Smoked Fish Dip Recipe

5 MINUTE ARUGULA BASIL PESTO

Posted: January 17, 2022 by lena gladstone | Updated: January 20, 2022

arugula basil pesto in glass with spoon and small wood board

Make this easy 5 Minute Arugula Basil Pesto recipe to add to any of your favorite dishes. Add it to your pasta, sandwiches, breakfast things, fish, meat, or veggies.

arugula basil pesto in glass

Isn’t this green color so pretty? I can just eat the arugula basil pesto right out of the jar, it’s that good. Perfect for when you have an abundance of fresh basil in the garden. Pick up some arugula, parmesan cheese, lemon at the market and you’re halfway to having this perfect sauce in your hands.

Make a double batch, because you will be adding it to everything.

  • Here are some ways you can use your arugula basil pesto :
  • Dress up your sandwiches.
  • Drizzle on top of salmon skewers or grilled piece or salmon.
  • Toss it in with any pasta or add it in to my penne pasta.
  • Top it on top of my everyday baked chicken breast, or shred the chicken, add some mayo and pesto and make a chicken salad.
  • Top this pizza and then add cheese and your favorite toppings.
  • Add a spoonful to my homemade ranch.
  • Add a spoonful to my homemade mayo to add flavor to your sandwiches.

You get the idea. Possibilities are endless.

One of my favorite olive oils is the Lucini Extra Virgin Olive Oil, it’s so fresh and clean. The flavors are unbelievable.

If you haven’t tried it yet, I highly recommend it. Grab a bottle or two in my Amazon Store among other goodies for the kitchen.

Arugula pesto ingredients laying down flat

I love the peppery flavor that arugula adds to this pesto. Since I discovered that I have an allergy to black pepper after the birth of my daughter, I stay away from pepper like the plague. So instead I add arugula to a lot of things to add that kick

Wonder how this tasty sauce came about? One day, I was making pesto and realized I didn’t have enough to make a batch. I scavenged the fridge and found half a bag of arugula and it made this bright, peppery and delicious pesto.

arugula, parmesan cheese in food processor

Here is the food processor I have and LOVE. It’s one of those tools that I use quite a bit. Mine is the 11 cup.

Are you a fan of adding nuts to your pesto? I’m not actually so this is nut-free and I bet if you wanted to, you can remove the parmesan cheese and make this vegan and Whole30 approved for sure. I don’t add a ton of cheese to mine because I want the freshness of the basil and arugula to shine.

arugula basil pesto in glass with spoon and small wood board

How long will this last in the fridge or can you can freeze it?

  • Make arugula basil pesto up to three days ahead of time. Add it into a container and cover it with a thin layer of olive oil. This helps with browning and preserves the bright green color.
  • Freezing your arugula basil pesto is totally fine! Add to a mason jar, cover with a thin layer of olive oil. It will keep in the freezer for up to three months.

What would you add your batch of arugula basil pesto to? Let me know in comments below. Can’t wait to read your ideas.

If you give this 5 MINUTE ARUGULA BASIL PESTO a try, let me know what you think, rate this recipe in comments below, share it on Pinterest, Facebook or Instagram.
Leave a comment and don’t forget to take a picture, tag it with #lenaskitchenblog on Instagram or tag me on my Facebook page! I love seeing what you come up with! Happy cooking.

arugula basil pesto in glass
Print Recipe
4.11 from 38 votes

5 MINUTE ARUGULA BASIL PESTO

Easiest 5 minute arugula basil pesto is my new sauce addiction this summer. Add it to your pasta, sandwiches, breakfast things, fish, meat or veggies.
Prep Time5 minutes mins
Course: Sauce
Cuisine: Italian
Keyword: dip, italian, pasta, pesto, sauce
Servings: 2 CUPS
Calories: 970kcal
Author: Lena Gladstone

Ingredients

  • 7 oz baby arugula
  • 4 oz fresh basil stems removed
  • 1 large lemon juiced
  • 2 large garlic cloves
  • ¾ cup olive oil
  • 1 cup parmesan cheese freshly grated
  • 1 tbsp sea salt

Instructions

  • Add arugula, basil, oil, parmesan, lemon juice, garlic and salt in a food processor until fully processed. Might need to scrape down the sides to ensure everything is well combined.
  • Serve immediately or store in the refrigerator covered with a thin layer of olive oil for up to three days, or in the freezer for up to three months in a mason jar.

Nutrition

Serving: 0g | Calories: 970kcal | Carbohydrates: 13g | Protein: 23g | Fat: 95g | Saturated Fat: 20g | Cholesterol: 34mg | Sodium: 4321mg | Potassium: 667mg | Fiber: 4g | Sugar: 4g | Vitamin A: 5748IU | Vitamin C: 55mg | Calcium: 874mg | Iron: 5mg

You might also like:
Penne Alla Vodka Sauce Recipe
A small glass jar of creamy homemade Caesar Dressing with a wooden spoon, placed on parchment paper alongside half a lemon.Caesar Dressing Recipe
A glass jar filled with yellow pineapple dressing sits on a matching saucer, surrounded by pineapple chunks and pineapple leaves.Pineapple Dressing Recipe
A bowl of simple guacamole, garnished with tortilla chips, is surrounded by fresh cilantro, lime, and tortilla chips on a marble surface.Simple Guacamole Recipe
Tomato gravy in a bowl.Tomato Gravy (Podliva)
Trader Joe's buffalo chicken dip.Trader Joes Buffalo Chicken Dip
Crab spinach artichoke dip.Crab Spinach Artichoke Dip
Mushroom sauce for steak.Mushroom Sauce for Steak

Mustard and Herb Crusted Rack of Lamb

Posted: December 21, 2021 by lena gladstone | Updated: January 24, 2022

Bring some elegance to the table with this Mustard and Herb Crusted Rack of Lamb. Dressed in dijon mustard, fresh garlic, and rosemary, this easy show-stopping centerpiece tastes deliciously savory and tangy. No breadcrumbs needed!

Jump to Recipe
crusted cooked lamb chops on a white plate with rosemary.

Rack of lamb with mustard and herb crust

There are many show-stopping dinners you can serve to family and friends during the holidays or for special occasions, like Ribeye Steak and Shrimp or Herbed Prime Rib Roast. But when you really want to go all out, wow your guests with this Mustard and Herb Crusted Rack of Lamb.

Incredibly tender, juicy, herbaceous, and slightly tangy, this dijon herb crusted rack of lamb is surprisingly easy to make! All you need is the meat and a handful of simple condiments, herbs, and seasonings. There aren’t any breadcrumbs needed for the crust either, meaning this elegant dinner is naturally gluten free and keto-friendly.

carving rack of lamb on a large white serving plate.

What is a rack of lamb?

Rack of lamb is cut from the unsplit primal rib on the lamb carcass. Instead of splitting the ribs (like baby back ribs), they’re held by the meat and cooked together.

When you’re out shopping for the lamb rack, look for meat with a vibrant red color with firm white fat throughout. If the meat is dark red, that means it’s older and won’t taste as fresh or tender.

raw rack of lamb on a metal tray.

Crusted rack of lamb ingredients

  • Rack of lamb – You’ll want the rack to be frenched, meaning the rib bones have been stripped of the meat and left exposed. If your rack didn’t already come this way, you can ask the butcher to do it for you.
  • Dijon mustard – This tangy condiment is brushed all over the lamb before it’s coated with garlic and rosemary.
  • Garlic – The chopped garlic sticks to the dijon-coated lamb and infuses delicious savory flavors right into the meat.
  • Rosemary – Or feel free to use any fresh herbs you love, like thyme or parsley.
searing rack of lamb in a metal skillet.
crusted rack of lamb in a tinfoil-lined baking dish.
roasted crusted rack of lamb in a tinfoil-lined baking dish.

How to make mustard and herb crusted rack of lamb

Although this recipe feels fancy, it’s actually very simple to make and uses common ingredients. Here’s how it’s done:

  1. Prepare the meat.

    When the refrigerated rack has come down to room temperature, trim the majority of the fat cap off of the top using a sharp knife. Season with salt on all sides.

  2. Sear the rack of lamb.

    Heat some oil in a skillet over high heat, then place the lamb rack fat side down. Continue searing on all sides until browned.

  3. Add the dijon and herb crust.

    Place the rack on your prepared baking sheet. While it cools, mix the chopped garlic and rosemary together in a small bowl. First, brush the dijon mustard evenly all over the lamb, then rub on the garlic and rosemary.

  4. Roast the rack of lamb.

    Wrap the rib bones in foil so they don’t burn, then roast the lamb to your desired doneness (see internal cooking temperatures below). Take it out of the oven when it’s 5 degrees away from your desired temperature and let it rest (covered in foil) for 10 to 15 minutes.

  5. Cut and serve.

    Cut the rack into single or double chops and serve with all of your favorite side dishes!

carving a crusted rack of lamb on a large white serving plate.

Rack of lamb oven roasting temperatures

According to USDA, you should cook the rack of lamb to an internal temperature of 145ºF and follow with a 3 minute rest. Use a meat thermometer and this guide to reach your desired internal temperature and level of doneness:

  • Rare: 120ºF to 130ºF
  • Medium-rare: 130ºF to 140ºF
  • Medium: 140º to 145ºF
  • Medium-well: 145ºF 150ºF
  • Well done: 150ºF to 160ºF
carving a crusted rack of lamb on a large white serving plate.

What to serve with herb crusted rack of lamb

Slice up the rack of lamb and place 2 or 3 chops on each plate. Pair them with all kinds of elegant side dishes, like:

  • Creamy mashed potatoes
  • Green beans
  • Asparagus
  • Cauliflower mash
  • Shaved brussels sprouts salad
  • Parmesan polenta
  • Roasted cauliflower
  • Creamy lemon orzo
  • Herb pesto green bean salad
2 lamb chops on a white plate with green beans and mashed potatoes.

Frequently asked questions

Should you sear rack of lamb before roasting?

Yes! Searing the rack of lamb in a skillet will seal in the flavors and caramelize the edges.

At which temperature do you roast rack of lamb?

The best temperature to roast a rack of lamb is 450ºF. It will only need about 20 to 25 minutes to cook. Remember to take it out of the oven when it’s 5 degrees away from your desired internal temperature so it doesn’t overcook.

How many people does this rack of lamb recipe serve?

I made this recipe with one 1 ¼ – ½ pound rack of lamb which had about 8 chops. This is enough for 2 to 3 chops per person for 4 people. Feel free to buy a second or third rack if you’re serving a crowd!

How do you store leftover rack of lamb?

The leftover chops can be kept in an airtight container in the fridge for up to 3 days.

close up on 2 lamb chops on a white plate with green beans and mashed potatoes.

Hungry for more show-stopping main dishes?

  • Oven Baked Salmon with Gremolata Sauce
  • Ribeye Steak Cooked in the Oven
  • Instant Pot Beef Short Ribs
  • Slow Roasted Brown Butter Pork Shoulder

If you give this Mustard and Herb Crusted Rack of Lamb a try, let me know in the comments below. I love seeing your pictures too, so please tag me on Instagram @lenaskitchenblog and use #lenaskitchenblog so I can share them on my page!

Print Recipe
4.44 from 32 votes

Mustard and Herb Crusted Rack of Lamb

Bring some elegance to the table with this Mustard and Herb Crusted Rack of Lamb. Dressed in dijon mustard, fresh garlic, and rosemary, this easy show-stopping centerpiece tastes deliciously savory and tangy. No breadcrumbs needed!
Prep Time10 minutes mins
Cook Time30 minutes mins
Total Time35 minutes mins
Course: Dinner, Main Course
Cuisine: American
Keyword: dinner, easy dinner, gluten free, holiday, keto, keto dinner, keto recipe, lamb, main course, main dish
Servings: 4 servings
Calories: 506kcal
Author: Lena Gladstone

Ingredients

  • 1 tablespoon avocado oil
  • 1 rack of lamb frenched (8 chops, about 1 ¼ – ½ lbs)
  • 1 teaspoon sea salt
  • 1 ½ tablespoons dijon mustard
  • 3 cloves garlic finely chopped
  • 4 tablespoons rosemary leaves finely chopped

Instructions

  • Preheat the oven to 450°F. Prepare a cookie sheet lined with foil.
  • Using a sharp knife, trim the majority of the fat cap off the top of the lamb. Season with salt on all sides.
  • Heat avocado oil in a large skillet over high heat, add lamb rack and sear on all sides to ensure browning and sealing flavors. About 5 minutes.
  • Remove the lamb from the pan and set on a baking sheet. Let it cool for 5 minutes. Brush on the Dijon mustard all over the rack in an even coating.
  • In a bowl, add the finely chopped garlic and rosemary, mix to combine and then rub all over the rack. Place the lamb rack back on a cooling rack and baking sheet.
  • Roast the lamb for exactly 20 minutes for rare or 25 minutes for medium-rare. Remove from the oven and cover with aluminum foil. Allow to sit for 10-15 minutes, then cut into double ribs and serve. (Internal temperature should be 130F for medium rare). You’ll want to take it out of the oven when it is about 5 degrees below your desired temperature since as it rests, the temperature will continue to increase.
  • Serve with creamy mashed potatoes, vegetables, salad or other favorite sides.

Notes

Cooking Temperature
Rare: 120-130 degrees (very red inside)
Medium-Rare: 130-140 degrees (bright pink inside)
Medium: 140-145 degrees (light pink inside)
Medium-Well: 145-150 degrees (barely any pink left)
Well-Done: 150-160 degrees (no pink)
USDA recommends cooking lamb to an internal temperature of 145F with a 3-minute rest.

Nutrition

Calories: 506kcal | Carbohydrates: 2g | Protein: 19g | Fat: 47g | Saturated Fat: 19g | Polyunsaturated Fat: 4g | Monounsaturated Fat: 20g | Cholesterol: 94mg | Sodium: 716mg | Potassium: 272mg | Fiber: 1g | Sugar: 1g | Vitamin A: 67IU | Vitamin C: 2mg | Calcium: 52mg | Iron: 2mg

You might also like:
Baked chicken kabobs on a plate.Baked Chicken Kabobs
Italian stuffed peppers on plate with a side salad.Italian Stuffed Peppers Recipe
Grilled chicken thighs on a plate.Grilled Cilantro Lime Chicken Thighs
Miso glazed salmon bites.Miso Glazed Salmon Bites
Ground Chicken Burgers (Extra Juicy)
Panko Crusted Salmon
Chicken Meatballs and Orzo
One Pot Beef Stroganoff Recipe

Crispy Oven Roasted Cabbage Steaks

Posted: October 22, 2021 by lena gladstone | Updated: October 26, 2021

These Crispy Oven Roasted Cabbage Steaks are incredibly simple and delicious! Seasoned with oil, garlic, and paprika, this vegetarian side dish comes out of the oven tasting perfectly tender and caramelized after just 30 minutes.

Jump to Recipe
roasted cabbage coated with breadcrumbs on a white plate

Easy and tender roasted cabbage steaks

Are you a fan of roasted brussels sprouts? Then you’re going to love these Crispy Oven Roasted Cabbage Steaks! Baked to tender, caramelized perfection, this super easy and healthy vegan side dish is the best addition to dinner.

Cabbage steaks are made by slicing a green cabbage into large rounds, seasoning both sides of the “steaks” with oil and simple seasonings, then letting them roast in the oven. Once they’re golden brown on the outside and tender on the inside, the crispy roasted cabbage is ready to be enjoyed with plenty of savory toppings!

roasted cabbage on a white plate with a knife and fork

Just like brussels sprouts or cauliflower, baking cabbage in the oven removes all of the bitter flavors you would normally taste if eaten raw. Instead, the baked vegetable has layers of savory flavors that pair well with anything, from steak to chicken to pasta!

raw cabbage on a large white plate next to smaller plates holding herbs and seasonings.

Ingredients and substitutions

  • Green cabbage – You can use red or purple cabbage if that’s all you have at home but I much prefer the flavor of roasted green cabbage. Make sure the cabbage you buy looks fresh, tight, and compact. It should also feel heavy for its size.
  • Olive oil – To help soften and tenderize the cabbage. To make this recipe oil free, substitute the oil for vegetable broth.
  • Simple seasonings – All you need is garlic powder, smoked paprika, and kosher salt to season the baked cabbage. You can get pretty creative with the seasonings so feel free to use what you like!
  • Toppings – I topped the cabbage steaks with toasted breadcrumbs, parmesan cheese, and herbs to keep things simple. To make this recipe keto, low carb, and gluten free, omit the breadcrumbs or use crushed pork rinds instead.
brushing oil onto raw cabbage.
cooked cabbage on a baking sheet.

How to make roasted cabbage steaks

It doesn’t get much easier than this! This cabbage steak recipe turns a simple green vegetable into a tender and crispy dish. All it takes is 30 minutes:

  1. Prepare the cabbage.

    Remove any wilted leaves from the outside of the cabbage and trim the end of the stem. Slice the cabbage into half-inch-thick rounds.

  2. Season and roast the cabbage steaks.

    Stir the olive oil, spices, and salt together in a small bowl. Brush the oil mixture over both sides of each cabbage steak, then place them on a baking sheet. Roast them in the oven until the edges brown.

  3. Prepare the toppings.

    Toast the panko breadcrumbs in a small pan over medium heat until they’re golden brown. Add them to a bowl with the herbs and parmesan, and stir them all together.

  4. Serve and enjoy!

    Add the baked cabbage slices to a serving platter. Top with the bread, herb, and cheese mixture and serve!

breadcrumbs and herbs in a metal pan.
roasted cabbage coated in breadcrumbs on a white plate.

Cabbage steak toppings

  • Panko breadcrumbs
  • Bacon
  • Parmesan cheese
  • Fresh herbs (parsley, basil, or cilantro)
  • Pickled onions
  • Sauteed mushrooms
  • Green onions
  • Yogurt feta sauce
  • Balsamic vinegar
  • Chopped pecans, walnuts, or pine nuts
  • Feta cheese
  • Caesar dressing
  • Red pepper flakes
close up on roasted cabbage coated in breadcrumbs on a white plate.

Frequently asked questions

Can you make this on the stove instead?

To pan-fry the cabbage steaks instead, add some oil to a large pan and heat over medium-high heat. Cook the seasoned cabbage wedges on both sides until they’re tender and crisp.

Can you grill cabbage steaks instead?

Yes! Oil the slats on the grill and preheat it to medium-high heat. Once the steaks are seasoned, place them on the grill and cook until both sides are tender and crisp (about 5 minutes per side).

What does roasted cabbage taste like?

Roasted cabbage tastes really tender, earthy, and rich. The bland, bitter flavors cook right out and the savory seasonings and oil are infused into every leaf.

What do you serve with cabbage steaks?

Grilled cabbage secretly pairs really well with beef and chicken. Serve the steaks over rice, quinoa, cauliflower mash, or polenta on the side of a ribeye steak, short ribs, corned beef sandwiches, or baked chicken for a hearty meal.

Serve the oven-roasted cabbage as a tasty vegetarian side dish on Meatless Monday! It’s delicious next to a baked whole cauliflower, brown butter gnocchi, and steamed artichokes.

Can you store cabbage steaks?

They’re best enjoyed right out of the oven but you can store the cabbage steaks for later if you end up with leftovers. Keep them in an airtight container in the fridge for 3 to 5 days. Reheat them in the microwave or a 350ºF oven until warmed through.

roasted cabbage coated in breadcrumbs on a white plate.

Hungry for more vegetarian side dishes?

  • Blistered Shishito Peppers
  • Herb Pesto Green Bean Salad
  • Shaved Brussels Sprouts Salad
  • Beet Terrine with Goat Cheese

Did you try these Crispy Oven Roasted Cabbage Steaks? Let me know what you think by leaving a comment below and giving this recipe a rating! Don’t forget to take a picture tag me on Instagram or use #lenaskitchenblog to be featured in my stories! I love seeing what you come up with!

Print Recipe
4.34 from 12 votes

Crispy Oven Roasted Cabbage Steaks

These Crispy Oven Roasted Cabbage Steaks are incredibly simple and delicious! Seasoned with oil, garlic, and paprika, this vegetarian side dish comes out of the oven tasting perfectly tender and caramelized after just 30 minutes.
Prep Time5 minutes mins
Cook Time25 minutes mins
Total Time30 minutes mins
Course: Appetizer, Side Dish
Cuisine: American
Keyword: 30 minute meal, appetizer, baked, easy appetizer, gluten free, roasted, side dish, sides, vegan, vegetarian, veggies
Servings: 6 servings
Calories: 167kcal
Author: Lena Gladstone

Ingredients

  • ⅓ cup olive oil plus 1 tablespoon for baking sheet
  • 1 head green cabbage dark loose leaves removed and cut into 1/2 inch rounds
  • 1 teaspoon kosher salt
  • 1 teaspoon garlic powder
  • 1 teaspoon smoked paprika

Optional Toppings

  • ¼ cup panko
  • ¼ cup fresh herbs finely chopped
  • 3 tablespoons parmesan cheese freshly grated

Instructions

  • Preheat oven to 400ºF. Preheat the oven to 400F. Add parchment paper to a baking sheet.
  • Peel off any wilted cabbage leaves. Trim just the end of the stem to remove any brown or dry parts, leaving the full stem intact. You need the stem to keep the slices together. Slice cabbage into ½ inch rounds.
  • In a small bowl mix olive oil with spices and salt.
  • Brush olive oil mixture on both sides of the cabbage. Lay on the baking sheet and bake for 15 minutes. Flip and cook for an additional 10-15 minutes.
  • While the cabbage is cooking, toast the panko crumbs in a small pan until golden brown. Move constantly so they don’t burn. Add salt, garlic powder, and smoked paprika. Mix to combine. Turn off heat. Remove from heat and let cool. Add freshly chopped herbs and cheese, toss together.
  • Remove the cabage from oven.
  • Top cabbage with toppings. Enjoy while warm.

Notes

Storing: These are best served hot and fresh, but if you don’t finish them all they can be stored in the fridge and reheated.
Refrigerate: These cabbage steaks will keep well in the fridge for 3 – 5 days in a sealed container.
Reheating: Reheat the cabbage in the microwave for about 2 minutes or bake at 350° F for about 10 – 15 minutes until warm.

Nutrition

Calories: 167kcal | Carbohydrates: 11g | Protein: 3g | Fat: 13g | Saturated Fat: 2g | Polyunsaturated Fat: 1g | Monounsaturated Fat: 9g | Cholesterol: 2mg | Sodium: 475mg | Potassium: 292mg | Fiber: 4g | Sugar: 5g | Vitamin A: 543IU | Vitamin C: 59mg | Calcium: 100mg | Iron: 1mg

You might also like:
A salad with sliced apples, arugula, pomegranate seeds, pecans, dried cranberries, and crumbled cheese in a black bowl with wooden salad servers.Apple Cranberry Salad
Oval platter with roasted delicata squash slices, garnished with pomegranate seeds, herbs, and pistachios. A serving spoon, bowl, and fresh sage are also visible.Roasted Delicata Squash
A black plate with cooked cabbage topped with breadcrumbs, a fork on the side, and a striped napkin nearby.Baked Cabbage
Sliced roasted butternut squash garnished with pecans, goat cheese, pomegranate seeds, fresh herbs, and served on an oval white platter with utensils.Maple Roasted Butternut Squash
A white plate with roasted vegetables, pita bread, hummus, crumbled feta, and olives, placed on a marble surface with a fork and a small bowl of hummus nearby.Mediterranean Roasted Vegetables
A bowl of butter with a butter knife on a plate, next to slices of whole grain bread, one slice partially spread with butter.Homemade Butter Recipe
A person holding an oval plate of garlicky green beans with seasonings, next to a small bowl of salt and a checkered napkin.French Style Green Beans (Haricots Verts)
Parker house rolls with garlic and sage.Parker House Rolls

Oven Baked Salmon Recipe with Tangy Gremolata Sauce

Posted: May 7, 2021 by lena gladstone | Updated: May 25, 2021

My Oven Baked Salmon with Tangy Gremolata Sauce is the ultimate weeknight meal. The herby sauce on top gives each bite of the tender and flaky fish intense flavors. You’d never know it only took 20 minutes to put together!

Jump to Recipe
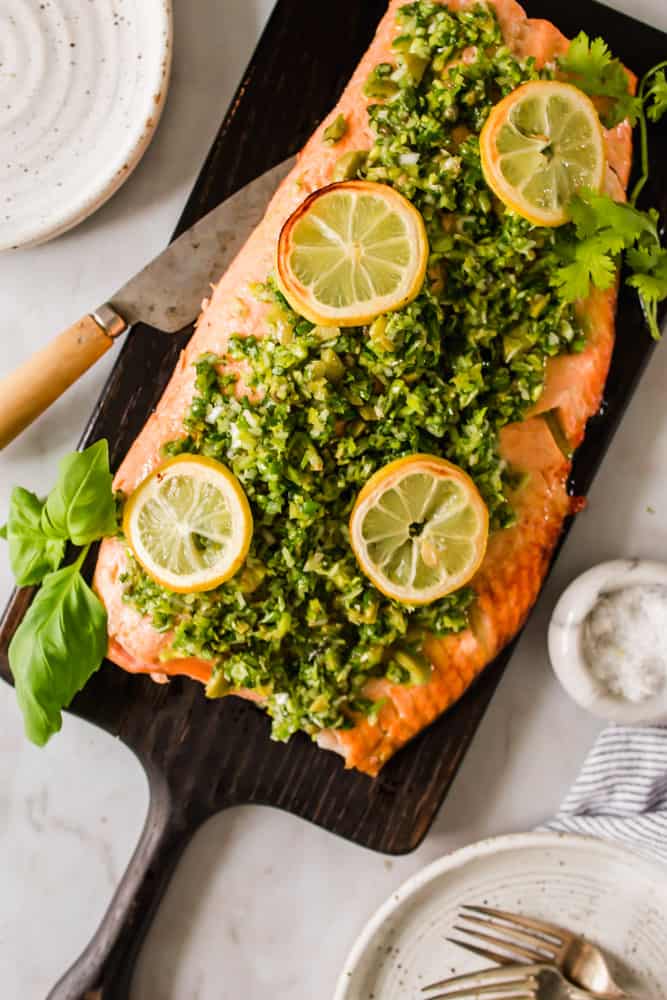
overhead view of a salmon fillet dressed in green sauce and lemon slices on a wood board

A healthy weeknight meal with a zesty spin, this Oven Baked Salmon with Tangy Gremolata Sauce is sure to become a part of your weekly meal rotation. All you need are simple ingredients and less than 30 minutes in the kitchen!

This easy baked salmon recipe can be enjoyed for simple and nutritious weeknight meals or for weekly lunches. With a fresh green salad and creamy cauliflower mash on the side, you’ll be feeling full and satisfied after digging into this keto and low-carb dish.

fork breaking up a salmon filet dressed in a green sauce and lemon slices

My homemade leek and olive gremolata sauce is the ultimate flavor-booster for this salmon. This tangy sauce is similar to an Italian gremolata but made with leeks, olives, and capers. Not only is its emerald green presentation divine, but it infuses bright and fresh flavors into every bite!

raw salmon filet on paper, next to lemon slices, salt and oil

Ingredients you’ll need to make Oven Baked Salmon Recipe

  • Salmon – Baking salmon in the oven is easy and doesn’t take much time. For the best results, look for a fillet with a bright orange-red flesh marbled with fat and a fresh smell.
  • Lemon – Layering lemon slices on top of the fish infuses bright and zesty flavors as it bakes in the oven. 
  • Olive oil and salt – These will give the salmon added moisture and flavor.
  • Tangy Leek And Olive Gremolata Sauce – My homemade gremolata sauce is easy to make and can be stored in your fridge for up to 2 weeks. It’s a fresh condiment you can layer not only on fish, but also on chicken, steak, and roasted vegetables.
jar of green herb sauce on a wood board

How to make oven baked gremolata salmon

  1. Season the salmon: Pat the fillet dry before drizzling the olive oil and salt over top. Afterward, add the sliced lemons.
  2. Bake the salmon: Bake the salmon until it’s tender and flaky. Take it out of the oven and remove the lemons.
  3. Dress and serve: Transfer the salmon to a serving platter and dress it with the tangy gremolata sauce. Place the lemons on the side and serve!
overhead view of a salmon fillet dressed in green sauce and lemon slices on a wood board

What goes well with oven baked salmon?

This healthy meal would pair so well with roasted or steamed vegetables on the side, like Baked Asparagus, Glazed Carrots, and Sauteed Broccolini. Your keto and low-carb friends would be so pleased with a side of Purple Cauliflower Mash as well!

Looking for a healthy lunch idea? Instead of serving it as a main dish, slice up the salmon fillet and top it on a salad or grain bowl with the gremolata for extra protein and flavor. 

If you’re running low on ingredients, you can always make this baked salmon with another herby sauce. Swap the gremolata for my homemade pesto or chimichurri sauces instead.

fork breaking up a salmon filet dressed in a green sauce and lemon slices

More salmon recipes you’ll love

  • Parm Crusted Salmon
  • Keto Smoked Salmon Salad
  • Beet and Dill Cured Salmon
  • Smoked Salmon Street Tacos

Did you try this Oven Baked Salmon with Tangy Gremolata Sauce? Let me know what you think in the comments below, or share a picture on Instagram! I love to share all of your recreations on my page.

Print Recipe
4.50 from 6 votes

Oven Baked Salmon with Tangy Gremolata Sauce

My Oven Baked Salmon with Tangy Gremolata Sauce is the ultimate weeknight meal. The herby sauce on top gives each bite of the tender and flaky fish intense flavors. You’d never know it only took 20 minutes to put together!
Prep Time5 minutes mins
Cook Time15 minutes mins
Total Time20 minutes mins
Course: Main Course
Cuisine: Italian, Mediterranean
Keyword: 20 minute recipe, italian, keto, keto salmon, low carb, low carb dinner, mediterranean, salmon, seafood
Servings: 6 servings
Calories: 223kcal
Author: Lena Gladstone

Ingredients

  • 2 lb salmon fillet belly side not the tail, with skin
  • ½ lemon sliced
  • 1 tsp olive oil
  • 1 tsp salt or more to taste
  • 1 ½ cups Tangy Gremolata Sauce

Instructions

  • Preheat the oven to 425ºF. Add parchment paper to a large baking sheet.
  • Using a paper towel, pat the salmon dry on both sides. Drizzle olive oil on the flesh side of the fish. Season with salt and sliced lemons.
  • Bake for 15 minutes. Remove from the oven and remove the lemons to the side.
  • Add the Tangy Gremolata Sauce on top. Serve with the lemons on the side and enjoy with your favorite side or salad.

Nutrition

Calories: 223kcal | Carbohydrates: 1g | Protein: 30g | Fat: 10g | Saturated Fat: 2g | Cholesterol: 83mg | Sodium: 454mg | Potassium: 753mg | Fiber: 1g | Sugar: 1g | Vitamin A: 62IU | Vitamin C: 5mg | Calcium: 21mg | Iron: 1mg

You might also like:
A bowl of cilantro lime cauliflower rice garnished with chopped herbs, a lime wedge, and cilantro, with a hand holding a spoon and another hand holding the bowl. Lime slices and cilantro are nearby.Cilantro Lime Cauliflower Rice
A hand lifts a slider from a tray of baked sandwich sliders topped with sesame seeds, next to half an orange and a striped napkin on a white surface.Hawaiian Roll Breakfast Sliders
A bowl of roasted Brussels sprouts with bacon sits on a white tiled surface, surrounded by scattered Brussels sprouts, serving utensils, and two small plates with servings.Balsamic Roasted Brussels Sprouts with Bacon
Mushroom burgers.Mushroom Burger
BBQ baby back ribs.BBQ Baby Back Ribs
Rotisserie chicken salad.Rotisserie Chicken Salad
Egg roll in a bowl in a pan.Egg Roll Bowl
Lemongrass chicken.Lemongrass Chicken

Keto Smoked Salmon Avocado Salad

Posted: April 14, 2021 by lena gladstone | Updated: April 14, 2021

Enjoy a bowl full of this Keto Smoked Salmon Avocado Salad for brunch or lunch. Dressed in a vibrant lemon dill vinaigrette, the bright flavors and healthy fats in each bite shine. It’s completely low-carb and gluten-free!

Jump to Recipe
white bowl of salad topped with eggs, tomatoes, salmon, and avocado

My nourishing Keto Smoked Salmon Avocado Salad with a homemade lemon dill vinaigrette makes for a beautiful entree you can serve at brunch, for Mother’s day, or for a bright and vibrant lunch. The soft boiled eggs, avocado, and smoked salmon served over a bowl of greens makes each bite filling, flavorful, and perfectly harmonized.

This keto and low-carb salad reminds me of my favorite bagel brunch board but without any of the heavy ingredients. The creamy avocado and eggs are full of healthy fats and protein, plus the buttery soft slices of cold smoked salmon give each bite just a little bit of saltiness. Topped with fresh dill, lemon juice, and cherry tomatoes, you end up with a light and fresh salad that will complement your main dish or a bowl of soup!

This brunch-worthy salad would be the perfect pairing to a bowl of Tomato Soup or on the side of a Keto Everything Bagel topped with cream cheese, pickled onions, and lox. Don’t forget my homemade Strawberry Pop Tarts for dessert!

2 white bowls of salad topped with eggs, tomatoes, salmon, and avocado

Ingredients you’ll need

  • Smoked salmon – Use your favorite storebought wild-caught cold smoked salmon, homemade dill cured salmon, or smoke the salmon filets yourself.
  • Eggs – Topping the salad with soft-boiled eggs almost turns this recipe into a smoked salmon cobb salad. They give each bite a boost of protein and healthy nutrients, making the salad a perfect option for lunch.
  • Avocado – Creamy avocado gives this salad some healthy fats to help fill you up. It’s a light alternative to the more traditional mayonnaise.
  • Cherry tomatoes – For a little freshness and a pop of color.
  • Arugula – I like the peppery taste of arugula but you could use butter leaf lettuce or mixed greens instead.
  • Everything But The Bagel Seasoning – To give the salad some crunch and savory flavors.
  • Dill and lemon juice – To season the eggs and salad.
  • Lemon dill salad dressing – This easy homemade vinaigrette perfectly complements the fresh and creamy salad. It’s made with a handful of simple ingredients, like extra virgin olive oil, dijon mustard, lemon juice, and fresh dill.
white bowls of salad greens next to plates of salmon, eggs, avocado, and seasonings

How to make smoked salmon salad with lemon dill vinaigrette

  1. Soft boil the eggs: Simmer the eggs for a few minutes or until you see small bubbles around the eggshells. When done, place them in a bowl of cold water to keep them from cooking. Peel off the shell when they’re cool to the touch.
  2. Make the lemon dill dressing: Chop the dill and add it to a mason jar along with the rest of the dressing ingredients. Shake it well and put it aside until it’s time to assemble the salad.
  3. Assemble the salad: Divide the greens between two bowls and top each with dressing. Add the tomatoes and smoked salmon. Add in the avocado and season with salt and lemon juice, then add the halved eggs and season with salt and dill. Top both bowls with everything but the bagel seasoning and serve with lemon wedges on the side.
sliced soft boiled eggs on a wood board

Substitutions

  • If you don’t have extra virgin olive oil, use light olive oil or safflower or sunflower oil instead.
  • Make it creamier: Replace the oil in the dressing with homemade mayonnaise or blend the ingredients together with half of an avocado instead.
  • More salad toppings: Add in sliced radishes, cucumbers, red onion, shredded chicken, bacon, or chives.
individual white bowls with greens, salmon, tomatoes, and eggs

Make ahead

Both the salad dressing and the soft boiled eggs can be made ahead of time so you can have this salad ready in minutes:

  • The make the salad dressing ahead: Combine all of the ingredients in a sealed jar and keep it in the fridge. It will stay fresh for 1 or 2 weeks.
  • To prepare the eggs ahead: Cook as instructed and store the unpeeled soft boiled eggs in a sealed container in the fridge. They’ll stay fresh for up to 2 days.

Serving suggestions

This salad would pair well on the side of a low-carb main for dinner or with a bowl of soup for a more filling meal:

  • Caprese Chicken Bake
  • Keto Zuppa Toscana Soup
  • Chili Lime Chicken Burgers
  • Creamy Cauliflower Soup
white bowls of salad topped with eggs, tomatoes, avocado, and salmon

More salad recipes

Freshen things up with more of my entree salad recipes:

  • Keto Thai Steak Salad
  • Roasted Cauliflower Salad
  • Loaded Chicken Salad
  • Low Carb Burger Salad

If you try making your own Keto Smoked Salmon Avocado Salad, let me know what you think. Leave a comment and don’t forget to take a picture tag me on Instagram or use #lenaskitchenblog to be featured in my stories! I love seeing what you come up with!

Print Recipe
4.50 from 4 votes

Keto Smoked Salmon Avocado Salad

Enjoy a bowl full of this Keto Smoked Salmon Avocado Salad for brunch or lunch. Dressed in a vibrant lemon dill vinaigrette, the bright flavors and healthy fats in each bite shine. It’s completely low-carb and gluten-free!
Prep Time5 minutes mins
Cook Time7 minutes mins
Total Time13 minutes mins
Course: Appetizer, Brunch, Salad, Side Dish
Cuisine: American
Keyword: 30 minute meal, egg salad, gluten free, healthy salad, keto, keto recipe, keto salmon, low carb, salmon, smoked salmon
Servings: 2 servings
Calories: 544kcal
Author: Lena Gladstone

Ingredients

Smoked Salmon Salad

  • 4 oz smoked salmon divided
  • 4 eggs soft-boiled
  • ½ avocado peeled and sliced
  • 10 cherry tomatoes divided
  • 2 ½ oz arugula or mixed baby greens
  • salt to taste
  • 2 tsp everything but the bagel seasoning
  • ¼ lemon cut into wedges serve on the side
  • 2 tbsp dill roughly chopped

Lemon Dill Dressing

  • ¼ cup extra virgin olive oil
  • ½ tsp dijon mustard
  • ¼ lemon juiced
  • 1 tbsp dill finely chopped
  • sea salt to taste

Instructions

Soft-boiled eggs:

  • Bring a medium pot of water to a boil. Afterward, lower the heat to a simmer. Use a slotted spoon to carefully and slowly add the eggs one by one into the water.
  • Turn the heat up to medium-low and simmer the eggs for about 6 ½ minutes. You should see small bubbles coming from the eggshell. After about 3 minutes, use a spoon to gently push and move the eggs around in the water so that the yolks will remain in the center. Place the eggs in a bowl and run cold water over top to cool off completely. Peel once they are cool to touch.

Lemon Dill Dressing:

  • Finely chop the dill, add it to a small mason jar along with the rest of the ingredients. Shake well and set aside.

Salad:

  • Divide the greens between two serving bowls, drizzle with the dressing, then toss. Add smoked salmon, sliced avocado, and tomatoes. Sprinkle avocado with salt and a squeeze of lemon juice.
  • Peel and cut the eggs in half and add them to the bowls. Season eggs with salt. Sprinkle with fresh dill. Sprinkle everything with everything but the bagel seasoning. Serve with lemon wedges on the side. Enjoy the salad right away.

Nutrition

Calories: 544kcal | Carbohydrates: 12g | Protein: 25g | Fat: 46g | Saturated Fat: 8g | Trans Fat: 1g | Cholesterol: 340mg | Sodium: 868mg | Potassium: 824mg | Fiber: 5g | Sugar: 4g | Vitamin A: 1908IU | Vitamin C: 45mg | Calcium: 137mg | Iron: 4mg

You might also like:
A bowl of cilantro lime cauliflower rice garnished with chopped herbs, a lime wedge, and cilantro, with a hand holding a spoon and another hand holding the bowl. Lime slices and cilantro are nearby.Cilantro Lime Cauliflower Rice
A hand lifts a slider from a tray of baked sandwich sliders topped with sesame seeds, next to half an orange and a striped napkin on a white surface.Hawaiian Roll Breakfast Sliders
A bowl of roasted Brussels sprouts with bacon sits on a white tiled surface, surrounded by scattered Brussels sprouts, serving utensils, and two small plates with servings.Balsamic Roasted Brussels Sprouts with Bacon
Mushroom burgers.Mushroom Burger
BBQ baby back ribs.BBQ Baby Back Ribs
Rotisserie chicken salad.Rotisserie Chicken Salad
Egg roll in a bowl in a pan.Egg Roll Bowl
Lemongrass chicken.Lemongrass Chicken

Creamy Garlic Tuscan Salmon with Spinach

Posted: March 30, 2021 by lena gladstone | Updated: February 1, 2022

This perfectly cooked Creamy Garlic Tuscan Salmon with Spinach is easy to make in only one pan. Pan-seared salmon, creamy garlic white sauce, spinach, and fresh basil make up this luscious dinner option that your whole family will love.

Jump to Recipe
Cooked salmon and cream sauce topped with spinach in a large pan

This Creamy Garlic Tuscan Salmon with Spinach will make you feel like you’re on a European vacation in your own kitchen! Flaky and succulent salmon fillets are pan-seared to perfection before being covered in a creamy, sun-dried tomato and garlic white sauce. Plate it with fresh basil, cooked spinach, and mashed potatoes for a filling and elegant dinner.

It’s hard to believe that this recipe is so quick and easy! In minutes, you’ll have perfectly cooked salmon and the white sauce with spinach. Plus, the simple ingredients are all cooked in the same pan so you don’t have to stress over cleanup.

If you love salmon as much as I do, you should try my recipes for Dill Cured Salmon, Sesame Ginger Baked Salmon, and Smoked Salmon Benedict for breakfast.

Creamy sauce for salmon

A simple white sauce made with heavy cream, sun-dried tomatoes, and vegetable broth provides so many extra luscious flavors in this salmon dish. It’s easy to put together and made in the same pan as the salmon, meaning there’s no cleanup in between cooking. 

Have fun with this meal and mix and match as you wish. The creamy sauce can be made dairy-free or without cream, and can be enhanced using a few simple ingredient substitutions. I’ve included a variety of options you can play with below.

raw salmon filets on parchment paper next to bowls of salmon, broth, garlic, spices, and herbs

Tuscan salmon ingredients and substitutions

  • Salmon fillets – The fillets should look moist and not have any blemishes, like brown spots. Try to buy fresh salmon if you can!
  • Seasonings – Each fillet has a simple seasoning of smoked paprika and salt.
  • Creamy sauce – This velvety smooth white sauce is made in one pan using simple ingredients. The heavy cream base can be swapped for milk or dairy-free coconut cream and you can use white wine instead of vegetable broth. Feel free to add in some Italian seasonings and lemon juice for freshness.
  • Spinach – To give this dish a bit of color and extra nutrients. Kale would make a great substitute if you don’t have spinach.
  • Basil – For a finishing touch.

How to make creamy Tuscan salmon

  1. Season and pan sear the salmon: Season each fillet with smoked paprika and salt. Heat some oil in a pan and when it’s hot, cook the fish skin side down. When it’s golden brown, flip it. Set it aside when it’s done.
  2. Make the creamy white sauce: Add the sun-dried tomato oil and garlic to the same pan you used for the salmon. Next, stir in the sun-dried tomatoes, broth, and cream and salt.
  3. Add the spinach and assemble: Reduce the heat and add the spinach to the sauce after a few minutes. When it wilts, return the salmon back into the pan and cook until everything is heated through. Plate each fillet with extra sauce and fresh basil and enjoy!

How to pan-sear salmon

To pan-sear salmon perfectly every time, let the fish come down to room temperature and pat the raw fillets dry using paper towels. Don’t add the seasonings until right before the fish hits the pan. If it sits too long, the salt could draw out the moisture (we need that for juicy, tender salmon!).

Place the salmon skin-side down in the pan to start and press it down using a spatula. According to Bon Appetit, this added pressure allows the delicate fish to cook evenly and prevents either end from curling up.

salmon filets topped with spinach and cream sauce over rice in a white bowl

What to serve with Tuscan salmon

Tuscan salmon is so delicious on its own or over a bed of grains or mash. Plate each salmon fillet over a bed of creamy cauliflower mash, pasta noodles, mashed potatoes, or rice for a well-rounded dinner.

I love the white sauce in this recipe with salmon but you can use it for almost anything! Make this recipe with another kind of fish or use skinless, boneless chicken breasts instead. Dress long pasta noodles in the sauce with pan-seared scallops, baked asparagus, parmesan cheese, and basil on top.

Storing and reheating

The leftover salmon can be stored in an airtight container in the fridge for about 3 days. It can be kept in the same container or separate from the sauce.

To reheat, heat the salmon with sauce in a skillet over medium heat until it’s warmed through.

More savory salmon recipes

You’re going to want to try these delectable salmon recipes the next time you’re craving something fresh, savory, and light:

  • Salmon Patties with Tartar Sauce
  • Smoked Salmon Tacos
  • Crab Stuffed Salmon
  • Parmesan Herb Crusted Salmon

If you give this Creamy Garlic Tuscan Salmon with Spinach a try, let me know what you think. Leave a comment and don’t forget to take a picture tag me on Instagram or use #lenaskitchenblog to be featured in my stories! I love seeing what you come up with!

Print Recipe
4.54 from 28 votes

Creamy Garlic Tuscan Salmon with Spinach

This perfectly cooked Creamy Garlic Tuscan Salmon with Spinach is easy to make in only one pan. Pan-seared salmon, creamy garlic white sauce, spinach, and fresh basil make up this luscious dinner option that your whole family will love.
Prep Time5 minutes mins
Cook Time15 minutes mins
Total Time20 minutes mins
Course: Dinner
Cuisine: Italian
Keyword: 30 minute meal, creamy, dinner, easy dinner, italian, keto dinner, keto recipe, keto salmon, salmon, sauce, seafood
Servings: 4 servings
Calories: 442kcal
Author: Lena Gladstone

Ingredients

Salmon

  • 1 lb salmon fillets cut into 4 fillets
  • 1 tbsp olive oil
  • 1 tsp smoked paprika
  • ½ tsp kosher salt

Cream Sauce

  • 6 cloves garlic minced
  • ½ tsp kosher salt
  • 1 tbsp sun-dried tomato oil
  • ¼ cup sun-dried tomatoes roughly chopped
  • 5 oz baby spinach fresh
  • ¼ cup vegetable broth
  • 1 cup heavy cream sub out with coconut cream or dairy-free creamer
  • ¼ cup basil finely chopped

Instructions

  • Pat the salmon dry with a paper towel. Cut into 4 equal filets. Season with smoked paprika and salt.
  • Heat a large non-stick pan over medium heat. Add the oil and heat until shimmering. Place the fish skin-side down in the pan and cook until nicely golden brown (about 5 minutes). Flip and cook for another 2 minutes on the flesh side. Use a spatula and press the fish down so it contacts the heat on all flesh parts.
  • Remove the fish from the pan and set it aside.
  • Using the same pan, add the sun-dried tomato oil and garlic. Sauté for 1 minute on medium heat.
  • Add chopped sun-dried tomatoes to the pan. Pour in the broth and heavy cream and stir well. Season with salt. Using a wooden spoon to scrape anything that stuck to the bottom of the pan, those are flavors. Reduce the heat to low and cook stirring for 2 minutes.
  • Add the spinach and let it wilt for about 5 minutes to let the sauce thicken.
  • Carefully return the cooked salmon back to the pan, nestling it into the sauce, and cook until heated (about 1 minute). Sprinkle with fresh basil.
  • Taste and adjust the seasonings according to your taste. Transfer the salmon to the serving plates. Serve on top of cauliflower mash, mashed potatoes, or rice.
  • Pour the sauce on top of the fish and enjoy while hot.

Notes

Storing: The leftover salmon can be stored in an airtight container in the fridge for about 3 days. It can be kept in the same container or separate from the sauce.
Reheating: Heat the salmon with sauce in a skillet over medium heat until it’s warmed through.
Creamy sauce – The heavy cream base can be swapped for milk or dairy-free coconut cream and you can use white wine instead of vegetable broth.

Nutrition

Calories: 442kcal | Carbohydrates: 10g | Protein: 26g | Fat: 34g | Saturated Fat: 15g | Cholesterol: 144mg | Sodium: 769mg | Potassium: 1132mg | Fiber: 2g | Sugar: 3g | Vitamin A: 4708IU | Vitamin C: 19mg | Calcium: 112mg | Iron: 3mg

You might also like:
A bowl of cilantro lime cauliflower rice garnished with chopped herbs, a lime wedge, and cilantro, with a hand holding a spoon and another hand holding the bowl. Lime slices and cilantro are nearby.Cilantro Lime Cauliflower Rice
A hand lifts a slider from a tray of baked sandwich sliders topped with sesame seeds, next to half an orange and a striped napkin on a white surface.Hawaiian Roll Breakfast Sliders
A bowl of roasted Brussels sprouts with bacon sits on a white tiled surface, surrounded by scattered Brussels sprouts, serving utensils, and two small plates with servings.Balsamic Roasted Brussels Sprouts with Bacon
Mushroom burgers.Mushroom Burger
BBQ baby back ribs.BBQ Baby Back Ribs
Rotisserie chicken salad.Rotisserie Chicken Salad
Egg roll in a bowl in a pan.Egg Roll Bowl
Lemongrass chicken.Lemongrass Chicken

Quick and Easy Keto Baked Asian Meatballs

Posted: March 23, 2021 by lena gladstone | Updated: March 26, 2021

Sweet and tangy, these Quick and Easy Keto Baked Asian Meatballs are loaded with flavor. Serve these saucy beef and pork meatballs in no time next to cauliflower rice or with more appetizers on gameday.

Jump to Recipe
large white bowl filled with cooked meatballs. Small bowls with cucumbers and red chiles on the side.

These aren’t your average homemade meatballs. Made with a pork and beef blend and a sticky Asian-inspired sauce, these keto, low-carb, and crowd-pleasing meatballs are such a delight!

These Quick and Easy Keto Baked Asian Meatballs are easy to make gluten-free and don’t need any fancy ingredients. No need for almond flour or breadcrumbs in this recipe! Each meatball is bound together with eggs, soy sauce, ginger, garlic, and seasonings before being tossed in a sweet and zesty sticky sauce.

close up of a grain bowl topped with meatballs and cucumbers

Meatballs are such an easy dish to make and can take on a number of flavors, from Italian to Swedish. Whether they’re stuffed into a marinara and cheese-covered slider or in a lettuce cup with pickled onions on top, they always make for a delicious, freezer-friendly, and filling treat.

white bowls filled with ground meat, eggs, green herbs, sauce, and ginger

Keto meatball ingredients and substitutions

  • Ground pork and beef – You get the best of both worlds in this meatball recipe. The pork and beef together mean extra flavor without them being too heavy. You can easily make this recipe using one or the other, or using ground turkey, chicken, or sausage instead.
  • Eggs – A must when you want all of the meatball ingredients to bind together.
  • Ginger paste – Get ready to turn up the flavor! A heap of ginger paste doubles down on the Asian flavors in this recipe. If you can’t find it in the grocery store, use minced ginger or 4 teaspoons of ginger powder instead.
  • Garlic – For extra savory flavors and balance.
  • Soy sauce – Feel free to replace this with coconut aminos or tamari to make the recipe gluten-free.
  • Herbs and sesame seeds – Cilantro, green onions, and sesame seeds add freshness and also make a wonderful garnish.
  • Chili – Use any small chili pepper you like, such as a jalapeno, aleppo, fresno, or chipotle. Remove the seeds and veins to cut down on the spice or leave them in for an extra kick.
  • Sticky sauce – The cooked meatballs are covered in a sticky homemade Asian-inspired sauce made from soy sauce, sesame oil, lime juice, monk fruit sweetener, garlic, and ginger.
large white bowl filled with cooked meatballs

How to make Asian meatballs

  1. Make the sticky sauce: Stir all of the sauce ingredients together in a saucepan. Cook over medium heat until it’s reduced by half.
  2. Make the meatballs: Gently fold all of the meatball ingredients together in a large bowl. Be careful not to overmix or else the meatballs could turn out rubbery.
  3. Shape and bake the meatballs: Use a 1-inch cookie scoop or a spoon to scoop meatballs from the bowl. Wet your hands so you can form evenly-sized meatballs without the meat sticking. Place them on a baking sheet and broil in the oven.
  4. Toss in the sauce: Place the baked meatballs in a bowl or saucepan with the sticky sauce and toss together. Serve with cauliflower rice and seasoned cucumbers, then enjoy!

How long to bake keto meatballs

Small to medium sized meatballs should only need to broil in the oven for about 7 minutes. Break one open to see if it’s still pink inside when they’re done or use a meat thermometer. The internal temperature of a cooked pork beef meatball should be 165°F.

Air fryer meatballs

Skip the oven and cook the meatballs in your air fryer instead. The cooking time will vary depending on the size of your meatballs. I would recommend cooking them for 8 to 12 minutes at 400ºF. 

grain bowl with meatballs and cucumbers in a white bowl. Surrounded by small bowls holding ingredients on the side.

What goes well with Asian meatballs?

Pork and beef meatballs with sticky sauce are a flavorful protein next to cauliflower rice and cooked vegetables on the side, like baked asparagus or roasted cauliflower salad. Don’t forget a garnish of green onions and sesame seeds on top!

The Asian-inspired flavors in the meatballs make them a welcome addition to a better-than-takeout dinner. Serve them over lo mein, with rice and steamed bok choy, or next to beef short ribs and broccolini. A cucumber salad on the side will add freshness to this flavorful meal. 

I particularly love to serve meatballs in lettuce cups or with toothpicks as a crowd-pleasing gameday appetizer. Serve them with keto chicken tenders, ribeye steak crostini, and ahi tuna nachos at your next get-together or party.

How to store meatballs 

After the cooked meatballs have cooled, store them in an airtight container in the refrigerator. You can toss them with the sauce before storing them, or store both separately. To reheat, cook them for a minute or two in the microwave or bake them in the oven until warmed through.

You can freeze the meatballs before or after they’re cooked. Place the shaped uncooked or the cooked and cooled meatballs in a single layer on a baking sheet in the freezer. Once they’re frozen, store them in an airtight container or transfer them to a freezer bag for easier storage. Thaw out before cooking.

wood chopsticks holding up one meatball from a grain bowl

More keto appetizer recipes

Spoil your low carb and keto friends with these tasty appetizers:

  • Salmon Patties With Homemade Tartar Sauce
  • Keto Chicken Kofta
  • Cheeseburger Stuffed Mini Peppers
  • Fully Loaded Keto Deviled Eggs

If you try my Quick and Easy Keto Baked Asian Meatballs, let me know what you think! Rate and review this recipe in the comments below. Don’t forget to take a picture and tag me on Instagram @lenaskitchenblog!

Print Recipe
3.68 from 25 votes

Quick and Easy Keto Baked Asian Meatballs

Sweet and tangy, these Quick and Easy Keto Baked Asian Meatballs are loaded with flavor. Serve these saucy beef and pork meatballs in no time next to cauliflower rice or with more appetizers on gameday.
Prep Time10 minutes mins
Cook Time10 minutes mins
Total Time20 minutes mins
Course: Appetizer, Side Dish
Cuisine: Asian
Keyword: 30 minute meal, appetizer, beef, keto, low carb, meatballs, pork
Servings: 8 servings
Calories: 689kcal
Author: Lena Gladstone

Ingredients

Meatballs

  • 1 ½ lb ground pork or sub out for turkey
  • 1 ½ lb ground beef or sub out for chicken
  • 2 eggs
  • 4 tbsp ginger paste
  • 4 cloves garlic grated
  • 4 tbsp soy sauce
  • 1 tbsp sesame oil
  • ¼ cup cilantro finely chopped
  • ¼ cup green onions finely chopped
  • 1 ½ tsp kosher salt
  • 1 tsp sesame seeds for topping
  • ½ small red chili finely chopped, optional

Sauce

  • 1 cup soy sauce or use coconut aminos
  • 2 tsp sesame seed oil
  • ½ lime juiced
  • 3 tbsp monk fruit sweetener optional
  • 2 cloves garlic grated
  • 1 tbsp ginger grated

Instructions

  • Turn the oven on to broil.
  • Add all of the sauce ingredients to a small saucepan and cook for 10 minutes on medium heat until reduced by about half. Turn off the heat and set aside.
  • In a large bowl, stir all of the meatball ingredients together. Gently fold until just combined. Do not overmix.
  • Use a small 1-inch cookie scoop to scoop into balls. Add to a baking sheet. This recipe should make 46 meatballs.
  • Wet your hands and roll each meatball into round meatballs.
  • Bake for 7 minutes on broil. Remove the meatballs from oven and toss in the sauce.
  • Serve over cauliflower rice and garnish with green onions, sesame seeds, and chilies if you want a little heat. Add seasoned cucumbers for additional freshness and crunch.

Notes

To store: After the cooked meatballs have cooled, store them in an airtight container in the refrigerator. You can toss them with the sauce before storing them, or store both separately.
To reheat: Cook them for a minute or two in the microwave or bake them in the oven until warmed through.
To freeze: You can freeze the meatballs before or after they’re cooked. Place the shaped uncooked or the cooked and cooled meatballs in a single layer on a baking sheet in the freezer. Once they’re frozen, store them in an airtight container or transfer them to a freezer bag for easier storage. Thaw out before cooking.

Nutrition

Calories: 689kcal | Carbohydrates: 5g | Protein: 46g | Fat: 52g | Saturated Fat: 19g | Trans Fat: 1g | Cholesterol: 217mg | Sodium: 3577mg | Potassium: 811mg | Fiber: 1g | Sugar: 1g | Vitamin A: 212IU | Vitamin C: 10mg | Calcium: 70mg | Iron: 5mg

You might also like:
A bowl of cilantro lime cauliflower rice garnished with chopped herbs, a lime wedge, and cilantro, with a hand holding a spoon and another hand holding the bowl. Lime slices and cilantro are nearby.Cilantro Lime Cauliflower Rice
A hand lifts a slider from a tray of baked sandwich sliders topped with sesame seeds, next to half an orange and a striped napkin on a white surface.Hawaiian Roll Breakfast Sliders
A bowl of roasted Brussels sprouts with bacon sits on a white tiled surface, surrounded by scattered Brussels sprouts, serving utensils, and two small plates with servings.Balsamic Roasted Brussels Sprouts with Bacon
Mushroom burgers.Mushroom Burger
BBQ baby back ribs.BBQ Baby Back Ribs
Rotisserie chicken salad.Rotisserie Chicken Salad
Egg roll in a bowl in a pan.Egg Roll Bowl
Lemongrass chicken.Lemongrass Chicken

Keto Loaded Creamy Cauliflower Soup

Posted: March 19, 2021 by lena gladstone | Updated: September 2, 2021

My Keto Loaded Creamy Cauliflower Soup is easy to make, deliciously rich, and made with gluten-free ingredients. Top each bowl with crispy bacon, herbs, and cheese for an extra hit of flavor!

Jump to Recipe
Bowl of soup next to small white bowls with paprika, scallions and cheese

Keto-friendly comfort food? Sign me up!

My Keto Loaded Creamy Cauliflower Soup has heaps of flavor thanks to delicious bacon fat, smoked paprika, and naturally rich cooked cauliflower. Blended together with smoked paprika, onion, and garlic, this soup turns out so delicious without needing to put in much effort!

This creamy soup is naturally gluten-free, dairy-free, and low-carb. It’s a healthy choice you can enjoy for a family-friendly dinner or to slurp on for weekday lunches. By adding all the toppings you can think of, it’s easy to customize this soup to almost everyone’s liking!

head of cauliflower next to small bowls of onion, bacon, spices, cheese, chicken broth, and green onions

Ingredients you’ll need

  • Cauliflower – Rich and buttery cooked cauliflower naturally thickens the soup, making it deliciously creamy without any added dairy. It’s one of my favorite vegetables to add to soups, salads, and to use in low-carb side dishes like Cauliflower Mash.
  • Onion and garlic – Sauteed in bacon grease, the onion and garlic will double down on the rich flavors in this soup.
  • Smoked paprika – To cook along with the garlic and onions. Feel free to use regular paprika or chipotle powder if you don’t have smoked paprika.
  • Chicken broth – This gives the soup a bit of saltiness and savory flavors. 
  • Toppings – It isn’t a loaded cauliflower soup without the toppings! I used bacon pieces, shredded cheddar cheese, scallions, and paprika with each bowl
large pink soup pot with cooked onions inside
large pink soup pot filled with raw cauliflower and broth
large pink soup pot filled with broth and cooked cauliflower

How to make Keto Loaded Creamy Cauliflower Soup

  1. Cook the bacon: Heat a large soup pot over medium-high heat. Cook the bacon until it’s crispy, then transfer it to a paper towel-lined plate.
  1. Saute the soup veggies: Pour some oil in the same pot with the bacon fat. Saute the onion until tender before adding the garlic and smoked paprika. Add the cauliflower florets and chicken broth.
  1. Let it simmer: Turn the heat down, cover the pot with a lid, and let the soup simmer until the cauliflower is fork tender.
  1. Puree the soup: Use an immersion blender or a regular blender to puree the soup until it’s very smooth. Give it a taste before adjusting any seasonings. When it’s time to eat, ladle some soup into a bowl and add the bacon, cheese, and any other toppings you like!
beige bowl filled with orange soup topped with bacon, scallions, and paprika

Can it be made in the Instant Pot?

Of course! To make Instant Pot loaded cauliflower soup, saute the bacon in the pot on Saute mode. Transfer the bacon to a plate when it’s done and add in some oil and the chopped onion.

When the onion is tender, add in the garlic and smoked paprika. Turn off Saute mode and add the cauliflower florets and chicken broth before locking the lid. Set it to Manual and cook on High Pressure for 5 minutes before quick releasing the pressure.

Carefully remove the lid and use your immersion blender to puree the soup. Feel free to turn Saute mode back on to keep the soup warm. Adjust the seasonings as necessary, then serve with your toppings.

womans hands holding a bowl of soup and a spoon

Cauliflower soup toppings

A bit of bacon, cheese, scallions, and paprika on top of each bowl of soup gives each spoonful of soup added flavor and texture. You can top your bowl with almost anything you like, such as:

  • Crispy kale chips
  • Chives
  • Cooked sausage
  • Roasted cauliflower
  • Shredded mozzarella cheese
  • Chimichurri sauce
  • Fresh parsley or cilantro

Tips and substitutions

  • If your soup is too thick, stir in some more chicken broth until it reaches the consistency you like.
  • Want to make it extra creamy? Stir in a can of coconut milk, half and half, or heavy cream at the end.
  • You can easily make this cauliflower soup vegan. Just swap the bacon for marinated or smoked tofu and use vegetable broth instead of chicken broth.
  • If blending with a regular blender, ladle the soup into the blender bowl and blend in batches. This will prevent you from making a mess!
  • Roast the cauliflower for deeper flavors. This can be done ahead of time and then added into the pot with the veggies and broth. After it simmers for a few minutes, puree with the immersion blender.
beige bowl filled with orange soup topped with bacon, scallions, and paprika

Storing and freezing

The keto cauliflower soup with bacon will last in the fridge for 4 to 5 days. Just keep the leftovers in sealed containers to keep the flavors fresh.

When it’s time to reheat, place a bowl of soup in the microwave and heat for 1 or 2 minutes until warmed through.

You can easily freeze this soup for later. Keep the cooked and cooled batch in an airtight container or a sealed ziploc bag for up to 3 months. Let it thaw completely in the fridge before reheating.

More keto soup recipes

Keep dinner or lunch light and fresh with these delicious keto and low-carb soup recipes:

  • Chipotle Chicken Tortilla Soup
  • Healthy Keto Zuppa Toscana Soup
  • Instant Pot Cheeseburger Soup

Did you try this Keto Loaded Creamy Cauliflower Soup? Let me know what you think by leaving a comment below and giving this recipe a rating! Don’t forget to take a picture tag me on Instagram or use #lenaskitchenblog to be featured in my stories! I love seeing what you come up with!

Print Recipe
3.75 from 16 votes

Keto Loaded Creamy Cauliflower Soup

My creamy Keto Loaded Creamy Cauliflower Soup is easy to make, deliciously rich, and made with gluten-free ingredients. Top each bowl with crispy bacon, herbs, and cheese for an extra hit of flavor!
Prep Time5 minutes mins
Cook Time20 minutes mins
Total Time25 minutes mins
Course: Dinner, Lunch, Main Course
Cuisine: American
Keyword: 30 minute meal, cauliflower, cauliflower recipe, gluten free, keto, keto dinner, low carb, low carb dinner, lunch, soup
Servings: 4 servings
Calories: 298kcal
Author: Lena Gladstone

Ingredients

  • 2 tbsp. olive oil
  • 1 yellow onion loosely chopped
  • 4 cloves garlic chopped
  • 1 large head cauliflower cut into florets
  • 4-6 cups chicken broth or use vegetable broth for a fully vegetarian option
  • ½ tbsp smoked paprika
  • salt to taste
  • 4 tsp scallions finely chopped for garnish
  • 4 slices bacon cooked crispy, for garnish
  • ½ cup cheddar cheese shredded, for garnish, optional
  • ½ tsp smoked paprika for garnish

Instructions

  • Heat a large pot over medium-high heat. When the pot is hot, add the bacon to the pan and cook until crispy. Once the bacon is done, remove it from the pan and allow it to drain on paper towels. Reserve the bacon fat.
  • In the same pot as bacon, add 2 tablespoons of olive oil over medium-high heat. Add the onion and a pinch of salt and saute for 5 minutes, or until the onions are tender. Add the garlic and smoked paprika and cook for 1 minute.
  • Add the cauliflower florets to the pot, then the chicken broth until it just covers the cauliflower. Depending on the size of your head of cauliflower, you will need between 4-6 cups. Add another pinch of salt.
  • Turn the heat down to medium, cover the pot with a lid, and let it simmer for 15 minutes, stirring occasionally. Your cauliflower should be very tender when you pierce it with a fork.
  • When your cauliflower is very tender, use an immersion blender to blend and puree until the soup is very smooth. (If you are using a blender, blend in smaller batches to avoid a mess!)
  • Taste to see if you need to adjust the seasonings. If your soup is too thick, stir in some more chicken broth until it reaches the consistency you like.
  • Garnish with a sprinkle of smoked paprika, chopped chives or scallions, bacon bits, and cheddar cheese (optional).

Notes

Storing: Leftovers will last in the fridge for 4 to 5 days. Just keep it in a sealed container to keep the flavors fresh.
Freezing: Keep the cooked and cooled batch in an airtight container or a sealed ziploc bag for up to 3 months. Let it thaw completely in the fridge before reheating.
Reheating: Reheat the soup in the microwave and heat for 1 or 2 minutes until warmed through. You can also warm it on the stovetop over medium heat for a few minutes.

Nutrition

Calories: 298kcal | Carbohydrates: 16g | Protein: 12g | Fat: 22g | Saturated Fat: 7g | Trans Fat: 1g | Cholesterol: 29mg | Sodium: 1159mg | Potassium: 957mg | Fiber: 5g | Sugar: 5g | Vitamin A: 729IU | Vitamin C: 121mg | Calcium: 179mg | Iron: 2mg

You might also like:
Grilled Salmon Kabobs
Panko chicken on a bed of greens.Panko Chicken
A bowl of hummus topped with spiced ground meat, pickled onions, pine nuts, fresh herbs, and a hand holding a spoon, with side dishes visible around the bowl.Hummus with Meat
Extra Crispy Air Fryer Wings with celery and homemade ranch sauce on plate being picked up with hand. lenaskitchenblog.comAir Fryer Wings
LENASKITCHEN PICKLED ONIONSPickled Onions Recipe
Steelhead Trout Recipe
Three slices of buffalo chicken pizza topped with red onions, green onions, and cheese are arranged on parchment paper, next to a bowl of dipping sauce.Buffalo Chicken Flatbread
Three cheddar bay biscuits on a plate, one split open with butter melting inside. A butter knife with butter rests on the plate, garnished with parsley.Cheddar Bay Biscuits

Keto Cheeseburger Stuffed Mini Peppers

Posted: March 17, 2021 by lena gladstone | Updated: March 18, 2021

Mini peppers stuffed with cheesy ground beef and warm marinara sauce on top makes these Keto Cheeseburger Stuffed Mini Peppers almost better than a real hamburger. Keto, low-carb, and gluten-free!

Red and orange beef stuffed peppers on parchment paper

I was asked by Carusele to participate in the #LaurasLean campaign, sponsored by Laura’s Lean. Although I have been compensated, all opinions are my own

These Keto Cheeseburger Stuffed Mini Peppers are a low-carb dinner or appetizer filled with juicy and lean ground beef, mushrooms, onion, and bound together with an egg white. Topped with melted cheese and marinara sauce, the peppers are so delectable and so much lighter than a regular hamburger.

Red and orange stuffed peppers next to packaged ground beef, herbs, and marinara sauce

This light meal prep or family dinner option is made extra delicious using Laura’s Lean Ground Beef. Unlike most other “natural” beef, Laura’s Lean is always sourced from suppliers that never use added hormones or antibiotics and are always vegetarian fed. I always feel good about serving it to both my family and guests!

Using mini peppers in this recipe means everything is ready in record time! They’re also bite-sized, meaning you can serve the keto stuffed peppers as an appetizer, snack, or for a tasty main with Creamy Cauliflower Mash and Baked Asparagus on the side.

White and brown bowls filled with mini peppers, cheese, beef, mushrooms, and onions

Ingredients you’ll need

  • Mini peppers – Making this recipe with cute and colorful sweet mini peppers means you can serve it as an appetizer or for a keto and low-carb party snack.
  • Laura’s Lean Ground Beef – Using Laura’s 92% lean beef will cut down on the grease and make this dish much lighter. I recommend buying in bulk so you always have beef ready to use in your freezer.
  • Mushrooms – Cooked mushrooms double down on the meaty flavor in this recipe.
  • Worcestershire sauce – For a little bit of umami flavor that helps elevate the flavors from the meat and cooked veggies. Your Worcestershire sauce is not gluten-free if it contains malt vinegar. In this case, replace it with tamari.
  • Onion – This will be grated and blended right into the hamburger filling. 
  • Egg white – To help bind everything together in the filling.
  • Mozzarella – Shredded mozzarella is added right before the stuffed peppers are done baked to give them a creamy and stretchy melted cheese topping.
  • Marinara sauce and parsley – For a savory finish!
Baked beef stuffed mini peppers in a white pan

How to make mini stuffed peppers with ground beef

woman's hand holding a marinara-dipped stuffed pepper
  1. Cook the veggies: In a pan, cook the mushrooms with butter. Add in the garlic and cook until soft and fragrant.
  2. Make the beef filling: Combine the beef, cooked mushrooms, salt, grated onion, Worcestershire Sauce, and egg white in a large bowl.
  3. Stuff the peppers and bake: Cut each mini pepper in half lengthwise, remove the seeds, and place each one in a baking dish. Spoon some of the beef mixture into each pepper before baking for 15 minutes.
  4. Add the cheese, then serve: Top each pepper with cheese before adding them back in the oven for another few minutes. Add the parsley and warm marinara sauce on top when they’re done!

Tips and substitutions

  • Want to add rice? You can add pre-cooked rice or cauliflower rice to the beef filling.
  • If you’re craving a little spice, mix some chopped jalapenos into the filling.
  • No need to parboil the peppers! Their small size helps the peppers cook and tenderize in record time and without cooking them beforehand.
  • Make sure to use sugar-free marinara sauce. This way it will be keto-friendly.
  • The egg white is optional. Feel free to leave it out if you want.
Serving platter holding stuffed mini peppers and white bowls with marinara sauce

Can I make these ahead of time?

Every element of this dish can be made ahead of time for meal prep. Make the ground beef filling and store it in an airtight container in the fridge for 1 or 2 days. You can also slice, prepare, and store the peppers in the fridge until you’re ready to put the dish together.

Not quite ready to cook the stuffed peppers yet? The mini peppers can easily be stuffed and then left covered in the fridge. Just throw them in the oven right before dinner time!

More keto and low-carb recipes

Put all of these dishes to create the keto and low-carb meal of your dreams:

  • Baked Parmesan Crusted Salmon
  • Caprese Chicken Bake
  • Purple Cauliflower Mash
  • Instant Pot Cheeseburger Soup

Did you try this recipe? Don’t forget to tag me on Instagram @lenaskitchenblog + use the #lenaskitchenblog hashtag. I love browsing through the photos of your recreations!

Print Recipe
4.43 from 7 votes

Keto Cheeseburger Stuffed Mini Peppers

Mini peppers stuffed with cheesy ground beef and warm marinara sauce on top makes these Keto Cheeseburger Stuffed Mini Peppers almost better than a real hamburger. Keto, low-carb, and gluten-free!
Prep Time10 minutes mins
Cook Time25 minutes mins
Total Time35 minutes mins
Course: Appetizer, Main Course, Side Dish
Cuisine: American
Keyword: appetizer, baked, beef, easy appetizer, healthy snack, keto, keto dinner, low carb, low carb dinner
Servings: 4 servings
Calories: 536kcal
Author: Lena Gladstone

Ingredients

  • 1 lb ground beef Laura’s Lean 92% lean
  • 14 mini peppers halved and deseeded
  • 4 oz mushrooms stems removed and finely chopped
  • 2 tbsp butter unsalted
  • 1 ½ tsp salt
  • 2 cloves garlic minced
  • 2 tbsp Worcestershire Sauce
  • 1 small onion grated, with the juice
  • 1 egg white large
  • 1 ½ cup shredded mozzarella
  • 1 cup marinara sauce
  • 2 tbsp parsley finely chopped

Instructions

  • Preheat the oven to 350ºF. Spray a baking sheet with olive oil spray.
  • In a pan on medium-high heat, melt the butter and add the finely chopped mushrooms. Cook for 5 minutes, moving the mushrooms around a few times. Add garlic and cook for an additional 1 minute.
  • In a large bowl, combine the beef, cooked mushrooms and garlic, salt, grated onion, Worcestershire Sauce, and egg white. Mix to combine.
  • Cut each pepper in half lengthwise and remove the seeds. Place them in the baking dish. Spoon some of the ground beef mixture into each pepper.
  • Bake for 15 minutes or until the peppers have softened and the beef is cooked through.
  • Top the peppers with cheese. Place them back in the oven and bake for additional 3-4 minutes. Top with chopped parsley and marinara sauce or serve more on the side for dipping.

Notes

To make ahead of time: Make the ground beef filling and store it in an airtight container in the fridge for 1 or 2 days. The peppers can also be sliced, prepped, and kept in the fridge until you’re ready to put the dish together.
You can also stuff the peppers, place them in a covered baking dish, and leave them in the fridge for a few hours until it’s time to bake.

Nutrition

Calories: 536kcal | Carbohydrates: 15g | Protein: 33g | Fat: 38g | Saturated Fat: 18g | Trans Fat: 2g | Cholesterol: 129mg | Sodium: 1685mg | Potassium: 962mg | Fiber: 4g | Sugar: 9g | Vitamin A: 3968IU | Vitamin C: 136mg | Calcium: 270mg | Iron: 4mg

You might also like:
A bowl of cilantro lime cauliflower rice garnished with chopped herbs, a lime wedge, and cilantro, with a hand holding a spoon and another hand holding the bowl. Lime slices and cilantro are nearby.Cilantro Lime Cauliflower Rice
A hand lifts a slider from a tray of baked sandwich sliders topped with sesame seeds, next to half an orange and a striped napkin on a white surface.Hawaiian Roll Breakfast Sliders
A bowl of roasted Brussels sprouts with bacon sits on a white tiled surface, surrounded by scattered Brussels sprouts, serving utensils, and two small plates with servings.Balsamic Roasted Brussels Sprouts with Bacon
Mushroom burgers.Mushroom Burger
BBQ baby back ribs.BBQ Baby Back Ribs
Rotisserie chicken salad.Rotisserie Chicken Salad
Egg roll in a bowl in a pan.Egg Roll Bowl
Lemongrass chicken.Lemongrass Chicken

Keto Baked Asparagus with Parmesan

Posted: March 1, 2021 by lena gladstone | Updated: March 3, 2021

Tender and cheesy Keto Baked Asparagus with Parmesan is the perfect side dish. It takes minutes to prepare and the pantry staple ingredients keep things simple while still providing big flavors.

Jump to Recipe
baked asparagus with cheese on top on a piece of parchment paper

Your favorite keto and low-carb meals won’t feel lonely now that they can be paired with this easy and delicious Keto Baked Asparagus with Parmesan. The vibrant green asparagus takes minutes to bake and while the simple seasonings give each bite big flavors. Plus, with cheese on top, it’ll be a miracle if you end up with leftovers!

What keeps this asparagus side dish keto-friendly is the simple list of seasonings. All it needs is garlic, oil, lemon juice, and a little salt. The flavors are bright, savory, and so satisfying.

close up of baked asparagus with cheese on top next to a lemon wedge

Cheesy asparagus can be enjoyed year-round for dinners, backyard cookouts, or with a seafood extravaganza. It goes perfectly on the side of Lemon Butter Scallops, Baked Crusted Salmon, and even with Soft Scrambled Eggs for breakfast.

Ingredients you’ll need

  • Asparagus – The best asparagus is firm, straight, and bright green. The tips should be firm and not loose or starting to sprout.
  • Parmesan cheese – A sprinkle of freshly grated parmesan on top of the asparagus will melt in the oven, giving each bite a bit of creaminess. Try to use fresh parmesan for the best flavors.
  • Garlic – Because it isn’t a savory dish without garlic.
  • Olive oil – This will help soften and tenderize the asparagus and provide healthy fats.
  • Lemon juice – For brightness and acidity that will help bring balance.
  • Salt – To round out all of the flavors.
raw asparagus on a wood board next to lemon, cheese, oil, garlic, and salt

How to make parmesan asparagus in the oven

  1. Prepare the asparagus: Once the woody bottoms are trimmed from the asparagus, spread them out on a baking sheet. Drizzle on the oil before using your hands to rub the garlic and salt all over the asparagus. Finish with a sprinkle of parmesan cheese.
  1. Roast the asparagus in the oven: Bake the asparagus for about 10 minutes or until the asparagus is slightly tender and the cheese has melted.
  1. Plate and serve: When they’re finished baking, place the asparagus on a serving platter and add more cheese and a squeeze of lemon juice. Serve and enjoy!

Air fryer instructions

Prepare and season the asparagus as normal. Lay them in an even layer in the air fryer basket (work in batches if you need to) and grate the parmesan on top. Set the air fryer to 400ºF and cook for around 7 minutes.

At what temperature do you bake asparagus?

Roasting asparagus in a 425ºF oven for 7 to 10 minutes will give you the best results. The cook time will depend on the thickness and age of the asparagus, so make sure to watch it carefully as it bakes. Once it hits the 7 minute mark, pierce it with a fork to see if it needs additional time.

baked asparagus with cheese on top on a piece of parchment paper

Tips and substitutions

  • To trim asparagus, remove the bottom inch to 1 ½ inches. The bottom is very woody, tough, and not fun to eat.
  • To tell when the asparagus is cooked through, pierce it with a fork. It should be fork tender but still have a slight crunch. You don’t want it too soft or mushy.
  • Top with any garnish you like, such as sliced almonds, fresh cracked pepper, lemon slices, or parsley.
  • If you don’t have parmesan cheese, use mozzarella, cheddar, swiss, or provolone instead. You can also make this recipe vegan by using dairy-free cheese.
  • For an added crunch, combine the cheese with panko breadcrumbs or pork rinds to keep the recipe low-carb.
  • To store uncooked asparagus, trim the ends and place the bunch upright in a tall glass or jar filled with an inch of water. This will keep it fresh, crisp, and green. Make sure to change the water every other day or so.

Can it be made ahead of time?

To make this recipe ahead of time, toss the asparagus in the oil and seasonings before placing it in an airtight container. The seasoned asparagus should stay fresh in the fridge for 1 or 2 days. Add the cheese on top right before it’s time to bake.

How to store and reheat baked asparagus

Leftovers can be stored in an airtight container in the fridge for up to 4 days. 

To maintain its texture, reheat the asparagus in a 400ºF oven for around 4 minutes. You can also reheat it in the microwave in 30-second intervals until warmed through. Just know that it may turn out mushier this way.

baked asparagus with cheese on top on a piece of parchment paper

What goes well with keto baked asparagus?

Almost everything! Serve this cheesy asparagus on the side of these keto-friendly recipes:

  • Thai Steak Salad
  • Caprese Chicken Bake
  • Ribeye Steak
  • Salmon Patties with Tartar Sauce

Did you try this Keto Baked Asparagus with Parmesan? Let me know what you think by leaving a comment below and giving this recipe a rating! Don’t forget to take a picture tag me on Instagram or use #lenaskitchenblog to be featured in my stories! I love seeing what you come up with!

Print Recipe
4.64 from 11 votes

Keto Baked Asparagus with Parmesan

Tender and cheesy Keto Baked Asparagus with Parmesan is the perfect side dish. It takes minutes to prepare and the pantry staple ingredients keep things simple while still providing big flavors.
Prep Time5 minutes mins
Cook Time10 minutes mins
Total Time15 minutes mins
Course: Side Dish
Cuisine: American
Keyword: air fryer, appetizer, baked, gluten free, keto, low carb, roasted, side dish, sides, vegetarian, veggies
Servings: 2 servings
Calories: 291kcal
Author: Lena Gladstone

Ingredients

  • 1 lb asparagus trimmed
  • 3 cloves garlic crushed
  • 3 tbsp olive oil
  • ¼ cup parmesan cheese freshly grated
  • ¼ tsp sea salt more to taste if needed
  • ¼ lemon juiced

Instructions

  • Preheat the oven to 425℉ and then line a baking sheet with parchment paper.
  • Trim the bottom of the asparagus (1-2 inches) and then spread it out across the baking sheet. Drizzle with olive oil and crushed garlic. Use your hands to rub the oil, salt, and garlic over the spears to ensure they are well coated. Sprinkle with half of the shredded parmesan cheese.
  • Roast in the oven for 7-10 minutes. The cooking time will depend on the thickness of your spears. The asparagus is ready when the tips have crisped and the cheese is nice and melty.
  • Remove from oven, add to a serving platter, add the remaining cheese, and squeeze some fresh lemon juice on top.

Notes

Making ahead of time: Toss the asparagus in the oil and seasonings before placing it in an airtight container. The seasoned asparagus should stay fresh in the fridge for 1 or 2 days.
Storing: Leftovers can be stored in an airtight container in the fridge for up to 4 days.
Reheating: Reheat the asparagus in a 400ºF oven for around 4 minutes. You can also reheat it in the microwave in 30-second intervals until warmed through. Just know that it may turn out mushier this way.

Nutrition

Calories: 291kcal | Carbohydrates: 12g | Protein: 10g | Fat: 25g | Saturated Fat: 5g | Cholesterol: 9mg | Sodium: 497mg | Potassium: 507mg | Fiber: 5g | Sugar: 5g | Vitamin A: 1816IU | Vitamin C: 21mg | Calcium: 214mg | Iron: 5mg

You might also like:
A bowl of cilantro lime cauliflower rice garnished with chopped herbs, a lime wedge, and cilantro, with a hand holding a spoon and another hand holding the bowl. Lime slices and cilantro are nearby.Cilantro Lime Cauliflower Rice
A hand lifts a slider from a tray of baked sandwich sliders topped with sesame seeds, next to half an orange and a striped napkin on a white surface.Hawaiian Roll Breakfast Sliders
A bowl of roasted Brussels sprouts with bacon sits on a white tiled surface, surrounded by scattered Brussels sprouts, serving utensils, and two small plates with servings.Balsamic Roasted Brussels Sprouts with Bacon
Mushroom burgers.Mushroom Burger
BBQ baby back ribs.BBQ Baby Back Ribs
Rotisserie chicken salad.Rotisserie Chicken Salad
Egg roll in a bowl in a pan.Egg Roll Bowl
Lemongrass chicken.Lemongrass Chicken

Low Carb Caprese Chicken Bake – Keto

Posted: February 17, 2021 by lena gladstone | Updated: February 18, 2021

overhead view of caprese chicken pot with fresh basil in a pot

This low carb take on Baked Caprese Chicken is the best one-skillet keto recipe. It’s an easy dish made from juicy chicken breasts and the fresh Italian flavors of tomato, mozzarella, and basil. It’s a beautiful weeknight dinner that can also be used for meal prep!

Jump to Recipe
large pot with baked chicken, mozzarella, and tomatoes

Following a low-carb lifestyle does not mean you have to sacrifice flavor! This one-pan Chicken Caprese recipe is filled with fresh Italian flavors that will keep you full and satisfied. It’s the perfect recipe to make for meal prep, a dinner party, or even for a romantic date night at home. 

All you’ll need to do is add chopped onions and tomatoes to the bottom of a skillet or casserole dish with some seasoned chicken breast and bake. Next, you’ll add creamy mozzarella cheese and bake until the cheese is melted and the chicken is cooked perfectly. Once it’s out of the oven, finish this dish with some balsamic glaze and fresh basil.

This is an easy dinner that is naturally gluten-free and can be served over zucchini noodles, spaghetti squash, or even a bed of fresh greens. It’s one of the staple keto dinners I love to make for my family, along with this Keto Baked Parmesan Salmon and Cauliflower Mash. 

fork taking a piece of baked caprese chicken out of a pot

What does Caprese mean?

The Capresi salad recipe originated in Capri, a small island off the coast of Italy. The literal translation of Caprese is “salad of Capri”.

Caprese salad is made up of a few distinct Italian ingredients like mozzarella cheese, tomatoes, fresh basil leaves, and balsamic vinegar. All of these ingredients can easily be used to also make sandwiches, hamburgers, or can be baked with different proteins like fish or beef. 

close up of baked chicken caprese in a pot

What is chicken Caprese?

Chicken Caprese is made with chicken and the traditional Caprese salad ingredients. This version adds rich protein that turns a simple salad into a hearty meal. 

The chicken and Caprese salad ingredients are baked together in the oven to bring out all of the fresh flavors. The chicken can then be used to top on pastas, Mediterranean chopped salads, or even put in a sandwich. 

small bowls holding tomatoes, onions, cheese, onions, and chicken

Ingredients and substitutions

  • Chicken breasts – Boneless skinless chicken breasts bake quickly and are the preferred choice in this recipe. You can also use boneless skinless chicken thighs if that’s all you have. 
  • Cherry tomatoes – These bright red juicy jewels add acidity and natural sweetness. 
  • Mozzarella – This will melt on top of the chicken for a creamy taste and texture. Use fresh, high-quality mozzarella if you can!
  • Balsamic vinegar – This adds to the sweet, salty, and bright acidic flavors. You can make your own balsamic glaze or take a shortcut and buy some at your local grocery store. 
  • Red onion – For more texture and a touch of sweetness without being overpowering. 
  • Garlic – You just can’t make a classic Italian dish without garlic! Fresh is best. 
  • Italian seasonings – Kicking up the flavor with Italian seasonings such as fresh basil and oregano are what takes this dish to the next level. 
roasted tomatoes, cheese and chicken in a large pot
roasted tomatoes, melted cheese and chicken in a large pot

How to make Caprese chicken in the oven

  1. Season the vegetables: Add the tomatoes and red onions to a skillet and season with salt and olive oil.
  2. Season and cook the chicken: Season the chicken before placing it on top of the veggies in the pan. Place the skillet in the oven and bake.
  3. Add the cheese: Remove the pan from the oven once the chicken is mostly cooked through. Add the cheese on top and bake once again to melt the cheese and finish cooking the chicken. 
  4. Finish and serve: Drizzle with balsamic glaze and top with fresh basil before serving.

What to serve with chicken Caprese 

A low carb chicken Caprese bake is such a versatile dish because it can be enjoyed as a main or added to many other dishes:

  • Add the cooked Caprese chicken in between two Keto Bacon Chaffles to make a sandwich. 
  • Serve it alongside a fresh salad like this Butter Lettuce Salad with Lemon Chive Dressing. 
  • Slice it up and serve it hot or cold on top of a green salad. 
  • Turn it into a low-carb soup by adding some chicken broth and zucchini noodles to a bowl and place the Caprese chicken and veggies on top.
  • Serve it hot along with hearty Keto Creamy Cauliflower Mash. 

Storing and reheating

You can store the cooked and cooled leftovers in an airtight container in the fridge for up to 3 days.

The best way to reheat chicken Caprese is to place it in an oven-safe dish and cook it in a 325ºF oven for 15 minutes or until warmed through. You can also add it to a skillet with a lid and warm over medium-low heat. This recipe is also great eaten cold!

fork taking a piece of baked caprese chicken out of a pot

More chicken recipes to try for dinner

You’ll love these easy and delicious chicken recipes for dinner:

  • Keto Buffalo Chicken Tenders
  • Vinegar Chicken With Crushed Olives
  • Keto Chicken Kofta with Herb Yogurt Sauce
  • Greek Chicken Kabobs

If you try this Low Carb Caprese Chicken Bake, please leave me a comment below or tag me on Instagram @lenaskitchenblog! I would love to know what you think.

large pot with melted cheese on chicken with roasted tomatoes, basil, and balsamic on top
Print Recipe
4.46 from 11 votes

Low Carb Caprese Chicken Bake

This low carb take on Baked Caprese Chicken is the best one-skillet keto recipe. It's an easy dish made from juicy chicken breasts and the fresh Italian flavors of tomato, mozzarella, and basil. It’s a beautiful weeknight dinner that can also be used for meal prep!
Prep Time5 minutes mins
Cook Time20 minutes mins
Total Time25 minutes mins
Course: Dinner, Main Course
Cuisine: Italian, Mediterranean
Keyword: 30 minute meal, baked, chicken, italian, keto, low carb, low carb dinner
Servings: 4 servings
Calories: 588kcal
Author: Lena Gladstone

Ingredients

  • 3 cups tomatoes on the vine or cherry tomatoes
  • 1 small red onion thinly sliced
  • 4 chicken breast boneless and skinless
  • 4 tbsp olive oil divided
  • 2 ½ tbsp sea salt divided
  • ¾ tsp dried oregano
  • 4 cloves garlic minced
  • 8 oz mozzarella ball sliced into 8 slices
  • ½ cup balsamic vinegar
  • 10 leaves fresh basil chopped for garnish

Instructions

  • Preheat the oven to 425 F. Add cast iron pan to preheat. (Baking dish would work if you don’t have a cast-iron pan).
  • Drizzle 1 tablespoon of olive oil over chicken breasts. Season with 1 teaspoon of salt and oregano. Add the minced garlic and rub it all over each chicken breast along with the seasonings. Set aside.
  • Remove pan from oven, add 3 tablespoons of olive oil, tomatoes, and red onions, season with 1 and 1/2 teaspoon of salt. Stir and arrange the chicken breasts over the tomatoes and onions.
  • Bake for 15 minutes. Remove from the oven and place the mozzarella over the chicken. Bake for additional 5-7 minutes to melt the cheese and finish cooking the chicken. When finished, the chicken should be 165 F internally.
  • While the chicken bakes, add balsamic vinegar to a small nonstick pot and cook until it reduces by half and becomes thicker on medium low heat. TIP: You can also skip this step and buy store-bought reduced balsamic vinegar.
  • Remove the skillet from the oven, drizzle with balsamic reduction, and top with chopped fresh basil leaves. Serve while hot.

Notes

To store: Keep the cooked and cooled leftovers in an airtight container in the fridge for up to 3 days.
To reheat: Place the chicken in an oven-safe dish and cook it in a 325ºF oven for 15-20 minutes or until warmed through. You can also add it to a skillet with a lid and warm over medium-low heat. Don’t forget that this recipe is also great eaten cold!

Nutrition

Calories: 588kcal | Carbohydrates: 14g | Protein: 60g | Fat: 32g | Saturated Fat: 7g | Trans Fat: 1g | Cholesterol: 165mg | Sodium: 4678mg | Potassium: 1198mg | Fiber: 2g | Sugar: 9g | Vitamin A: 1072IU | Vitamin C: 21mg | Calcium: 256mg | Iron: 2mg
pinterest image of baked caprese chicken in a pot

You might also like:
A bowl of cilantro lime cauliflower rice garnished with chopped herbs, a lime wedge, and cilantro, with a hand holding a spoon and another hand holding the bowl. Lime slices and cilantro are nearby.Cilantro Lime Cauliflower Rice
A hand lifts a slider from a tray of baked sandwich sliders topped with sesame seeds, next to half an orange and a striped napkin on a white surface.Hawaiian Roll Breakfast Sliders
A bowl of roasted Brussels sprouts with bacon sits on a white tiled surface, surrounded by scattered Brussels sprouts, serving utensils, and two small plates with servings.Balsamic Roasted Brussels Sprouts with Bacon
Mushroom burgers.Mushroom Burger
BBQ baby back ribs.BBQ Baby Back Ribs
Rotisserie chicken salad.Rotisserie Chicken Salad
Egg roll in a bowl in a pan.Egg Roll Bowl
Lemongrass chicken.Lemongrass Chicken

Butter Lettuce Salad with Lemon Chive Dressing

Posted: January 26, 2021 by lena gladstone | Updated: September 2, 2021

Treat yourself to this refreshing Butter Lettuce Salad with Lemon Chive Dressing. Full of fresh veggies and Parmesan crisps, each bite is light and tangy. It’s the perfect side to any meal!

Jump to Recipe
Large black plate holding a salad with cucumbers, radishes, and parmesan crisps on top.

Fresh and vibrant flavors are plentiful in this Butter Lettuce Salad with Lemon Chive Dressing. Layers of crisp radishes and cucumber pair perfectly with Parmesan crisps and the homemade salad dressing. It’s an easy salad recipe you can whip up before a hearty steak dinner or on the side of brunch.

This is clean eating at its finest, as all of the ingredients are gluten-free, keto, vegetarian, and low-carb. Butter lettuce, radishes, cucumber, and Parmesan cheese tossed together in the simple lemon herb dressing creates bursts of flavor without messing with your budget.

Large black platter with lettuce and sliced cucumber. Small bowls with sliced radish, parmesan crisps, and salad dressing on the side.

What is butter lettuce?

Butter lettuce, also known as Bibb or Boston lettuce, has vibrant green leaves that are round, smooth, and loose. It has a sweet and tender bite, making it the perfect choice for refreshing spring or summer salads. You can even use the large leaves as a replacement for pita bread or tortillas when you want to enjoy a healthy appetizer or lunch.

Large black platter with lettuce and sliced cucumber and radishes

Ingredients you’ll need to make this butter lettuce salad recipe

  • Butter lettuce – This vibrant and hearty lettuce isn’t only great for lettuce cups. Butter lettuce has round, thick, and vibrant green leaves. It has a tender and crisp taste that has a little more substance than iceberg or romaine lettuce.
  • Toppings – Thinly sliced cucumbers and radishes are fresh, light, and crisp. They’re all you need for this simple yet delicious salad, but you’re welcome to add sliced avocado, croutons, baked chicken breast, or hard-boiled eggs to make it a little more hearty.
  • Parmesan crisps – So easy to make at home! All you need is shredded Parmesan cheese and a hot oven. If you’re in a rush, just substitute them with shaved Parmesan. If you want to try the one I am using, get a bag or two of these ParmCrisps Everything.
  • Lemon chive dressing – This is a simple homemade dressing made with lemon juice, fresh chives, oil, and dijon mustard. You can keep a batch of this dressing in the fridge to use with a Mediterranean salad or even fish.
Individual white bowls holding ingredients for a salad and salad dressing

How to make this salad with homemade lemon dressing

  1. Make the lemon dressing: Add all of the dressing ingredients to a jar and shake well to combine.
  2. Prepare the veggies: Wash and dry the lettuce before adding it to a large bowl or platter. Slice the radishes and cucumber using a mandolin or a sharp knife. Keep the radishes in a bowl with cold water until everything is prepared.
  3. To make homemade parmesan crisps: Preheat the oven to 400ºF. Spoon small piles of shredded Parmesan onto a parchment-lined baking sheet and pat each one down slightly. Bake for around 5 minutes or until each pile of cheese is golden and crisp.
  4. Assemble the salad: Pat the radishes dry and add them to the lettuce and cucumbers in the bowl. When the homemade Parmesan crisps are cool, add them in as well. Finish by drizzling on the dressing and serve with your favorite meal!
Large black plate holding a salad with cucumbers, radishes, and parmesan crisps on top.

Tips and substitutions

  • I recommend using a mandolin to create paper-thin veggies. If you don’t have one, slicing the veggies carefully with a sharp knife will work as well.
  • Letting the sliced radishes sit in cold water while you prep will keep them nice and crisp.
  • Can’t find butter lettuce? Replace it with another large, green leaf lettuce like romaine.
  • Serve the salad with a creamy dressing instead. Both Caesar and ranch dressing would go well on this simple salad.
  • If you can’t find fresh chives, you can use dried chives or dill as a replacement.
Close up of a salad with parmesan crisps, sliced radishes, and cucumber.

What goes well with butter lettuce salad?

You can serve this fresh simple salad with a heavy or light dinner, lunch, or on the side of brunch. It’s a refreshing side dish next to a ribeye with chimichurri sauce or a buttery slice of prime rib roast. If you want to keep things on the lighter side, serve the salad next to a baked chicken breast, keto crusted salmon, or a creamy bowl of pasta.

Large black plate holding a salad with cucumbers, radishes, and parmesan crisps on top.

More salad recipes

Add some color to your meal with these vibrant and tasty salads:

  • Broccoli Brussels Sprouts Salad
  • Keto Thai Steak Salad
  • Loaded Chicken Salad With Honey Mustard Vinaigrette
  • Delicata Squash Salad With Persimmons

Did you try this Butter Lettuce Salad with Lemon Chive Dressing? Let me know what you think and leave a comment below! Don’t forget to also take a picture of your recreation and tag me on Instagram. I love to see all of your photos!

Print Recipe
5 from 7 votes

Butter Lettuce Salad with Lemon Chive Dressing

Treat yourself to this refreshing Butter Lettuce Salad with Lemon Chive Dressing. Full of fresh veggies and Parmesan crisps, each bite is light and tangy. It’s the perfect side to any meal!
Prep Time10 minutes mins
Total Time10 minutes mins
Course: Salad
Cuisine: American
Keyword: 20 minute recipe, gluten free, healthy salad, keto, keto dinner, low carb, salad, vegetarian
Servings: 4 servings
Calories: 315kcal
Author: Lena Gladstone

Ingredients

Salad

  • 1 head butter lettuce washed, patted dry, and torn
  • 3 small cucumbers thinly sliced
  • 4 radishes thinly sliced
  • ½ cup parmesan crisps or substitute with shaved parmesan

Lemon Chive Dressing

  • ½ cup extra virgin olive oil
  • 1 tbsp dijon mustard
  • ½ lemon juiced
  • 3 tbsp chives finely chopped
  • sea salt to taste

Instructions

Lemon Chive Dressing

  • Add all of the dressing ingredients to a small jar with a lid and shake well to combine.

Butter Lettuce Salad

  • Wash the lettuce and dry it using a clean kitchen down or a salad spinner. Add to a large serving platter or bowl.
  • Use a mandolin to thinly slice the radishes. Keep them in a bowl with cold water until everything else is prepared. When ready to serve, dry the radishes and add to the platter.
  • Use a mandolin to thinly slice the cucumber.
  • Add cucumbers in clusters to the platter with the lettuce. Then add radishes in clusters too.
  • Top the salad with parmesan crisps or shaved parmesan, drizzle with dressing, and serve.

Notes

Get a few bags of my new favorite crunchy topping: ParmCrisps Everything
Or make homemade parmesan crisps at home:
  • Preheat the oven to 400ºF.
  • Spoon small piles of shredded Parmesan onto a parchment-lined baking sheet and pat each one down slightly. Add a sprinkle of everything but the bagel seasoning if you’d like.
  • Bake for 3 to 5 minutes or until each pile of cheese is golden and crisp.
  • Let cool and enjoy.

Nutrition

Calories: 315kcal | Carbohydrates: 6g | Protein: 6g | Fat: 31g | Saturated Fat: 6g | Cholesterol: 9mg | Sodium: 250mg | Potassium: 310mg | Fiber: 2g | Sugar: 3g | Vitamin A: 1636IU | Vitamin C: 14mg | Calcium: 188mg | Iron: 1mg

You might also like:
A bowl of cilantro lime cauliflower rice garnished with chopped herbs, a lime wedge, and cilantro, with a hand holding a spoon and another hand holding the bowl. Lime slices and cilantro are nearby.Cilantro Lime Cauliflower Rice
A hand lifts a slider from a tray of baked sandwich sliders topped with sesame seeds, next to half an orange and a striped napkin on a white surface.Hawaiian Roll Breakfast Sliders
A bowl of roasted Brussels sprouts with bacon sits on a white tiled surface, surrounded by scattered Brussels sprouts, serving utensils, and two small plates with servings.Balsamic Roasted Brussels Sprouts with Bacon
Mushroom burgers.Mushroom Burger
BBQ baby back ribs.BBQ Baby Back Ribs
Rotisserie chicken salad.Rotisserie Chicken Salad
Egg roll in a bowl in a pan.Egg Roll Bowl
Lemongrass chicken.Lemongrass Chicken

The Best 5-Ingredient Keto Creamy Cauliflower Mash

Posted: January 25, 2021 by lena gladstone | Updated: January 25, 2021

The Best 5-Ingredient Keto Creamy Cauliflower Mash takes less time to prepare than traditional mashed potatoes and is way healthier! Made with steamed cauliflower, butter, cheese, and salt, this low-carb side dish is perfect for special occasions or weeknight dinners.

Jump to Recipe
Black bowl filled with mashed cauliflower with fresh dill and butter on top.

Push the potatoes aside because we’re making The Best 5-Ingredient Keto Creamy Cauliflower Mash instead. This low-carb side dish is rich, creamy, soft, and out of this world buttery. Ready in less time than it takes to make mashed potatoes, this new staple recipe can easily become a permanent part of your weekly meal prep.

Black bowl filled with mashed cauliflower with fresh dill and butter on top.

A low-carb cauliflower mash doesn’t need much to help it taste amazing. Just like your favorite mashed potatoes, this easy recipe is made with butter, cheese, and a handful of seasonings for full flavors. 

Keto and low-carb lovers aren’t the only ones who will get a kick out of mashed cauliflower. It’s a healthy option you can serve to fit with your New Year’s goals, for the holidays, or when you need a quick side dish during busy weekdays. Serve it next to a ribeye steak, salmon patties, or green vegetables for a nutritious and delicious dinner.

Black bowl filled with mashed cauliflower with fresh dill and butter on top.

Does cooked cauliflower taste like mashed potatoes?

Whether you’re sticking to a keto/low-carb diet or not, mashed cauliflower is delicious, light, and just as creamy as traditional mashed potatoes. The biggest difference is that the nutritious and light cauliflower won’t weigh you down as much as the starchy potatoes. 

Mashed cauliflower is mixed with butter, cream cheese, and salt to add fat and flavor. Just like with mashed potatoes, you need this fat the create a creamy texture, cut down on the starch, and to help the side dish taste its best. It’s even better when you add the extras, like roasted garlic, dill, butter, sour cream, or chives!

Chopping cauliflower on a wood cutting board. Small bowls with butter, cheese, and cream cheese on the side

What you need to make keto cauliflower mash

  • Cauliflower – The best hack to making a quick cauliflower mash is buying pre-cut cauliflower! If you’re looking to save time, just cut the florets away from the cauliflower and keep them in the fridge until you’re ready to make this recipe.
  • Butter – Just like the best-mashed potatoes, cauliflower mash needs butter! It adds delicious fat and flavor to each bite and helps achieve that silky smooth texture.
  • Cream cheese – This helps give the mash its creamy texture while holding everything together. It also adds a sweet and tangy flavor.
  • Parmesan cheese – For added creaminess and flavor. Always use freshly grade for best results.
  • Sea salt – Just a pinch or two will do!

How to make keto mashed cauliflower on the stove

  1. Steam the cauliflower: Place a steaming basket over a large pot filled with water. Boil the water and add the cauliflower florets into the basket. Cover with a lid and cook until fork tender.
  2. Mash and season the cauliflower: Add the soft cauliflower, butter, cream cheese, and parmesan cheese to a food processor and puree until smooth. Taste it as you blend and add in salt or any other seasonings as needed.

Tips and tricks

  • Creamy cauliflower mash starts with the steam. Boiling cauliflower in water will make it wet and mushy instead of soft and creamy. Cauliflower that’s been steamed will dry as it cools down and absorbs moisture.
  • Let the cauliflower sit in a colander or strainer after it’s done steaming. Letting the steamed cauliflower sit for a few minutes will help it retain heat and moisture, and prevent the mash from being watery.
  • If the mash does turn out watery or thin, you can thicken it by stirring in more cream cheese until you reach the desired consistency.
  • If you don’t have a food processor, make the mash using an immersion blender or a regular blender. If you like a bit more texture, use a potato masher instead. 
Close up of mashed cauliflower with dill and melted butter on top

Recipe variations

  • You can roast the cauliflower instead of steaming to add layers of flavor. Toss it in a little olive oil and roast the florets on a baking sheet at 450ºF for about 30 minutes.
  • Season the mash with any herbs you like, such as dill, chives, parsley, or crispy herbs like sage.
  • Add more flavor or texture to the mash by stirring in roasted garlic, bacon, fresh parsley, or more cheese.
  • Looking for dairy-free mashed cauliflower? Replace the cheese and butter with olive oil or plant-based butter and cream cheese.

Can you make creamy mashed cauliflower ahead of time?

Yes, you can make a cauliflower mash ahead of time! Save time by separating the florets away from the cauliflower head days before making this recipe. Then you can make the mash and keep it in your fridge for a few days or even freeze it (see directions below)!

Can you freeze cauliflower mash?

I would recommend freezing your mash before adding the cream cheese. The texture just won’t be the same once it thaws because dairy just isn’t great at freezing. Instead, make the mash without the cream cheese and freeze in a ziploc bag.

Black bowl filled with mashed cauliflower with fresh dill and butter on top.

What goes well with keto cauliflower mash?

Serve this creamy keto side dish with these delicious recipes and more:

  • Herbed Prime Rib Roast
  • Keto Baked Salmon
  • Grilled Flank Steak
  • Greek Chicken Kabobs
  • Crab Stuffed Salmon
Print Recipe
4.37 from 22 votes

The Best 5-Ingredient Keto Creamy Cauliflower Mash

The Best 5-Ingredient Keto Creamy Cauliflower Mash takes less time to prepare than traditional mashed potatoes and is way healthier! Made with steamed cauliflower, butter, cheese, and salt, this low-carb side dish is perfect for special occasions or weeknight dinners.
Prep Time5 minutes mins
Cook Time10 minutes mins
Total Time15 minutes mins
Course: Side Dish
Cuisine: American
Keyword: 30 minute meal, appetizer, cauliflower, cauliflower mash, cauliflower recipe, gluten free, keto, keto dinner, low carb, side dish, sides
Servings: 4 servings
Calories: 432kcal
Author: Lena Gladstone

Ingredients

  • 6 cups cauliflower florets or one large head
  • 5 tbsp unsalted butter divided, cut into smaller chunks
  • 3 oz cream cheese cut into smaller chunks
  • 2 cups parmesan cheese freshly grated
  • 3/4 tsp sea salt more to taste
  • 2 tbsp dill for garnish

Instructions

  • If using a whole head of cauliflower, remove florets from head and cut into similar size pieces.
  • In a large pot or pan add water up to the steamer basket fitted over it. Bring water to a boil.
  • Add the cauliflower florets into the steamer basket. Cover the steamer basket with a lid. Lower the temperature and bring water to a simmer and cook, covered, for about 10 minutes, until cauliflower is fork-tender.
  • In a food processor, add the cauliflower, 3 tablespoons of butter, salt, cream cheese.
  • Puree for a few minutes on high, until smooth. Scrape the sides as needed and finish blending until fully pureed.
  • Add parmesan cheese and blend to combine. Adjust salt to taste.
  • Sprinkle with chopped dill or another fresh herb of choice. Add the remaining 2 tablespoons of butter on top if you'd like. Serve hot and enjoy.

Notes

Make ahead: Separate the florets away from the cauliflower head days before making this recipe. Then you can make the mash and keep it in your fridge for a few days or even freeze it.
Freezing: Freeze the mash before adding the cream cheese. The texture just won’t be the same once it thaws because dairy just isn’t great at freezing. Instead, make the mash without the cream cheese and freeze in a ziploc bag.

Nutrition

Calories: 432kcal | Carbohydrates: 10g | Protein: 22g | Fat: 35g | Saturated Fat: 21g | Cholesterol: 95mg | Sodium: 1352mg | Potassium: 524mg | Fiber: 3g | Sugar: 4g | Vitamin A: 1129IU | Vitamin C: 72mg | Calcium: 650mg | Iron: 1mg

You might also like:
Grilled Salmon Kabobs
Panko chicken on a bed of greens.Panko Chicken
A bowl of hummus topped with spiced ground meat, pickled onions, pine nuts, fresh herbs, and a hand holding a spoon, with side dishes visible around the bowl.Hummus with Meat
Extra Crispy Air Fryer Wings with celery and homemade ranch sauce on plate being picked up with hand. lenaskitchenblog.comAir Fryer Wings
LENASKITCHEN PICKLED ONIONSPickled Onions Recipe
Steelhead Trout Recipe
Three slices of buffalo chicken pizza topped with red onions, green onions, and cheese are arranged on parchment paper, next to a bowl of dipping sauce.Buffalo Chicken Flatbread
Three cheddar bay biscuits on a plate, one split open with butter melting inside. A butter knife with butter rests on the plate, garnished with parsley.Cheddar Bay Biscuits

Easy Keto Buffalo Chicken Tenders

Posted: January 20, 2021 by lena gladstone | Updated: January 24, 2022

This recipe for baked Easy Keto Buffalo Chicken Tenders takes an ordinary chicken tender, dredges it in egg then coats it in a keto “breading”. The tenders turn out juicy on the inside and crispy on the outside with a spicy kick from homemade buffalo sauce. Perfect to serve at any party or a great protein for a low carb weeknight dinner. 

Jump to Recipe
White baking dish filled with orange buffalo tenders next to dipping sauce and celery sticks

These Easy Keto Chicken Tenders are made with a handful of simple ingredients and can be on the table in 30 minutes or less! Push the breadcrumbs aside and bring in crushed pork rinds instead. This keto breading option helps you stick to your diet and still produces a crunchy bite. Cook them quickly in the oven or even faster in your air fryer!

You’ll love making these buffalo tenders because they can be used in so many different ways. Use them in a loaded chicken salad or place them in a wrap with some veggies for a quick lunch. As a bonus, freeze or refrigerate the tenders to enjoy as leftovers or for a no-hassle keto and kid-friendly dinner.

Are chicken tenders keto friendly?

To make sure your chicken tenders are keto friendly, it’s best if you make them from scratch like in this recipe. Store bought chicken tenders usually have a breading that is made of grains or flour which adds carbs. These homemade buffalo chicken tenders are breaded in a mixture of crushed pork rinds that are free of carbohydrates depending on what brand you use. You won’t be able to tell the difference!

How many carbs are there in homemade chicken tenders? 

This will all depend on the ingredients you personally use as some contain variations of amounts of carbohydrates. Always check your labels to calculate the correct amount.

Closeup of a pile of orange buffalo tenders with a bite taken out of one

Ingredients you’ll need to make easy keto buffalo chicken tenders

  • Boneless, skinless chicken tenderloins: You can find these at any grocery store. They are small, thin, and come from the tenderloin of the chicken breast and can be flavored any way you like. 
  • Finely crushed pork rinds: Pork rinds have become a staple substitute for bread crumbs in low carb living. All you need to do is grab a bag of plain pork rinds and pulse them in a blender until a fine “crumb” is created. 
  • Paprika, garlic powder, onion powder, and salt: This will flavor the chicken tender in addition to the buffalo sauce. 
  • Franks Red Hot Sauce: This classic buffalo wing ingredient gives the chicken a tangy and spicy kick. 
  • Unsalted butter: Mixed with Frank’s, the butter tones down the heat so each bite isn’t overwhelming.
  • Mayonnaise: You can mix homemade or store-bought mayonnaise with the hot sauce to make a creamy and spicy buffalo sauce for the chicken tenders. 
  • Eggs: To help bind together the mayo and buffalo sauce so everything stays together while it bakes. 

Is there a difference between chicken tenders and chicken strips? 

Chicken tenders are taken from the tenderloin part of the breast whereas strips are cut up from the chicken breast. The chicken tenderloin is more tender and moist when cooked.

White individual bowls filled with raw chicken, buffalo sauce, spices, and eggs.

How to oven bake easy keto chicken tenders

This method for baking easy chicken tenders is quick and easy. It takes 15 minutes to get your chicken crisp and tender! Here’s how it’s done:

  1. Combine the dry coating: Whisk the crushed pork rinds, paprika, garlic powder, onion powder, and salt together in a bowl.
  2. Combine the wet ingredients: Whisk the hot sauce, mayonnaise, and eggs together in a mixing bowl. 
  3. Dredge the chicken tenders: Use a fork to dip each chicken tender into the egg and mayo mixture. Next, coat the tender in the dry ingredients. Once it’s fully coated, transfer the breaded chicken to your prepared baking rack. Repeat until all of the tenders are coated.
  4. Bake the chicken tenders: After 15 minutes, use a meat thermometer to ensure the internal temperature of the chicken has reached 165ºF.
  5. Make the buffalo dip: In a small pot over medium heat, melt the butter with the hot sauce. Dip both sides of the baked tenders in the sauce, add to a platter, and serve!

Air fryer keto chicken tenders

You can make this keto chicken using your air fryer to save time, electricity, and additional clean up! Dredge the tenders using the steps in the recipe instructions, but add them to your air fryer basket instead of the oven. Here’s how to make crispy keto chicken tenders using your air fryer:

  1. Place the chicken in the air fryer: Once the tenders are coated, arrange them in your air fryer basket. 
  2. Air fry the chicken: Set your air fryer at 400ºF for 10 minutes or until the internal temperature of the chicken reaches 165°F. 
  3. Dress in the buffalo sauce: Remove cooked chicken tenders from the basket and coat evenly in the buffalo sauce before transferring to a platter and serving hot.

NOTE: If you have a smaller Air Fryer, consider using a double layer rack or cooking the chicken in batches so it cooks and crisps evenly.

Orange buffalo chicken tenders on a metal baking rack
Orange buffalo chicken tenders in a black air fryer basket

How to serve easy keto buffalo chicken tenders

  • Serve on a platter with a dipping sauce like blue cheese or ranch dressing along with carrot and celery sticks.
  • Chop them up and put the tenders on top of a green salad with some blue cheese crumbles.
  • Add them to a keto buffalo chicken casserole made with spaghetti squash. 
  • Slice and serve the chicken in lettuce cups along with a batch of my Asian pork meatballs.
  • Slice thinly and add them to a low carb tortilla with ranch and lettuce for a quick lunch.
  • Shred up any leftovers and turn them into a decadent keto buffalo chicken dip for game day.
  • Serve alongside your favorite green vegetable and mashed cauliflower for a keto weeknight dinner. 
Orange buffalo tenders on a white platter with blue cheese on top. Ranch dip and celery on the side.

Recipe tips and variations

  • To help the wet and dry coating stick, pat the raw chicken tenders dry with paper towels first.
  • To remove the tendon from the chicken tenderloin, hold the tender with a paper towel. Thread the top of the tendon through a fork and pull it until it is fully removed.
  • If you don’t have Frank’s Red Hot Sauce, use your favorite keto friendly hot sauce.
  • If you don’t like buffalo sauce, swap it for your favorite keto BBQ sauce..
  • Can’t find chicken tenderloins? Use sliced chicken breast or boneless chicken thighs instead.
  • Want to make the tenders kid friendly? Cut them into chicken nugget shapes and sizes before adding the breading.

Keto breading swaps

If you don’t like the idea of using crushed pork rinds to bread the chicken tenders, use these keto breadcrumb alternatives:

  • Almond Flour: Mix the same amount of almond flour with the spices.
  • Almond Flour & Coconut Flour Mixture: Use a half and half mixture of these two and add in the spices. I do not recommend using coconut flour on it’s own as it will create a soft and chewy breading that has a slight coconut taste.
  • Grated Parmesan Cheese – Use 1-2 cups of grated parmesan cheese mixed with the spices to coat the chicken.

NOTE: Texture and taste will vary depending on which breading you used.

Orange buffalo tenders on a white platter with blue cheese on top and next to celery sticks

Storing, freezing, and reheating tips

  • Storing: Cooked buffalo chicken tenders can be stored in the fridge for up to 5 days in an airtight container. 
  • Freezing: Lay the breaded keto chicken tenders on a baking sheet, and then add the sheet to the freezer. Once the chicken is frozen, transfer them to a freezer safe bag or airtight container. The texture may be a bit soft when reheating as freezing will change the structure of the keto breading.
  • Reheating: You can easily reheat chicken tenders in a 350ºF oven for 10 to 12 minutes. Alternatively, use the air fryer to heat them up at 350ºF for 5 to 7 minutes.

More healthy keto recipes you’ll love

  • Keto Thai Steak Salad
  • One Bowl Keto Crackers
  • Low Carb Breakfast Bowl
  • Keto Zuppa Toscana Soup

If you give these Easy Keto Buffalo Chicken Tenders a try, let me know what you think! Leave a comment and don’t forget to take a picture and tag it with #lenaskitchenblog on Instagram. I love seeing what you come up with!

Print Recipe
4.55 from 11 votes

Easy Keto Buffalo Chicken Tenders

This easy recipe for Keto Buffalo Chicken Tenders takes an ordinary chicken tender, dredges it in egg, then coats it in a keto “breading”. Juicy on the inside and crispy on the outside, this chicken has a spicy kick and is perfect for parties or a low carb weeknight dinner.
Prep Time15 minutes mins
Cook Time15 minutes mins
Total Time30 minutes mins
Course: Dinner
Cuisine: American
Keyword: 20 minute recipe, 30 minute meal, chicken, keto, keto dinner, low carb, low carb dinner
Servings: 6 servings
Calories: 344kcal
Author: Lena Gladstone

Ingredients

  • 12 chicken tenders boneless and skinless

Dry Coating

  • 2 ½ cups pork rinds (5oz bag) finely crushed
  • 1 ½ teaspoons smoked paprika
  • ½ teaspoon garlic powder
  • ½ teaspoon onion powder
  • ½ teaspoon kosher salt

Wet Coating

  • 1 tablespoons franks red hot sauce
  • ¼ cup mayonnaise
  • 2 eggs

Buffalo Sauce

  • ½ cup franks red hot sauce or use your favorite hot sauce or BBQ sauce
  • 3 tablespoons unsalted butter

Optional toppings and garnishes:

  • ½ cup blue cheese or ranch dressing
  • 2 tablespoons blue cheese crumbles
  • ½ bunch celery cut into smaller pices
  • 1 tablespoon finely chopped green onions

Instructions

Oven Cooking Method

  • Preheat the oven to 425ºF and place a baking rack atop a foil-lined baking sheet. Generously coat the baking rack in nonstick cooking spray.
  • Using paper towels, pat the chicken tenders dry. Set aside.
  • Using a food processor or zip lock bag and a rolling pin, crush the pork rinds until they're powder-like.
  • In a small mixing bowl, combine the crushed pork rinds, paprika, garlic powder, onion powder, and salt. Whisk together until fully incorporated. Transfer the dry ingredients to a shallow dish.
  • In a separate small mixing bowl, whisk together 1 tbsp hot sauce, mayonnaise, and eggs. Transfer to a shallow dish.
  • Using a fork, poke the tenders and then, a few at a time, dip chicken tenders into the egg mixture.
  • Then dredge the chicken into the dry ingredient mixture, flipping the chicken tender over multiple times until it's fully coated. Continue breading the remaining chicken tenders.
  • Transfer the breaded chicken to a prepared baking rack.
  • Bake the tenders until their internal temperature reaches 165ºF, about 15 minutes, depending on the thickness of chicken tender.

Buffalo Sauce

  • In a small pot over medium heat, melt the butter and ½ cup hot sauce.
  • Dip the tenders into the sauce on both sides. Add to a platter.
  • Serve chicken tenders topped with blue cheese crumbles, a side of blue cheese or ranch dressing, celery, and fresh green onions.

Air Fryer Cooking Method

  • Carefully arrange the breaded chicken in your air fryer basket.
  • Cook at 400ºF for 9-10 minutes (smaller tenders will be ready in less time) or until the internal temperature of the chicken reaches 165°F. When they're done, dip the tenders in the prepared buffalo sauce (see instructions above). If you have a smaller Air Fryer, consider using a Double Layer Rack or frying in batches so the chicken can all crisp up evenly.

Notes

Storing, freezing, and reheating tips:
  • Storing: Cooked buffalo chicken tenders can be stored in the fridge for up to 5 days in an airtight container. 
  • Freezing: Lay the breaded keto chicken tenders on a baking sheet, and then add the sheet to the freezer. Once the chicken is frozen, transfer them to a freezer safe bag or airtight container. The texture may be a bit soft when reheating as freezing will change the structure of the keto breading.
  • Reheating: You can easily reheat chicken tenders in a 350ºF oven for 10 to 12 minutes. Alternatively, use the air fryer to heat them up at 350ºF for 5 to 7 minutes.

Nutrition

Calories: 344kcal | Carbohydrates: 1g | Protein: 32g | Fat: 22g | Saturated Fat: 8g | Polyunsaturated Fat: 6g | Monounsaturated Fat: 5g | Trans Fat: 1g | Cholesterol: 151mg | Sodium: 1522mg | Potassium: 426mg | Fiber: 1g | Sugar: 1g | Vitamin A: 576IU | Vitamin C: 1mg | Calcium: 53mg | Iron: 1mg

You might also like:
A bowl of cilantro lime cauliflower rice garnished with chopped herbs, a lime wedge, and cilantro, with a hand holding a spoon and another hand holding the bowl. Lime slices and cilantro are nearby.Cilantro Lime Cauliflower Rice
A hand lifts a slider from a tray of baked sandwich sliders topped with sesame seeds, next to half an orange and a striped napkin on a white surface.Hawaiian Roll Breakfast Sliders
A bowl of roasted Brussels sprouts with bacon sits on a white tiled surface, surrounded by scattered Brussels sprouts, serving utensils, and two small plates with servings.Balsamic Roasted Brussels Sprouts with Bacon
Mushroom burgers.Mushroom Burger
BBQ baby back ribs.BBQ Baby Back Ribs
Rotisserie chicken salad.Rotisserie Chicken Salad
Egg roll in a bowl in a pan.Egg Roll Bowl
Lemongrass chicken.Lemongrass Chicken

Keto Baked Salmon With Parmesan Herb Crust

Posted: January 15, 2021 by lena gladstone | Updated: September 2, 2021

My 6 ingredient Keto Baked Salmon With Parmesan Herb Crust can be made in the oven or air fryer. Enjoy it for an easy weeknight dinner or for delicious leftovers the next day. Made with keto, low-carb, and gluten-free ingredients!

Jump to Recipe
Coated fillet of salmon of a white plate with basil and lemon on the side

My Keto Baked Salmon With Parmesan Herb Crust is made without any bread, is easy to prepare in very little time, and is a healthy choice for a weeknight dinner. It’s a keto, low-carb, and gluten-free recipe you can serve to your entire family.

With a little mayonnaise, parmesan cheese, lemon, and fresh basil spread on top, the taste of a crusted salmon fillet is completely transformed! It’s a 6-ingredient recipe that can be baked in the oven or made in the air fryer. No matter which method you use, the salmon is ready quickly and turns out tender, moist, and flaky.

Enjoy your fillet of keto baked salmon with a few low-carb side dishes, like French green beans and roasted cauliflower steaks. 

Coated fillet of salmon of a white plate with basil and lemon on the side

Ingredients you’ll need for crusted baked salmon

  • Salmon fillet – Look for a fillet that appears moist and without any blemishes, like brown spots. The fresher the fish, the more tender and juicy it will taste.
  • Lemon – Seasoning salmon with lemon juice not only marinates the meat as it cooks but adds a slight tangy flavor. To finish, add a final squeeze of lemon to the salmon for more pop!
  • Mayonnaise – Use homemade or storebought. This is used as the base of your coating.
  • Parmesan cheese – If you can, buy a brick of fresh Parmesan cheese and shred it yourself. If you really want to go all out, spring for the higher-quality Parmigiano-Reggiano.
  • Basil leaves – For a pop of fresh flavor. Use fresh basil if you can and chop it into fine pieces so you’ll get the taste in every bite.
  • Garlic – This will add depth and savoriness to the coating.
Close up of a coated fillet of salmon with a fork taking a piece

How to bake salmon in the oven

This is a quick and easy recipe you can prepare ahead of time or finish when you’re in a hurry! Salmon takes very little time to bake in the oven and turns out juicy, flavorful, and flaky. With the parmesan herb crust on top, you’ll be begging for seconds!

Here’s how it’s done:

  1. Prepare the salmon and coating: Season the salmon fillet with lemon juice and salt. Next, mix the mayonnaise, basil, garlic, and Parmesan cheese in a bowl.
  2. Add the coating: Spread the mayonnaise mixture over top of the fillet. Sprinkle the remaining Parmesan cheese on top.
  3. Bake, then serve: Bake for 12-15 minutes, depending on the thickness of the salmon. Sprinkle fresh basil and lemon juice on top and serve with plenty of side dishes!

How to air fry salmon

Prepare the salmon and the mayonnaise, herb, and Parmesan crust as you would if you were baking the salmon. Place the crusted salmon in your oil-coated air fryer basket.

You’ll air fry the salmon for around 10 minutes, depending on the thickness of the fillet. To finish, squeeze an extra drizzle of lemon and more basil on top, then serve!

White plates holding raw salmon, garlic, cheese, and mayonnaise

What to serve with herb crusted salmon

This is a healthy and no-nonsense keto main dish you can serve with almost anything:

  • Place the salmon on top of a salad for extra protein and flavor.
  • Over a bed of cauliflower rice.
  • With veggies on the side, like a beet terrine, sauteed broccolini, or glazed carrots.
  • Next to a cauliflower mash.
  • In a keto bagel sandwich.
  • With homemade tartar sauce for dipping.

Recipe tips and variations

  • If you’re unsure if the salmon is done cooking, use a meat thermometer to ensure the internal temperature has reached 135ºF.
  • The best temperature to bake salmon in the oven is 425º F. The high temperature cooks the fillet quickly and doesn’t dry out the meat.
  • Don’t want to use mayonnaise? You can replace it with a soft cheese (like goat cheese or Boursin) or melted butter instead.
  • If using frozen salmon, make sure it has thawed completely before cooking and pat it fully dry.
  • Use any herbs you like. You can add fresh dill, parsley, or cilantro for a more herby flavor.
  • If you don’t follow a keto diet, feel free to add some panko breadcrumbs to the coating for an extra crunch.
Crusted salmon on a white plate next to parmesan cheese and a bowl of purple radicchio

Making ahead of time, storing, and reheating

You can make the salmon coating 1 or 2 days ahead of time. Mix everything together in a bowl or container, then seal it with a lid. Keep the coating in the fridge until you’re ready to make the herb crusted salmon.

Baked salmon can be wrapped tightly in foil, kept in a sealed container, and stored in the fridge for up to 4 days. Reheat the fillet in a 275°F oven for around 15 minutes. Alternatively, reheat it in your air fryer at 360ºF for around 4 minutes.

Close up of a coated fillet of salmon with a fork taking a piece

More salmon recipes

Do you love salmon as much as I do? Then you must try these recipes!

  • Keto Salmon Patties
  • Crab Stuffed Salmon
  • Salmon And Tomato Skewers
  • Smoked Salmon Street Tacos

If you give this Keto Baked Salmon With Parmesan Herb Crust a try, let me know what you think. Leave a comment and don’t forget to take a picture tag me Instagram or use #lenaskitchenblog to be featured in my stories! I love seeing what you come up with!

Print Recipe
4.56 from 74 votes

Keto Baked Salmon With Parmesan Herb Crust

My 6 ingredient Keto Baked Salmon With Parmesan Herb Crust can be made in the oven or air fryer. Enjoy it for an easy weeknight dinner or for delicious leftovers the next day. Made with keto, low-carb, and gluten-free ingredients!
Prep Time5 minutes mins
Cook Time15 minutes mins
Total Time20 minutes mins
Course: Dinner, Main Course
Cuisine: American, Italian
Keyword: 30 minute meal, dinner, easy dinner, gluten free, keto, keto dinner, low carb, low carb dinner, salmon, seafood, weeknight dinner
Servings: 4 servings
Calories: 374kcal
Author: Lena Gladstone

Ingredients

  • 1 ½ -2 lb salmon fillet
  • ½ lemon juiced, extra ¼ lemon for after cooked
  • 4 tbsp mayonnaise
  • 8 leaves fresh basil minced, plus more for garnish
  • 3 cloves garlic minced
  • 6 tbsp Parmesan cheese freshly grated and divided
  • ½ tsp kosher salt

Instructions

Oven Instructions:

  • Preheat the oven to 425ºF. Add parchment paper to a baking sheet.
  • Season the salmon with lemon juice and salt.
  • Mix the mayonnaise with basil, minced garlic, and 3 tablespoons of Parmesan cheese in a small bowl.
  • Spread completely over the top of salmon.
  • Sprinkle remaining Parmesan cheese on top.
  • Bake for 12-15 minutes, depending on the thickness of the salmon.
  • Sprinkle with fresh basil and a drizzle of lemon juice. Serve with a salad, veggies, or cauliflower rice.

Air Fryer Instructions:

  • Preheat air fryer to 400ºF. Spay the basket with olive oil.
  • Season the salmon with lemon juice and salt.
  • Mix the mayonnaise with basil, minced garlic, and 3 tablespoons of Parmesan cheese in a small bowl.
  • Spread completely over the top of salmon. Sprinkle remaining Parmesan cheese on top.
  • Air fry for 8-10 minutes, depending on the thickness of the salmon.
  • Sprinkle with fresh basil and a drizzle of lemon juice optional. Serve with a salad, veggies, or cauliflower rice.

Notes

Making ahead and storing tips:
  • Make the salmon coating 1 or 2 days ahead of time. Mix everything together in a bowl or container, then seal it with a lid and keep it in the fridge until you’re ready to make the herb crusted salmon.
  • Baked salmon can be wrapped tightly in foil, kept in a sealed container, and stored in the fridge for up to 4 days.
  • Reheat the fillet in a 275°F oven for around 15 minutes. Alternatively, reheat it in your air fryer at 360ºF for around 4 minutes.

Nutrition

Calories: 374kcal | Carbohydrates: 2g | Protein: 37g | Fat: 23g | Saturated Fat: 5g | Cholesterol: 105mg | Sodium: 575mg | Potassium: 861mg | Fiber: 1g | Sugar: 1g | Vitamin A: 179IU | Vitamin C: 8mg | Calcium: 117mg | Iron: 2mg

You might also like:
A bowl of cilantro lime cauliflower rice garnished with chopped herbs, a lime wedge, and cilantro, with a hand holding a spoon and another hand holding the bowl. Lime slices and cilantro are nearby.Cilantro Lime Cauliflower Rice
A hand lifts a slider from a tray of baked sandwich sliders topped with sesame seeds, next to half an orange and a striped napkin on a white surface.Hawaiian Roll Breakfast Sliders
A bowl of roasted Brussels sprouts with bacon sits on a white tiled surface, surrounded by scattered Brussels sprouts, serving utensils, and two small plates with servings.Balsamic Roasted Brussels Sprouts with Bacon
Mushroom burgers.Mushroom Burger
BBQ baby back ribs.BBQ Baby Back Ribs
Rotisserie chicken salad.Rotisserie Chicken Salad
Egg roll in a bowl in a pan.Egg Roll Bowl
Lemongrass chicken.Lemongrass Chicken

Low Carb Keto Everything Bagels

Posted: January 12, 2021 by lena gladstone | Updated: September 2, 2021

These 5-ingredient Low Carb Keto Everything Bagels come together easily using a fathead dough. After only 15 minutes in the oven, these crunchy on the outside and soft on the inside bagels are ready to be layered with all of your favorite keto toppings. 

Jump to Recipe
Pile of everything bagels on parchment paper

My Low Carb Keto Everything Bagels are made with a short list of gluten-free ingredients and are ready to eat in under 30 minutes. They’re a healthy and low carb treat you can make fresh for breakfast, brunch, or to keep frozen for when those bread cravings hit.

These tasty bagels are formed by hand and made from a fathead dough. With simple ingredients like mozzarella, cream cheese, eggs, and almond flour, they are quick to make and turn out soft and chewy. A sprinkle of everything bagel seasoning surrounds each bagel and adds to their irresistible flavor. You won’t even be able to tell that they’re made without conventional flour, yeast, or gluten! 

Include these bagels on a breakfast board with plenty of cream cheese, avocado, and my Keto Bacon Chaffles.

Are everything bagels keto friendly?

Most storebought or bakery bagels are not keto-friendly because they’re made using flour and sugar. We need to use a completely different kind of dough to make keto bagels.

For this keto everything bagels recipe, we’ll need to use fathead dough. This is a dough made from cheese, cream cheese, and almond or coconut flour. It helps the bagels bind together while still maintaining a soft and chewy texture.

cheese, cream cheese, almond flour, oil, everything bagel seasoning, eggs, and baking powder in small individual white bowls

Ingredients you’ll need for keto everything bagels

Everything But The Bagel Seasoning from Trader Joe’s is suitable for keto and low carb diets. As a bonus, it adds tons of flavor and crunch. You can always swap out this seasoning for plain sesame seeds if that’s what you prefer!

These are the ingredients you need:

  • Mozzarella cheese
  • Cream cheese
  • Eggs
  • Almond flour
  • Baking powder
  • Everything But The Bagel Seasoning
  • Sesame seeds
ball of raw dough on top of plastic wrap
woman's hands forming bagels using raw dough
4 unbaked everything bagels on a baking sheet
4 baked everything bagels on a baking sheet

How to make low carb keto bagels

Making keto bagels is actually easier than the traditional recipe. There’s no need to boil the bagels before baking!

Here’s how it’s done:

  1. Prep dry and wet ingredients: Whisk the flour and baking powder together in a small bowl. In another bowl, melt the cream cheese and mozzarella. 
  2. Make the bagel dough: Use a stand or handheld mixer to mix 2 eggs and the dry ingredients into the cream cheese and mozzarella mixture until a dough forms. 
  3. Divide the dough: Place a large piece of plastic wrap on the counter and lightly coat your hands in oil. Divide the dough into 8 parts and roll each one out into a rope. 
  4. Shape the bagels: Form each rope into a circle and pinch the ends closed.
  5. Bake the bagels: Place the bagels on a parchment-lined baking sheet 2 inches apart and brush the tops with egg wash, Everything But The Bagel Seasoning, and sesame seeds. Bake until the bagels are golden brown.
close up of woman's hand holding a sliced bagel

Tips and Tricks

  • The baked bagels should not collapse after you touch their surface. I recommend baking the bagels one sheet at a time rather than trying to bake both sheets at once because it leads to uneven heat distribution and your bagels may not puff up properly. 
  • Fathead dough is very sticky. Coating your hands in oil will help prevent the dough from sticking to your hands too much. You could also try chilling the dough for 30 minutes to help make it less sticky.
  • Make your own everything bagel seasoning by combining sesame seeds, poppy seeds, minced dried garlic, minced dried onion, and sea salt.
Stack of everything bagels wth everything bagel seasoning and cream cheese in bowls on the side

What can I put on everything bagels?

Anything you want! Fill up your bagels with all of your favorite keto spreads, toppings, or use them for a sandwich. This is how I suggest serving your low carb keto everything bagels:

  • Slathered in cream cheese.
  • With smoked salmon and pickled onions on top.
  • Topped with soft scrambled eggs.
  • With mashed avocado and more everything bagel seasoning on top.
  • Used for a cheese and meat sandwich.
  • As a keto option on a lox and bagel brunch board.
Stack of everything bagels wth everything bagel seasoning and cream cheese in bowls on the side

Storing and freezing tips

You can make the fathead dough ahead of time and keep it in the fridge or freezer. Once the dough has come together, wrap it tightly in plastic wrap. Refrigerate for up to 1 week or freeze for up to 3 months.

Store the baked bagels in a sealed container in your fridge for up to 1 week. You can also freeze them in a sealed container or bag for up to 3 months. Let them thaw in the fridge, then slice, toast, and enjoy!

Close up of everything bagels stacked on top of each other.

More keto breakfast recipes to try

Start your day off right with these easy keto breakfast recipes:

  • Instant Pot Egg Bites
  • Low Carb Breakfast Bowl
  • Easy Keto Bacon Chaffles
  • Soft Scrambled Eggs With Boursin Cheese

Did you try these Low Carb Keto Everything Bagels? Let me know what you think and leave a comment below! Don’t forget to also take a picture of your recreation and tag me on Instagram. I love to see all of your photos!

Print Recipe
4.67 from 24 votes

Low Carb Keto Everything Bagels

These 5-ingredient Low Carb Keto Everything Bagels come together easily using a fathead dough. After only 15 minutes in the oven, these crunchy on the outside and soft on the inside bagels are ready to be layered with all of your favorite keto toppings.
Prep Time5 minutes mins
Cook Time12 minutes mins
Total Time17 minutes mins
Course: Breakfast, Brunch
Cuisine: American
Keyword: 30 minute meal, breads, breakfast, brunch, keto, keto breakfast, low carb
Servings: 8 servings
Calories: 316kcal
Author: Lena Gladstone

Ingredients

Bagels

  • 3 cups mozzarella cheese shredded
  • 2 oz cream cheese
  • 3 large eggs divided (one egg is for egg wash)
  • 1 ¾ cups superfine almond flour
  • 1 tbsp baking powder
  • olive oil for hands

Toppings

  • everything but the bagel seasoning optional
  • sesame seeds optional

Instructions

  • Preheat oven to 400°F. Line two baking sheets with parchment paper or silicone baking mats.
  • In a small bowl, whisk together the almond flour and baking powder. Set aside.
  • Add the mozzarella and cream cheese to a large microwave-safe bowl. Melt in the microwave at full power in 30 second intervals. After every 30 seconds, stir the cheese until it's completely melted and uniform. This should take around 2 ½ minutes in total. Do not try to microwave the full time at once because some of the cheese will overcook. You can also melt the cheese over the stove in a double boiler.
  • In the same bowl as the cheese mixture, add in 2 eggs and the almond flour mixture. Mix until the dough forms. The dough will be quite sticky, which is totally normal.
  • Add a large piece of plastic wrap to a clean surface or add a drizzle of oil on the surface you'll be rolling your dough out, to prevent dough from sticking. Lightly coat your hands with oil and divide the dough into 8 equal parts. Roll each dough into ropes about 1 inch thick. The plastic wrap should keep your dough from sticking to the surface. Form each rope into a circle and pinch the ends closed. Carefully place the bagels onto the parchment-lined baking sheets. Repeat with the remaining dough. The bagels should be placed about 2 inches apart.
  • Add the final egg to a bowl and whisk. Generously brush the top of bagels with egg wash. Sprinkle the everything but the bagel seasoning on top.
  • Bake the bagels for about 12-14 minutes in the middle rack of your oven, or until bagels are golden brown (each oven is different so start with 12 minutes and go up to 14 if you want a more dark bake on these).
  • When you touch the surface of the bagels, they should not collapse. I recommend baking the bagels one sheet at a time rather than trying to bake both sheets at once because it leads to uneven heat distribution and your bagels may not puff up properly. Allow bagels to cool on baking sheets before removing.

Notes

  • Making ahead of time: You can make the fathead dough ahead of time and keep it in the fridge or freezer. Once the dough has come together, wrap it tightly in plastic wrap. Refrigerate for up to 1 week or freeze for up to 3 months.
  • Storing and freezing: Store the baked bagels in a sealed container in your fridge for up to 1 week. You can also freeze them in a sealed container or bag for up to 3 months. Let them thaw in the fridge, then slice, toast, and enjoy!

Nutrition

Calories: 316kcal | Carbohydrates: 7g | Protein: 17g | Fat: 26g | Saturated Fat: 8g | Cholesterol: 111mg | Sodium: 472mg | Potassium: 68mg | Fiber: 3g | Sugar: 2g | Vitamin A: 480IU | Calcium: 369mg | Iron: 2mg

You might also like:
A bowl of cilantro lime cauliflower rice garnished with chopped herbs, a lime wedge, and cilantro, with a hand holding a spoon and another hand holding the bowl. Lime slices and cilantro are nearby.Cilantro Lime Cauliflower Rice
A hand lifts a slider from a tray of baked sandwich sliders topped with sesame seeds, next to half an orange and a striped napkin on a white surface.Hawaiian Roll Breakfast Sliders
A bowl of roasted Brussels sprouts with bacon sits on a white tiled surface, surrounded by scattered Brussels sprouts, serving utensils, and two small plates with servings.Balsamic Roasted Brussels Sprouts with Bacon
Mushroom burgers.Mushroom Burger
BBQ baby back ribs.BBQ Baby Back Ribs
Rotisserie chicken salad.Rotisserie Chicken Salad
Egg roll in a bowl in a pan.Egg Roll Bowl
Lemongrass chicken.Lemongrass Chicken

Broccoli Brussels Sprouts Salad with Sardines

Posted: November 20, 2020 by lena gladstone | Updated: November 20, 2020

You’re going to love the pops of flavor in this Broccoli Brussels Sprouts Salad with Sardines. A healthy side dish or lunch, every bite is flavorful, light, and delicious. This is a simple and crowd-pleasing recipe you can make ahead of time or serve for the holidays.

Jump to Recipe
Large brown serving bowl filled with salad with cheese on top. Parmesan and salt on the side.

This is a sponsored post written by me on behalf of Matiz. All opinions are 100% mine.

This isn’t your average salad!

Every bite has a bit of tang and a lot of freshness. Made with crisp veggies, creamy Parmesan, and rich Matiz sardines, this salad is an easy option when you need a light lunch or side dish for dinner. Using simple ingredients that are all naturally gluten-free, keto, paleo, and low-carb, it’s an ideal choice to serve to a crowd.

The broccoli and brussels sprouts are sliced super small, making this salad easy to eat or to use as a slaw. Finish it off with green olives and sliced almonds on top to really up the flavor! Add a scoop of this tasty salad to smoked salmon tacos or on the side of vinegar chicken.

These aren’t your grandpa’s sardines

Matiz Sardines are not just delicious, but also a convenient and healthy food. You can enjoy them on the go for a snack or lunch, with pasta or rice, or include them in your tapas on a charcuterie. Simply open the tin and pair with crusty bread to experience the #tintotable trend at home.

Spain has a rich tradition of canning seafood where it is considered a delicacy. Wild sardines from Spain are high in calcium, protein, and omega-3 essential fats, with 18g of protein, 2g of O-3’s, and 260mg of calcium per tin. They’re also minimally processed and cooked only once at low temperatures before being hand packed in Spanish olive oil. 

Sardines are versatile in recipes, are keto and paleo-friendly, and are an essential part of the healthful Mediterranean diet. You can buy Matiz Wild Sardines and their other Spanish products at these online retailers: yummybazaar.com, Amazon.com, and thespanishtable.com

Shaved brussels sprouts, broccoli, cheese, sardines, and olives in small individual bowls

Sardines vs. Anchovies

Sardines and anchovies are very similar. They’re both common in the Meditterenean, are packaged in tins, and are very small fish. Before you substitute one for the other, learn about their many differences.

Sardines are actually much larger than anchovies and are a completely different kind of fish. Their white flesh has a light and mild flavor, making it an ideal addition to pasta, salad, rice, or even on crackers. 

Anchovies are small and oily with an aggressive flavor. Their pink and grey flesh can be pulverized into dressings or just added on top of a pizza. The strong flavor comes from the curing process, where the fish is dried in salt before being packaged in olive oil. 

Ingredients you need

Throw the salad together using these easy to find and simple ingredients. For the best flavor, use organic produce and a high quality Parmesan.

Here’s what you need:

  • Broccoli
  • Brussels sprouts
  • Matiz Sardines
  • Parmesan
  • Olive oil
  • Lemon juice
  • Castelvetrano green olives
Large brown serving bowl filled with salad with cheese on top. Parmesan, salt, and sardines on the side.

How to make Broccoli Brussels Sprouts Salad with Sardines

This salad is ready to enjoy in just 20 minutes. If you’re short on time, you can easily make this recipe up to 1 day ahead of time.

Here’s how it’s done:

  1. Slice and dress the veggies: Combine the prepared broccoli florets and brussels sprouts in a food processor. With the slice attachment, slice the veggies into small pieces. Transfer them to a large bowl and toss with a bit of salt. Let them sit for about 10 minutes to soften slightly. 
  2. Make the dressing: In a small bowl, combine the Parmesan, oil, lemon juice, and salt. Pour it over the salad.
  3. Finish and serve: Serve the finished salad with sardines, olives, and more Parmesan.

Can I make this without a food processor?

Of course! It’s a little more work, but just use a knife to finely chop the broccoli and brussels sprouts into small pieces.

Green salad with cheese and sardines in a white bowl with a fork

Recipe tips and substitutions

  • Use green pitted Castelvetrano olives. These are more sweet and mild than Kalamata or black olives and won’t overpower the salad.
  • Make this salad with a creamy dressing instead. My Caesar salad dressing would pair perfectly with the Parmesan and sardines.
  • Don’t forget the toppings! Top the salad with shaved almonds, pistachios, or even dried cranberries for a festive finish.
  • Make it a main! Beef up this salad by adding in sliced baked chicken, croutons, kale, or shaved green cabbage.
  • Want to keep it simple? Make my easy Raw Brussels Sprouts Salad instead.
Close up of a salad with cheese, sardines, and olives on top

How to serve Broccoli Brussels Sprouts Salad with Sardines

This fresh green salad would be an excellent side dish for the holidays. Serve it alongside more veggie dishes like miso glazed carrots, mashed potatoes, or green beans.

Are you craving more seafood? Make my crab stuffed salmon and serve it on top of this salad instead. Otherwise, keep dinner simple and pair a fresh salad with my Mediterranean Chicken, flank steak, or baked salmon.

Green salad with cheese and sardines in a white bowl

Making it ahead of time

You can make this salad up to 1 day ahead of time. Put everything together (except the dressing) in a serving dish, cover it with a lid or plastic, and keep it in the fridge. When you’re ready to serve, pour the dressing over top and add the almonds.

2 white bowls with individual servings of salad and a large brown bowl on the side.
White bowls filled with salad and wine glass

More salad recipes

These light and fresh salads are far from boring:

  • Mediterranean Chopped Salad
  • Asian Cucumber Salad
  • Easy Tuna Egg Salad
  • Delicata Squash Salad

If you give this Broccoli Brussels Sprouts Salad with Sardines a try, let me know in the comments below. I love seeing your pictures too, so please tag me on Instagram @lenaskitchenblog and use #lenaskitchenblog so I can share them to my page!

Print Recipe
3.67 from 9 votes

Broccoli Brussels Sprouts Salad with Sardines

You’re going to love the pops of flavor in this Broccoli Brussels Sprouts Salad with Sardines. A healthy side dish or lunch, every bite is flavorful, light, and delicious. This is a simple and crowd-pleasing recipe you can make ahead of time or serve for the holidays.
Prep Time15 minutes mins
Total Time15 minutes mins
Course: Appetizer, Lunch, Side Dish
Cuisine: Mediterranean
Keyword: 20 minute recipe, appetizer, easy appetizer, gluten free, healthy salad, keto, low carb, salad, seafood, side dish, sides
Servings: 4 servings
Calories: 1260kcal
Author: Lena Gladstone

Ingredients

  • 1 small head broccoli cut into small pieces (2 cups chopped)
  • 10 large brussels sprouts trimmed, thinly sliced lengthwise (3 cups chopped)
  • ¼ tsp sea salt plus more to taste
  • 4.2 oz oil-packed sardines
  • ½ cup Parmesan finely grated and shaved, plus more for serving
  • ¼ cup olive oil
  • 3 tbsp fresh lemon juice
  • ¼ cup Castelvetrano olives pitted

Instructions

  • Cut the broccoli florets into small pieces, peel the stalk with a peeler, and thinly slice it. You can slice both broccoli and brussels sprouts in a food processor with slice attachment. Combine broccoli and brussels sprouts in a large bowl and toss with ½ teaspoon of salt. Let them sit for 10 minutes to soften slightly.
  • Combine the grated Parmesan, oil, and lemon juice in a small bowl; season with salt. Drizzle it over the salad and toss to coat. Top it with sardine pieces, olives, and shaved Parmesan.

Notes

Making it ahead of time: You can make this salad up to 1 day ahead of time. Put everything together (except the dressing) in a serving dish, cover it with a lid or plastic, and keep it in the fridge. When you’re ready to serve, pour the dressing over top and add the almonds.

Nutrition

Calories: 1260kcal | Carbohydrates: 62g | Protein: 71g | Fat: 89g | Saturated Fat: 19g | Cholesterol: 203mg | Sodium: 2753mg | Potassium: 3148mg | Fiber: 23g | Sugar: 16g | Vitamin A: 5722IU | Vitamin C: 704mg | Calcium: 1422mg | Iron: 11mg

You might also like:
A bowl of cilantro lime cauliflower rice garnished with chopped herbs, a lime wedge, and cilantro, with a hand holding a spoon and another hand holding the bowl. Lime slices and cilantro are nearby.Cilantro Lime Cauliflower Rice
A hand lifts a slider from a tray of baked sandwich sliders topped with sesame seeds, next to half an orange and a striped napkin on a white surface.Hawaiian Roll Breakfast Sliders
A bowl of roasted Brussels sprouts with bacon sits on a white tiled surface, surrounded by scattered Brussels sprouts, serving utensils, and two small plates with servings.Balsamic Roasted Brussels Sprouts with Bacon
Mushroom burgers.Mushroom Burger
BBQ baby back ribs.BBQ Baby Back Ribs
Rotisserie chicken salad.Rotisserie Chicken Salad
Egg roll in a bowl in a pan.Egg Roll Bowl
Lemongrass chicken.Lemongrass Chicken

Sautéed Garlic Mushrooms With Thyme

Posted: October 29, 2020 by lena gladstone | Updated: October 30, 2020

These easy Sautéed Garlic Mushrooms With Thyme are the perfect 15 minute side dish to serve with any meal. Caramelized in garlic butter and a splash of soy sauce gives the mushrooms a boost and makes each bite rich and juicy.

Jump to Recipe
Close up of a large white bowl with a spoon and filled with cooked brown mushrooms.

We’re recreating the buttery and rich mushrooms you’d normally find in a steak house with this recipe for Sautéed Garlic Mushrooms With Thyme! The ingredients are really simple but don’t lack any flavor. Done in 15 minutes, you can add these juicy pan fried mushrooms to a rib eye steak, baked chicken, or even fish!

Sautéed in garlic butter, fresh thyme, and a dash of soy sauce, this easy mushroom dish is beautifully caramelized and full of flavor. You could whip this up in no time using ingredients you already have at home, or make a few easy changes to make the recipe your own.

What type of mushrooms are best?

It’s best to use mushrooms you’re already familiar with so there aren’t too many surprises. I used a mix of cremini and shitake mushrooms which worked well with the butter and slight umami flavor from the soy sauce. Go ahead and use any kind you already love.

To really speed up the process, slice the mushrooms before they go in the pan. They’ll cook much faster this way. Whole mushrooms will take a little longer to cook, but they add more texture to each bite.

Large white bowl with a spoon and filled with cooked brown mushrooms.

Ingredients you need

All you need are a handful of easy ingredients that are likely already in your kitchen! If you want to keep this recipe gluten-free, use tamari instead of the soy sauce.

These are the simple ingredients you need:

  • Mushrooms
  • Unsalted butter
  • Garlic
  • Thyme
  • Sea salt
  • Light soy sauce
Chopped mushrooms on a cutting board. Butter and herbs on the side.

How to make Sautéed Garlic Mushrooms With Thyme

This appetizer, side dish, or topping is so simple and ready in a flash! The process only has two steps you need to follow.

Here’s what you need to do:

  1. Sauté the mushrooms: Heat a skillet on medium-high heat and add in the butter and mushrooms. Cook for a few minutes, then season with a little salt.
  2. Add the aromatics and flavor: Add in the garlic and remaining butter. Turn down the heat and add in the thyme and soy sauce for the last minute of cooking.
Large pot with cooked mushrooms and sprigs of thyme

How to use garlic mushrooms

If you’re replicating the steak house vibe, be sure to top a grilled steak, pork chops, beef short ribs, or grilled salmon with these juicy mushrooms. Don’t forget the mashed potatoes on the side!

Use them to beef up your veggie side dishes. They would pair really well with broccolini, green beans, carrots, or asparagus. You could even add them to smashed potatoes, cauliflower gnocchi, or garlic herb spaghetti for extra earthy flavors.

Try them for breakfast! Pile them onto buttered toast, on top of scrambled eggs, or put them in an omelet.

Recipe variations

  • Make it vegan: Just swap the butter for dairy-free butter.
  • Keep it oil-free: Remove some or all of the butter for white wine or vegetable stock.
  • Make it really herby: Add in more fresh herbs like basil, rosemary, or parsley.
  • Add some onions: Sauté white, yellow, or red onions with the mushrooms or top with green onions when they’re finished.
  • Make it saucy: Top the mushrooms with homemade chimichurri, tarragon sauce, or more garlic butter.
Woman's hands holding a white bowl and a spoon, scooping out cooked brown mushrooms

Storing and freezing tips

Keep the leftovers for your toast the next morning or enjoy them as a simple side dish. Store the mushrooms in a shallow, airtight container in the fridge. They should stay fresh for up to 1 week.

You can also freeze cooked mushrooms by laying them out on a lined baking sheet. Place them in the freezer until they’re hard, and then transfer the mushrooms to a sealed bag or container.

Large white bowl with a spoon and filled with cooked brown mushrooms.

More side dishes to try

Any of these flavorful side dishes will give your dinner or lunch a boost:

  • Creamy Cheesy Polenta
  • Boiled Baby Potatoes
  • Roasted Cauliflower Steaks
  • Raw Brussels Sprouts Salad
  • Air Fryer Baked Sweet Potatoes

If you fall in love with these Sautéed Garlic Mushrooms With Thyme as much as I think you will, make sure to post and tag @lenaskitchenblog on Instagram and use #lenaskitchenblog hashtag!

Print Recipe
4.24 from 17 votes

Sautéed Garlic Mushrooms With Thyme

These easy Sautéed Garlic Mushrooms With Thyme are the perfect 15 minute side dish to serve with any meal. Caramelized in garlic butter and a splash of soy sauce gives the mushrooms a boost and makes each bite rich and juicy.
Prep Time5 minutes mins
Cook Time7 minutes mins
Total Time13 minutes mins
Course: Appetizer, Side Dish
Cuisine: American
Keyword: 20 minute recipe, appetizer, easy appetizer, herbs, mushrooms, side dish, sides, vegetarian
Servings: 2 servings
Calories: 365kcal
Author: Lena Gladstone

Ingredients

  • 12 oz mushrooms cremini and shitake, cut in half
  • 6 tbsp unsalted butter
  • 6 sprigs thyme
  • 6 cloves garlic finely chopped
  • ¼ tsp sea salt
  • 3 tsp light soy sauce

Instructions

  • Cut the mushrooms in half and finely chop the garlic.
  • Heat a pan to medium-high heat. Add in 4 tablespoons of butter and the mushrooms. Cook for 5-7 minutes. Add salt and cook for 1 more minute.
  • Add the garlic and the remaining 2 tablespoons of butter. Turn down the heat to medium-low and cook for 1 more minute. Add the thyme and soy sauce, mix, and cook for 1 more minute.

Nutrition

Calories: 365kcal | Carbohydrates: 10g | Protein: 7g | Fat: 35g | Saturated Fat: 22g | Cholesterol: 92mg | Sodium: 808mg | Potassium: 614mg | Fiber: 2g | Sugar: 4g | Vitamin A: 1207IU | Vitamin C: 11mg | Calcium: 44mg | Iron: 2mg

You might also like:
A bowl of cilantro lime cauliflower rice garnished with chopped herbs, a lime wedge, and cilantro, with a hand holding a spoon and another hand holding the bowl. Lime slices and cilantro are nearby.Cilantro Lime Cauliflower Rice
A hand lifts a slider from a tray of baked sandwich sliders topped with sesame seeds, next to half an orange and a striped napkin on a white surface.Hawaiian Roll Breakfast Sliders
A bowl of roasted Brussels sprouts with bacon sits on a white tiled surface, surrounded by scattered Brussels sprouts, serving utensils, and two small plates with servings.Balsamic Roasted Brussels Sprouts with Bacon
Mushroom burgers.Mushroom Burger
BBQ baby back ribs.BBQ Baby Back Ribs
Rotisserie chicken salad.Rotisserie Chicken Salad
Egg roll in a bowl in a pan.Egg Roll Bowl
Lemongrass chicken.Lemongrass Chicken

Miso Butter Glazed Carrots

Posted: October 16, 2020 by lena gladstone | Updated: October 15, 2020

Sweet and savory Miso Butter Glazed Carrots are the ultimate side dish for this holiday season. Taking less than 30 minutes, it’s an easy and creative recipe that makes eating vegetables fun!

Jump to Recipe
Close up of multicolored glazed carrots with sesame seeds and cilantro on top.

Get creative this holiday season with this recipe for Miso Butter Glazed Carrots! It’s a fun and creative twist on the usual roasted maple or balsamic vegetables that we’re so used to seeing. Serve them next to my Greek Crispy Chicken Thighs for a complete and hearty meal.

Roasting carrots in a miso and honey mixture turns eating vegetables into a treat! The carrots cook in oil and salt for 10 minutes in the oven before being drenched in dreamy miso butter and sweet honey. The soft carrots then soak in all of the sweet and savory flavors while the outside develops a caramel-like glaze.

It’s a fun and easy side dish to try for the holidays or when you need something quick on a weeknight. All you need are a handful of ingredients and less than 30 minutes to bring it all together!

What is miso?

Miso is a fermented soybean paste commonly used in Japanese cooking. It’s made by blending soybeans, grains, salt, and koji culture (for fermentation) together, then leaving it to ferment for 6 months to 5 years.

There are many types of miso, but they can all be categorized by color: red, white, and blended. 

  • Red miso: This has a stronger flavor and is much more salty, due to its longer fermentation process.
  • White miso: This is less salty and has a more mild flavor because it’s made with more grains than soybeans.
  • Blended miso: A combination of white and red, for when you want balance!

You can use any color of miso you like in this recipe, but white has the most neutral flavor and won’t overpower the natural carrot taste.

Multicolored glazed carrots in a white bowl with sesame seeds and cilantro on top.

Ingredients you need

The ingredients in this glazed carrot recipe add deep and savory flavors to a normally simple vegetable. It’s an inventive and creative side dish, perfect for when you want to impress family members around the holidays.

This is what you need:

  • Whole Dutch carrots
  • Miso paste
  • Unsalted butter
  • Honey
  • Olive oil
  • Sea salt
  • Sesame seeds
  • Cilantro

What are dutch carrots?

Also known as baby carrots, dutch carrots are much smaller and skinnier than the kind that comes in a large bag at the grocery store. They’re usually sold in a bunch with their green tops still attached. 

Dutch carrots have a slightly sweeter, more “organic” flavor than other varieties, making them an ideal choice for a fancy side dish. Since they come in so many colors as well, you can really add a pop of color to your plate with just a few carrots!

Peeled carrots in a large bowl. Cilantro, miso, salt, and sesame seeds in small bowls on the side.

How to make Miso Butter Glazed Carrots

This quick and easy side dish is perfect when you need veggies in a pinch. Make it for Thanksgiving, Christmas, or any family gathering!

Here’s how to make it: 

  1. Make the miso butter: Preheat the oven. Mix the softened butter and miso paste together in a small bowl.
  2. Prepare the carrots: Clean, trim, and peel the carrots. Rub in olive oil and salt, then place them on a baking sheet. Roast for 10 minutes.
  3. Toss in miso butter: Remove the carrots from the oven and toss gently in the honey and half of the prepared miso butter. Place them back in the oven for another 8 to 10 minutes
  4. Serve: Toss the roasted carrots in the remaining miso butter, add your garnish, and serve.
3 images of peeled carrots in a large baking dish.

Stovetop instructions

Bring a large pot of water to a boil, lower the heat to medium, then add in the carrots. Let them cook for 8 to 10 minutes or until they’re fork-tender, then drain. Heat a skillet over medium heat with the olive oil, then add in the carrots and toss with salt, miso butter, and honey.

Move the carrots around in the pan for 2 or 3 minutes to cook and coat in the flavors. Add to a serving plate with the garnishes when done.

Roasted carrots in a large bowl with sesame seeds and cilantro on top.

Helpful recipe tips and substitutions

  • Can’t find colorful dutch carrots? Just peel and cut regular orange carrots into quarters lengthwise instead.
  • Don’t want to use carrots? The miso glaze would be delicious on roasted sweet potatoes, squash, parsnips, and other root vegetables.
  • Both red and white miso paste will work. Keep in mind that white miso has a milder flavor than red and won’t be overpowering.
  • Don’t want to use honey? Maple syrup is an excellent substitution, especially in fall!

Storing leftovers

Store any leftover roasted carrots in an airtight container in the fridge. They should last for about 5 to 6 days.

Reheating them in a 400ºF oven or in a skillet over medium heat will help retain their texture and flavor. They can be reheated in the microwave for 1 or 2 minutes but may turn out softer than you like.

Close up of multicolored glazed carrots with sesame seeds and cilantro on top.

More side dishes for the holidays

Fill your holidays or weeknight dinners with plenty of creative and delicious side dishes:

  • Loaded Air Fryer Baked Sweet Potatoes
  • Roasted Butternut Squash Risotto
  • Raw Brussels Sprouts Salad
  • Crispy Smashed Potatoes With Roasted Garlic
  • Delicata Squash Salad

If you give these Miso Butter Glazed Carrots a try, let me know in the comments below. I love seeing your pictures too, so please tag me on Instagram @lenaskitchenblog and use #lenaskitchenblog so I can share them to my page!

Print Recipe
4.18 from 23 votes

Miso Butter Glazed Carrots

Sweet and savory Miso Butter Glazed Carrots are the ultimate side dish for this holiday season. Taking less than 30 minutes, it’s an easy and creative recipe that makes eating vegetables fun!
Prep Time5 minutes mins
Cook Time20 minutes mins
Total Time25 minutes mins
Course: Side Dish
Cuisine: American, Asian
Keyword: 30 minute meal, appetizer, roasted, side dish, sides, vegetarian, veggies
Servings: 4 servings
Calories: 182kcal
Author: Lena Gladstone

Ingredients

Roasted Miso Butter Glazed Carrots

  • 2 bunches dutch carrots trimmed and peeled
  • 1 ½ tbsp olive oil
  • sea salt to taste
  • 1 ½ tsp miso paste
  • 2 tbsp unsalted butter softened
  • ½ tbsp honey

Garnish

  • 1 tsp sesame seeds
  • 1 tbsp cilantro finely chopped

Instructions

  • Preheat oven to 400°F.
  • Mix the softened butter and miso paste together in a small bowl.
  • Clean, peel, and trim the carrots as necessary.
  • Rub the olive oil and salt into the carrots, place them on a baking sheet or in a shallow baking dish, then roast for 10 minutes.
  • Remove from the oven and pour on the honey and half of the miso butter. Toss gently before placing them back in the oven for another 8 – 10 minutes.
  • Once cooked, toss the carrots in the remaining miso butter. Transfer them to a serving platter and add garnish with sesame seeds and cilantro.

Notes

Storage:
  • Store any leftover roasted carrots in an airtight container in the fridge. They should last for about 5 to 6 days.
  • Reheating them in a 400ºF oven or in a skillet over medium heat will help retain their texture and flavor. They can be reheated in the microwave for 1 or 2 minutes but may turn out softer than you like.

Nutrition

Calories: 182kcal | Carbohydrates: 19g | Protein: 2g | Fat: 12g | Saturated Fat: 4g | Cholesterol: 15mg | Sodium: 202mg | Potassium: 544mg | Fiber: 5g | Sugar: 10g | Vitamin A: 28578IU | Vitamin C: 10mg | Calcium: 61mg | Iron: 1mg

You might also like:
A bowl of cilantro lime cauliflower rice garnished with chopped herbs, a lime wedge, and cilantro, with a hand holding a spoon and another hand holding the bowl. Lime slices and cilantro are nearby.Cilantro Lime Cauliflower Rice
A hand lifts a slider from a tray of baked sandwich sliders topped with sesame seeds, next to half an orange and a striped napkin on a white surface.Hawaiian Roll Breakfast Sliders
A bowl of roasted Brussels sprouts with bacon sits on a white tiled surface, surrounded by scattered Brussels sprouts, serving utensils, and two small plates with servings.Balsamic Roasted Brussels Sprouts with Bacon
Mushroom burgers.Mushroom Burger
BBQ baby back ribs.BBQ Baby Back Ribs
Rotisserie chicken salad.Rotisserie Chicken Salad
Egg roll in a bowl in a pan.Egg Roll Bowl
Lemongrass chicken.Lemongrass Chicken

Easy Sautéed Broccolini With Garlic and Lemon

Posted: October 9, 2020 by lena gladstone | Updated: October 23, 2020

Prepare this Easy Sautéed Broccolini With Garlic and Lemon in only 10 minutes! It’s a bright, flavorful, and vibrant veggie side dish that pairs perfectly with weeknight meals.

Jump to Recipe
White plate with cooked broccolini and lemon slices. Large spoon on the plate for serving.

Who would have thought a deliciously flavored side dish only required simple ingredients?

This Easy Sautéed Broccolini With Garlic and Lemon is so flavorful, bright, and vibrant! It’s a 10-minute recipe with simple ingredients you can serve with weeknight dinners or at your holiday celebrations. Pair it with fish, steak, and chicken for a healthy and nutrient-packed meal!

This side dish is a total breeze to prepare and cook. Once your ingredients are prepped, sautée them all in a skillet for a few minutes and serve! Quick, easy, and flavorful enough to please almost anyone.

Serve this easy sautéed broccolini on its own dressed in olive oil or pesto, or on the side of Baked Salmon or Roasted Butternut Squash Risotto.

Sliced broccolini and lemon on a wood cutting board.

What is broccolini?

This bright green and healthy vegetable looks just like a baby version of broccoli. It’s actually a hybrid of broccoli and gai lan (Chinese broccoli), and sometimes goes by the name, “baby broccoli” (how fitting!). It’s part of the brassica family, where you’ll find broccoli, brussel sprouts, and cabbage as well.

Broccolini has long stems and small florets. Its taste is similar to broccoli, except it’s less bitter and has a touch of sweetness. Broccolini also has many health benefits and is a source of vitamin c, beta-carotene, fiber, and much more.

Broccolini can be cooked in almost any way you can imagine. It tastes great panfried with garlic butter and lemon, throw it on the grill with seafood or steak, or roast it in the oven with more veggies. Cook it any way you would cook broccoli!

Broccolini vs. broccoli rabe

No, these two vegetables are not the same. Broccoli rabe (or rapini) is a leafy vegetable with thin stalks, buds, and a bitter taste. The buds look similar to broccoli or broccolini but are much smaller.

Broccolini, lemon slices, and garlic in a large pink skillet.

Ingredients you need

All you need are 6 easy ingredients to make this flavorful side dish. 

This is what you need:

  • Broccolini
  • Lemon
  • Olive oil
  • Sea salt
  • Garlic
  • Water
Close up of a white plate with cooked broccolini and lemon.

How to make easy sautéed broccolini

This is a great time-saving side dish that’s ready in just 10 minutes. You get so much flavor for such little effort!

Here’s how to make it:

  1. Place everything in a hot skillet: Heat your large skillet with oil over medium-high heat and sauté the broccolini, lemon slices, salt, and garlic slices. Cook for around 7 minutes, moving the skillet continuously to ensure nothing burns.
  2. Add the water: Pour the water into the skillet. After a couple minutes, the water will cook off and the broccolini stems will soften.
  3. Serve: Serve the sautéed broccolini with an extra drizzle of olive oil on a platter with dinner and enjoy!
White plate with cooked broccolini and lemon.

Helpful recipe tips

  • Prepare the broccolini for cooking by trimming the end of the stems. You can also cut each broccolini bunch in half if they’re too thick. 
  • Slice the lemons and garlic cloves into thin slices before adding them to the skillet.
  • Sautéeing the broccolini in a little water right before it finishes cooking helps the stiff stems to soften and takes away the need to parboil the vegetables.
  • Make this recipe oil-free and replace the olive oil with an extra 4 tablespoons of water.
  • Test the firmness of the broccolini by poking it with a fork at it cooks. You want the fork to pierce the thickest point somewhat easily.
  • Toss the broccolini and garlic every minute or so in the pan so it doesn’t burn. This also helps to fully coat everything in the oil and lemon juice.
  • You’ll know the broccolini is ready when it turns to a rich, bright green color. If the color dulls, that means it’s overdone but can still be eaten.
  • Can’t find broccolini? Feel free to make this recipe with regular broccoli or broccoli rabe instead.

How to serve

Garlic and lemon broccolini is a side dish that’s bursting with flavor. It goes well next to crispy skinned salmon or added into a sushi poke bowl. Try it with steak and rib eye, or to compliment a baked chicken breast or Mediterranean chicken and orzo pasta.

You can also enjoy this dish on its own as a light lunch. Dress it up with parmesan cheese, a homemade pesto or chimichurri sauce, or topped with chopped nuts for a little protein.

Close up of a white plate with cooked broccolini and lemon.

Storing leftovers

If you end up with leftover cooked broccolini, store it in an airtight container or sealed bag in the fridge. It should stay fresh for up to 1 week.

Leftovers can be reheated in a skillet or the microwave until warmed through. Feel free to add in a little water or oil, garlic, and lemon for added flavor.

More veggie side dishes

Make sure to include this side dish and more to fill your weeknight meals with plenty of vegetables:

  • Roasted Cauliflower Steaks
  • Easy And Creamy Mashed Potatoes
  • Crispy Smashed Potatoes
  • Mediterranean Chopped Salad
  • Cucumber Salad
  • Sautéed Baby Bok Choy

Did you try this Easy Sautéed Broccolini With Garlic and Lemon? Let me know what you think and what kind of meal you enjoyed it with in the comments below. Don’t forget to snap a pic and tag me on Instagram! I would love to share your recreation with my followers.

Print Recipe
5 from 8 votes

Easy Sautéed Broccolini With Garlic and Lemon

Prepare this Easy Sautéed Broccolini With Garlic and Lemon in only 10 minutes! It’s a bright, flavorful, and vibrant veggie side dish that pairs perfectly with weeknight meals.
Prep Time5 minutes mins
Cook Time10 minutes mins
Total Time15 minutes mins
Course: Appetizer, Side Dish
Cuisine: Italian
Keyword: 20 minute recipe, easy, easy appetizer, side dish, sides, vegan, vegetarian, veggies
Servings: 4 servings
Calories: 100kcal
Author: Lena Gladstone

Ingredients

  • 2 bunches broccolini trimmed and halved if stem is thick
  • 1/2 lemon sliced
  • 3 tbsp olive oil divided
  • 1 tsp sea salt
  • 3-4 cloves garlic finely sliced
  • 4 tbsp water

Instructions

  • Trim the ends from the broccolini. Cut the bunches in half if the stems are too thick. Slice the lemon and garlic into thin slices.
  • Heat a large skillet over medium-high heat. Add 2 tablespoons of olive oil, broccolini, lemon slices, salt, and garlic to the skillet. Cook for 5-7 minutes, moving everything around every minute or so so nothing burns.
  • Pour in the 4 tablespoons of water. Cook for another 2 minutes while the water cooks off and the stems soften.
  • Place everything from the skillet on a platter to serve. Drizzle with the remaining 1 tablespoon of olive oil.

Nutrition

Calories: 100kcal | Carbohydrates: 2g | Protein: 1g | Fat: 11g | Saturated Fat: 1g | Sodium: 583mg | Potassium: 28mg | Fiber: 1g | Sugar: 1g | Vitamin C: 8mg | Calcium: 8mg | Iron: 1mg

You might also like:
A bowl of cilantro lime cauliflower rice garnished with chopped herbs, a lime wedge, and cilantro, with a hand holding a spoon and another hand holding the bowl. Lime slices and cilantro are nearby.Cilantro Lime Cauliflower Rice
A hand lifts a slider from a tray of baked sandwich sliders topped with sesame seeds, next to half an orange and a striped napkin on a white surface.Hawaiian Roll Breakfast Sliders
A bowl of roasted Brussels sprouts with bacon sits on a white tiled surface, surrounded by scattered Brussels sprouts, serving utensils, and two small plates with servings.Balsamic Roasted Brussels Sprouts with Bacon
Mushroom burgers.Mushroom Burger
BBQ baby back ribs.BBQ Baby Back Ribs
Rotisserie chicken salad.Rotisserie Chicken Salad
Egg roll in a bowl in a pan.Egg Roll Bowl
Lemongrass chicken.Lemongrass Chicken

Mediterranean Chopped Salad With Herb Vinaigrette

Posted: August 7, 2020 by lena gladstone | Updated: August 7, 2020

This savory and flavorful Mediterranean Chopped Salad with Herb Vinaigrette is perfect for a crowd or on your own. Load it up with bits of Comté cheese, salami, and fresh herbs for authentic European flavors.

Jump to Recipe
Overhead shot of a large chopped salad in a brown bowl with salad tongs

This is a sponsored post written by me on behalf of Comté Cheese Association. All opinions are 100% mine.

The flavors in my Mediterranean Chopped Salad will make you feel like you’re dining in the south of France. Creamy Comté cheese, salty cured meats, and endless herbs are so refreshing and satisfying. Dressed in an easy and flexible herb vinaigrette, it’ll be hard not to love this side dish!

The particularly unique Comté cows milk cheese will play with your senses as you enjoy this salad. No two cheese wheels taste the same! Its special flavors play well with a variety of Mediterranean ingredients.

This salad is not only easy to prepare but is also gluten-free and keto-friendly! It would be a flavorful addition to potlucks, barbeques, or family meals. Top it with grilled shrimp or a seasoned beef patty for a summer flare.

What is Comté?

Comté is an ancient cooked and pressed cheese made from raw milk. The cheese is handmade every day by artisans in about 150 small village cheesemaking facilities in the Jura Massif of France. Made with no additives or artificial colorants, and controlled at each level of production, Comté is a pure, healthy, and natural food.


An older Comté cheese will work best in this recipe. The cheese will taste nuttier and buttery the longer it ages, pairing well with the intricate and savory Mediterranean flavors.

Chopped tomatoes, salami, olives, cheese, sundried tomatoes, and artichokes on top of a bowl of lettuce.

Recommended Salad Ingredients

You can make this salad with this list of ingredients or anything you have leftover in the fridge.

These toppings are what I liked best:

  • Comté cheese
  • Kalamata olives
  • Salami
  • Cherry tomatoes
  • Sundried tomatoes
  • Marinated artichoke hearts
  • Romaine lettuce

How to make Mediterranean Chopped Salad 

I love to make chopped salads because they are so low maintenance. All you have to do is chop everything up and throw it in a bowl!

Follow these steps to make your salad:

  1. Chop or slice all of the ingredients and add them to a large salad bowl.
  2. Drizzle with dressing, toss well, and enjoy!
Woman's hand pouring green dressing over top a large bowl of chopped salad

Salad Dressing Ingredients

You can adjust, add, or take away from this easy salad dressing. Check out my dressing variations below.

Use these ingredients to make your homemade vinaigrette:

  • Lemon juice
  • Olive oil
  • Salt
  • Garlic 
  • Parsley
  • Cilantro

How to make Herb Vinaigrette

It doesn’t get much easier than this. Keep this recipe for herb vinaigrette around the next time you need an easy, homemade dressing.

This is all you need to do:

  1. Combine all of the ingredients into a jar and blend with an immersion blender or use a regular blender.
Overhead shot of a large chopped salad in a brown bowl with salad tongs

How to serve

Your salad will be savory and filling whether it’s served cold or warm. I prefer it as a cold side dish on a hot summer day. 

Dress up the romaine with the vinaigrette in this recipe or feel free to swap it for another favorite. A simple combination of olive oil and lemon juice is always delicious or use my homemade ranch dressing as a creamy alternative.

Don’t forget the wine! A glass or bottle of Sauvignon Blanc or Pinot Gris will play nicely with the fresh herbs and citrus notes in the salad. The acidity of both will work well with the richness of the cheese and salami.

Recipe variations

Clean out your fridge and top the Mediterranean salad with whatever you have on hand. It will still taste great! To your romaine lettuce, add any of the following recommendations:

  • Chickpeas, kidney beans, or your favorite kind of bean
  • Other varieties of olives
  • Another type of salami or cured meat (thick-cut or pre-sliced)
  • More vegetables like cucumbers, red onion, or raw peppers
  • Nuts or seeds
  • Add cooked grains like quinoa or couscous

Play with the salad dressing flavors with these recommended variations. Most homemade salad dressings are easy to adjust to fit your preferences:

  • Add more dried herbs like oregano or thyme
  • Swap the lemon juice for red wine or balsamic vinegar
  • Fresh garlic is optional but recommended
  • Use vegetable broth instead of olive oil for an oil-free alternative
Overhead shot of a large chopped salad in a brown bowl with salad tongs

More Salad Recipes

If you love this recipe, don’t forget to check out my other salads:

  • Loaded Chicken Salad With Honey Mustard Vinaigrette
  • Garlic Grilled Shrimp With Mediterranean Salad
  • Delicata Squash Salad With Persimmons
  • Raw Brussels Sprouts Salad With Parmesan
  • Radicchio Salad With Creamy Ranch

Did you try this recipe for Mediterranean Chopped Salad with Herb Vinaigrette? Let me know what you think! Leave a comment and don’t forget to take a picture, tag it with #lenaskitchenblog on Instagram. I love seeing what you come up with!

Print Recipe
5 from 7 votes

Mediterranean Chopped Salad With Herb Vinaigrette

This savory and flavorful Mediterranean Chopped Salad with Herb Vinaigrette is perfect for a crowd or on your own. Load it up with bits of cheese, salami, and fresh herbs for authentic European flavors.
Prep Time10 minutes mins
dressing5 minutes mins
Total Time15 minutes mins
Course: Appetizer, Salad
Cuisine: Mediterranean
Keyword: 20 minute recipe, appetizer, cheese, healthy salad, mediterranean, salad, side dish
Calories: 1452kcal
Author: Lena Gladstone

Equipment

  • immersian blender or blender

Ingredients

Mediterranean Chopped Salad

  • ½ cup Comte cheese cubed
  • ⅓ cup kalamata olives cut in half
  • 6 thick slices salami sliced
  • 6 cherry tomatoes halved
  • 2 tbsp sundried tomatoes diced
  • 4 marinated artichoke hearts halved
  • 1 head romaine lettuce chopped

Lemon-Herb Vinaigrette

  • ½ lemon juiced
  • ⅓ cup olive oil
  • ¼ tsp salt
  • 1 garlic clove
  • 2 tbsp parsley
  • 2 tbsp cilantro

Instructions

Mediterranean Chopped Salad

  • Chop or slice all of your ingredients and add them to a large bowl.
  • Drizzle with dressing and toss well. Enjoy as a side salad or with your favorite protein.

Herb Vinaigrette Dressing

  • Combine all of the dressing ingredients into a jar and blend with an immersion blender or use a regular blender.

Nutrition

Calories: 1452kcal | Carbohydrates: 28g | Protein: 38g | Fat: 135g | Saturated Fat: 32g | Cholesterol: 115mg | Sodium: 3423mg | Potassium: 1008mg | Fiber: 9g | Sugar: 10g | Vitamin A: 6242IU | Vitamin C: 103mg | Calcium: 772mg | Iron: 5mg

You might also like:
Kale Caesar Salad
Lemon Basil Pasta Salad
A person holds a plate of chopped salad with greens and radicchio, using a fork. Fresh herbs, citrus halves, and drinks are on the table.Radicchio Fennel Salad with Kale
Overhead shot of honey lime fruit salad in a serving dish and small bowl.Honey Lime Fruit Salad
Easy Olivier Salad (Russian Potato Salad)
A white oval platter with fall harvest salad topped with apple slices, orange slices, dried cranberries, pecans, pumpkin seeds, and cheese shavings, surrounded by salad ingredients.Fall Harvest Salad
A bowl of chicken salad with chopped vegetables and herbs, garnished with fresh greens, sits on a marble surface with a spoon in the bowl.Chicken Salad with Apples
Overhead shot of chicken caesar pasta salad with shaved parmesan cheese on top.Chicken Caesar Pasta Salad

Easy Sushi Poke Bowls

Posted: July 17, 2020 by lena gladstone | Updated: July 17, 2020

This super refreshing, no-cook meal is perfect for summer lunches or dinners! Easy Sushi Poke Bowls are loaded with raw fish, tons of fresh vegetables, and Asian-inspired flavors. Whip up this easy meal in just 15 minutes!

Jump to Recipe
Overhead view of poke bowls with avocado, cucumber salad, raw fish, masago, ginger, and seaweed salad. Chopsticks and sesame seeds on the side.

Easy And Fresh Poke Bowls

Making your own Easy Sushi Poke Bowls at home is so simple!

This refreshing and tasty lunch or dinner has all the flavors of summer. Homemade poke bowls are loaded with raw fish, crispy vegetables, sushi rice, and a spicy chili sauce. With its Asian-inspired flavors and ingredients, you’ll be making this easy meal over and over again. 

If you like my easy poke bowls, you’ll love my recipe for Crispy Skin Salmon With Veggies And Noodles and Easy Sesame Ginger Baked Salmon.

Individual white bowls containing raw salmon and tuna, cucumbers, rice, seaweed salad, sesame seeds, ginger, masago, chili sauce, green onions, and avocado.

What Is Poke?

Poke (pronounced poh-kay) is a Hawaiian dish that contains diced raw fish and fresh vegetables layered over rice. They are always beautiful, colorful, and fresh tasting. When you’re not in the mood for traditional sushi, a poke bowl is the way to go.

Poke Ingredients

Starting with the raw fish is necessary when making poke bowls from scratch. It will first need to be marinated or drenched in a spicy chili and soy sauce.

This what you need to prepare your poke bowls:

  • Sushi-grade fish (a mix of salmon and tuna)
  • Trader Joe’s Chili Onion Crunch sauce
  • Soy sauce
  • Sesame oil
  • Green onions
  • Sesame seeds
  • Sushi rice

The chili onion sauce from Trader Joe’s has a bit of a kick! An alternative chili sauce from an Asian grocery store will still add the same delicious flavor if you don’t have a Trader Joe’s near you. Feel free to use fresh or dried chili’s if that’s what you have at home.

What Kind of Fish Is Best?

Traditional Hawaiian poke is made with raw ahi tuna or cured octopus. Sushi poke bowls are more influenced by Japan. This is why I chose to use a high-quality mix of sushi-grade salmon and tuna.

Topping Options

It’s time to load up the rest of the bowls now that the fish is marinated and dressed. Top your tuna and salmon poke bowls with all of these toppings and more:

  • Cucumber salad
  • Pickled ginger
  • Seaweed salad
  • Masago (fish eggs)
  • Avocado
  • Pickled onions
Overhead view of poke bowls with avocado, cucumber salad, raw fish, masago, ginger, and seaweed salad. Chopsticks and sesame seeds on the side.

How To Make Poke Bowls

This recipe for easy poke bowls only requires 2 steps and can be prepared in just 15 minutes. Here’s how to make poke bowls:

  1. Marinate The Fish: Cut your fish into 1/2 inch cubes. Add it to a medium bowl and toss it with soy sauce, sesame oil, chopped green onions, and chili sauce. Let it sit for 15 to 30 minutes before serving or add it to the poke bowls right away.
  2. Put The Bowls Together: Add rice, marinated fish, cucumber salad, and your toppings of choice to a bowl. Drizzle any extra sauce over top and enjoy!
Woman's hands using chopsticks to grab a piece of raw fish from a bowl with poke ingredients.

How To Make Cucumber Salad

A refreshing cucumber salad on the side or included in the bowl is a delicious and simple addition to the meal. This is all you need to do:

  1. Slice the cucumber into thin slices using a mandolin or a sharp knife. Toss it in a bowl with rice vinegar and salt. Set aside and add it to your poke bowls or enjoy it as a side dish when ready.

Mix it up and use my recipe for my 5 Minute Asian Cucumber Salad instead.

Overhead view of poke bowls with avocado, cucumber salad, raw fish, masago, ginger, and seaweed salad. Chopsticks and sesame seeds on the side.

Recipe Variations

  • Make this poke bowl low-carb and keto-friendly by swapping the white rice for cauliflower rice.
  • If you’re gluten-free, switch the soy sauce for gluten-free tamari instead. Always read the labels on each ingredient to ensure they’re certified gluten-free.
  • Vegan sushi poke bowls are easy to make. Simply remove the fish and masago from the bowls, or substitute them with marinated tofu.
  • Mix up the poke bowl dressing and drizzle my Ginger Sauce over the fish and bowl instead of the chili-soy sauce.
Overhead view of poke bowls with avocado, cucumber salad, raw fish, masago, ginger, and seaweed salad. Chopsticks and sesame seeds on the side.

More Asian-Inspired Recipes You’ll Love

If you enjoy my easy sushi poke bowls, you’ll love these recipes as well:

  • Sautéed Baby Bok Choy
  • Asian Pork Lettuce Cups
  • Air Fryer Asian Pork Meatballs
  • Grilled Asian Salmon

Did you try these Easy Sushi Poke Bowls? Let me know what you think! Leave a comment or rate this recipe below. Don’t forget to take a picture and tag me on Instagram! I love to share all of your recreations!

Print Recipe
4.58 from 14 votes

Easy Sushi Poke Bowls

Easy Sushi Poke Bowls are loaded with raw fish, tons of fresh vegetables, and Asian-inspired flavors. Whip up this easy meal in just 15 minutes!
Prep Time15 minutes mins
Total Time15 minutes mins
Course: Dinner, Lunch
Cuisine: Asian
Keyword: 20 minute recipe, asian, easy, how to make poke tuna, keto, keto dinner, low carb, lunch, poke salmon, poke tuna, salmon, seafood, tuna
Servings: 2 servings
Calories: 339kcal
Author: Lena Gladstone

Ingredients

Poke

  • ¾ lb sushi-grade fish: a mix of salmon and tuna cut into ½ inch cubes
  • ¼ tbsp Trader Joe's chili onion crunch sauce or a chili sauce equivalent
  • 1 ½ tbsp soy sauce
  • 1 tbsp sesame oil
  • ¼ cup green onions
  • ½ tbsp sesame seeds
  • sushi rice

Topping Options

  • pickled ginger
  • seaweed salad
  • masago (fish eggs)
  • avocado sliced thinly

Cucumber Salad

  • 1 small cucumber thinly sliced
  • 1 tsp salt
  • ½ tbsp rice vinegar

Instructions

Poke Bowls

  • Cut the salmon and tuna into 1/2 inch cubes.
  • Toss the fish with soy sauce, sesame oil, chopped green onions, and chili sauce in a medium bowl. You can let it marinate for 15-30 minutes before serving or add it to the bowls right away.
  • In a bowl, add sushi rice, fish, cucumber salad, and toppings of choice. Drizzle over extra sauce. Enjoy!

Cucumber Salad

  • Slice cucumber into thin slices using a mandolin or a sharp knife. Toss with rice vinegar and salt in a medium bowl. Set aside and add to the bowl when ready.

Notes

Once marinated, fish should be used within 24 hours to retain freshness.

Nutrition

Calories: 339kcal | Carbohydrates: 4g | Protein: 36g | Fat: 19g | Saturated Fat: 3g | Cholesterol: 94mg | Sodium: 1996mg | Potassium: 1004mg | Fiber: 1g | Sugar: 2g | Vitamin A: 250IU | Vitamin C: 8mg | Calcium: 62mg | Iron: 2mg

You might also like:
A bowl of cilantro lime cauliflower rice garnished with chopped herbs, a lime wedge, and cilantro, with a hand holding a spoon and another hand holding the bowl. Lime slices and cilantro are nearby.Cilantro Lime Cauliflower Rice
A hand lifts a slider from a tray of baked sandwich sliders topped with sesame seeds, next to half an orange and a striped napkin on a white surface.Hawaiian Roll Breakfast Sliders
A bowl of roasted Brussels sprouts with bacon sits on a white tiled surface, surrounded by scattered Brussels sprouts, serving utensils, and two small plates with servings.Balsamic Roasted Brussels Sprouts with Bacon
Mushroom burgers.Mushroom Burger
BBQ baby back ribs.BBQ Baby Back Ribs
Rotisserie chicken salad.Rotisserie Chicken Salad
Egg roll in a bowl in a pan.Egg Roll Bowl
Lemongrass chicken.Lemongrass Chicken

Easy 5 Minute Asian Cucumber Salad

Posted: June 17, 2020 by lena gladstone | Updated: June 23, 2020

This Easy 5 Minute Asian Cucumber Salad features bright flavors of ginger, rice vinegar, and sesame oil. It’s a keto and Whole30-friendly side dish that can be whipped up in no time!

Jump to Recipe
Large bowl with asian cucumber salad with a serving spoon and sesame seeds on the side.

An easy and flavorful side dish

It’s amazing what you can do using a few simple ingredients. This Easy 5 Minute Asian Cucumber Salad is no exception, with bright and tangy flavors and a short list of ingredients. It’s a tasty side dish that’s fresh and light.

I love to whip up fun and flavorful salads because guess what: salad doesn’t have to be boring! There are so many options available to make salads filling, light, satisfying, or whatever you want.

Whether you need a boost of flavor or a quick side dish, this keto and Whole30 approved Asian Cucumber Salad is the perfect option!

Seperate bowls with asian cucumber salad ingredients

Asian Cucumber Salad Ingredients

The secret’s in the dressing! Cucumbers are obviously a staple in this salad recipe, but all the flavor comes from the dressing. 

Whip it up using these easy ingredients:

  • English cucumbers
  • Rice vinegar
  • Sesame oil
  • Ginger
  • Sea salt
  • Green onions
  • Sesame seeds

How To Make This Recipe

This simple salad recipe is so easy to make. It comes together in 5 minutes and doesn’t require any fancy tools. 

Here’s how to make my Easy 5 Minute Asian Cucumber Salad:

  1. Using a mandolin or sharp knife, thinly slice the cucumber and add into a medium bowl.
  2. In a small bowl, whisk all of the dressing ingredients together. Pour the dressing over the cucumbers and toss together.
  3. Add sliced green onions and sesame seeds, then lightly toss together one last time.
  4. Let the salad marinate in the dressing for 5 minutes, then serve.

Do I need to marinate the cucumbers?

The cucumbers only need to marinate for 5 minutes in the Asian dressing before serving. You can let them sit for longer, however, the cucumbers will naturally release their liquid the longer they sit. This will thin out the dressing slightly.

Should I Peel The Cucumbers First?

It’s up to you! I like the added crunch and fiber when the cucumber peel is left on. Use a vegetable peeler to remove the skin or wash the cucumbers well and leave it on.

Large bowl of asian cucumber salad topped with dressing and green onions

Customize The Flavors

This cucumber salad recipe is very versatile and can take on a number of flavors to fit your palate! Try these recommendations if you want to mix up the dressing or salad:

  • Try a touch of honey or agave syrup to add sweetness in the dressing.
  • You can even add a little heat in the dressing with a sprinkle of red pepper flakes or sriracha.
  • Use my Asian ginger sauce for a stronger flavor!
  • Add additional veggies to the salad like edamame, radishes, red peppers, or red onion for crunch.
Close-up of large bowl with asian cucumber salad with a spoon

How To Serve

This cucumber salad recipe is best served after sitting for a few minutes in the dressing. Leftovers can be stored in an airtight container in the fridge for up to 3 days. Any longer and the cucumber slices may lose their crunch and the dressing will become watery.

Serve this easy side salad with any of these tasty mains:

  • Crispy Skin Salmon With Veggies And Noodles
  • Air Fryer Asian Pork Meatballs
  • Asian Pork Lettuce Cups
Large bowl of asian cucumber salad topped with sesame seeds and green onions

Did you remake this Easy 5 Minute Asian Cucumber Salad? Don’t forget to tell me what you think in the comments below, or share a picture on Instagram! I love to share all of your recreations on my page.

Print Recipe
4 from 23 votes

Easy 5 Minute Asian Cucumber Salad

This Easy 5 Minute Asian Cucumber Salad features bright flavors of ginger, rice vinegar, and sesame oil. It’s a keto and Whole30-friendly side dish that can be whipped up in no time!
Prep Time5 minutes mins
rest time5 minutes mins
Total Time10 minutes mins
Course: Salad, Side Dish
Cuisine: Asian
Keyword: appetizer, asian, keto, salad, side dish, sides, vegan, vegetarian, whole30
Servings: 2 servings
Calories: 96kcal
Author: Lena Gladstone

Ingredients

  • 1 English cucumber thinly sliced
  • 2 tsp rice vinegar
  • 1 tbsp sesame oil
  • 2 tsp ginger grated
  • 1 tsp sea salt
  • 2 green onions
  • 1 tsp sesame seeds

Instructions

  • Using a mandolin or sharp knife, thinly slice the cucumber and add into a medium bowl.
  • In a small bowl, whisk all of the dressing ingredients together. Pour the dressing over the cucumbers and toss together.
  • Add sliced green onions and sesame seeds, then lightly toss together one last time.
  • Let the salad marinate in the dressing for 5 minutes, then serve.

Notes

  • The cucumbers only need to marinate for 5 minutes in the Asian dressing before serving. You can let them sit for longer, however, the cucumbers will naturally release their liquid the longer they sit. This will thin out the dressing slightly.
  • Leftovers can be stored in an airtight container in the fridge for up to 3 days. Any longer and the cucumber slices may lose their crunch and the dressing will become watery.

Nutrition

Calories: 96kcal | Carbohydrates: 7g | Protein: 1g | Fat: 8g | Saturated Fat: 1g | Sodium: 1168mg | Potassium: 254mg | Fiber: 1g | Sugar: 3g | Vitamin A: 277IU | Vitamin C: 6mg | Calcium: 42mg | Iron: 1mg

You might also like:
A bowl of cilantro lime cauliflower rice garnished with chopped herbs, a lime wedge, and cilantro, with a hand holding a spoon and another hand holding the bowl. Lime slices and cilantro are nearby.Cilantro Lime Cauliflower Rice
A hand lifts a slider from a tray of baked sandwich sliders topped with sesame seeds, next to half an orange and a striped napkin on a white surface.Hawaiian Roll Breakfast Sliders
A bowl of roasted Brussels sprouts with bacon sits on a white tiled surface, surrounded by scattered Brussels sprouts, serving utensils, and two small plates with servings.Balsamic Roasted Brussels Sprouts with Bacon
Mushroom burgers.Mushroom Burger
BBQ baby back ribs.BBQ Baby Back Ribs
Rotisserie chicken salad.Rotisserie Chicken Salad
Egg roll in a bowl in a pan.Egg Roll Bowl
Lemongrass chicken.Lemongrass Chicken

Salmon Patties With Homemade Tartar Sauce (Keto)

Posted: May 21, 2020 by lena gladstone | Updated: January 25, 2022

Try these juicy Salmon Patties with Homemade Tartar Sauce as a healthy and time-saving appetizer or side dish! Using simple ingredients, this keto and gluten-free dish takes under 15 minutes to come together and is a real crowd-pleaser.

Jump to Recipe
Salmon patties on a serving plate with  homemade tartar sauce on the side

Fresh and Satisfying Salmon Patties

Need a light weeknight meal or a healthy appetizer? These Salmon Patties with Homemade Tartar Sauce are the perfect option! They’re so easy to whip together and use fresh and simple ingredients. Unlike regular recipes, these salmon patties do not contain any flour, crackers, breadcrumbs, or mayo. It ticks all the boxes: low-carb, keto-friendly, gluten-free, and pescetarian friendly!

Better yet, salmon is rich in omega-3’s, making it the ultimate food for your brain and body. It gets even better when mixed and formed into small, fried cakes with fresh lemon, tangy mustard, and delicious herbs and spices. 

It’s not a party without the tartar sauce! Use my easy recipe to create your own seafood sauce from scratch. Plus, it’s the perfect partner to this appetizer and takes just 5 minutes to throw together.

Close up of salmon patties with tartar sauce on the side and pickles

Salmon Patty Ingredients

The list of ingredients in these patties is fairly short and simple:

  • Skinless salmon fillet
  • Egg yolk
  • Shallot or sweet onion
  • Fresh lemon juice
  • Salt
  • Dijon mustard
  • Smoked paprika
  • Dill

The egg yolks create an immaculate bind that will hold all of the ingredients together. Fresh lemon juice makes the patties extra juicy, plus it reduces the fishy smell from the salmon. Add a little extra squeeze of lemon to the finished patties.

Can I Use Canned Salmon?

Canned salmon is a great option if you’re running low on time and unable to shop for or prepare fresh salmon. Just know that skinless, boneless, fresh salmon fillet is the best option and will give you an unbeatable flavor.

How to Make Salmon Patties

Using a food processor will save you time in this recipe, however, feel free to throw everything in a large mixing bowl and combine the ingredients with a fork instead.

This is how you make fresh and crispy salmon patties:

  1. Mix Ingredients: In a food processor, add the salmon, egg yolk, lemon juice, onion, salt, dijon mustard, paprika, and dill. Pulse for 10 seconds or until all of the ingredients are well combined. DO NOT over blend.
  2. Form The Patties: Wet your hands with water and shape the salmon mixture into 8 balls. Use your hands to flatten each ball into patties.
  3. Pan Fry: Heat up a skillet with the cooking oil on medium heat. Fry the salmon patties, cooking for 2 to 2 ½  minutes per side, or until golden and crispy.
  4. Let Them Cool: Allow the salmon patties to rest on a cooling rack for 5 minutes.
  5. Serve and Enjoy: Transfer the patties to a serving plate. They’re best served warm with lemon wedges and homemade tartar sauce.

How To Make Salmon Patties In An Air Fryer

Cooking the patties in an air fryer will create a low-fat version and save you time. To do so, spray both sides of each salmon cake with cooking spray. Preheat the air fryer at 400ºF for about 3 minutes. Cook the patties for 6 to 8 minutes per side or until golden brown and crispy all around.

Can I Bake Salmon Patties Instead?

Of course! This is another great, low-fat option. To bake the salmon patties, preheat your oven to 425ºF. Place the patties on a baking sheet with parchment paper and bake for 8 minutes on each side.

Homemade Tartar Sauce Ingredients

This homemade and easy tartar sauce is tangy and the perfect pairing for the salmon cakes. These are the only ingredients you need: 

  • Mayonnaise
  • Buttermilk
  • Dill pickle + juice
  • Shallot or onion
  • Capers
  • Dried dill or parsley
  • Dijon mustard

How to Make Homemade Tartar Sauce

Does it get any easier than this? Two steps and one bowl!

  1. Combine: In a small mixing bowl, add all of the ingredients and mix well to blend.
  2. Cover: Cover the bowl with plastic wrap and refrigerate for 30 minutes before serving.
Salmon Patties With Homemade Tartar Sauce on top of a kale salad

Recipe Variations

  • You don’t have to use egg yolks as a binder. Use a mixture of 6 tablespoons of water and 2 tablespoons of golden flaxseed meal as a substitution.
  • If you don’t have dill on hand, feel free to change the herbs to parsley, cilantro, or green onion.
  • Don’t like mayonnaise? Use plain Greek yogurt instead of mayo in the tartar dressing.
  • If you don’t have buttermilk at home, use an equal amount of plain yogurt instead, or pour 1 cup of milk over 1 tablespoon of white vinegar. Stir, and let it sit for 5 minutes.
Salmon Patties With Homemade Tartar Sauce on a serving plate with pickles and lemon wedges

How to Serve

Serve the keto-friendly salmon patties warm with a squeeze of fresh lemon juice and the homemade tartar sauce on the side. They go great as the protein next to a kale salad with fresh caesar dressing.

Looking for more tasty salmon dishes? Try these recipes:

  • Smoked Salmon Street Tacos
  • Crispy Skin Salmon With Veggies And Noodles
  • Salmon, Tomato Skewers With Chimichurri Sauce
  • Grilled Asian Salmon With Mustard Dressing
  • Smoked Salmon Benedict
Close up of Salmon Patties With Homemade Tartar Sauce on top of a kale salad

Did you try these Salmon Patties With Homemade Tartar Sauce? Let me know what you think by leaving a comment below and giving this recipe a rating! Don’t forget to take a picture tag me Instagram or use #lenaskitchenblog to be featured in my stories! I love seeing what you come up with!

Print Recipe
4.23 from 18 votes

Salmon Patties With Homemade Tartar Sauce (Keto)

Try these juicy Salmon Patties with Homemade Tartar Sauce as a healthy and time-saving appetizer or side dish! Using simple ingredients, this keto and gluten-free dish takes under 15 minutes to come together and is a real crowd-pleaser.
Prep Time10 minutes mins
Cook Time5 minutes mins
Tartar Sauce5 minutes mins
Total Time15 minutes mins
Course: Appetizer, Dinner, Lunch
Cuisine: American
Keyword: 20 minute recipe, 30 minute meal, appetizer, easy appetizer, gluten free, keto, low carb, salmon, seafood, side dish, sides
Servings: 8 cakes
Calories: 319kcal
Author: Lena Gladstone

Equipment

  • Food Processor

Ingredients

Salmon Patties

  • 1 lb skinless salmon fillet cut into 1" chunks
  • 1 egg yolk
  • 1 small shallot or 1/4 sweet onion chopped
  • 1 tbsp fresh lemon juiced
  • ½ tsp salt
  • 1 ½ tsp Dijon mustard
  • ¼ tsp smoked paprika
  • 2 tbsp fresh dill chopped
  • 2 tbsp cooking oil
  • lemon wedges

Tartar Sauce

  • 1 cup mayonnaise
  • 2 tbsp buttermilk
  • 2 tbsp dill pickle minced finely
  • 2 tbsp dill pickle juice
  • 2 tbsp shallot or onion minced finely
  • 1 tbsp capers drained and minced
  • 1 tbsp fresh dill or parsley finely chopped
  • 1 tsp Dijon mustard

Instructions

Salmon Patties

  • In a food processor, add the salmon, egg yolk, onion, lemon juice, salt, dijon mustard, paprika, and dill.
  • Pulse for 10 seconds or until all of the ingredients are well combined. DO NOT over blend.
  • Wet your hands with water and shape the salmon mixture into 8 balls. Use your hands to flatten each ball into patties.
  • Heat up a skillet with the cooking oil on medium heat. Fry the salmon patties, cooking for 2 to 2 ½  minutes per side, or until golden and crispy.
  • Allow the salmon patties to rest on a cooling rack for 5 minutes.
  • Transfer the patties to a serving plate. They’re best served warm with lemon wedges and homemade tartar sauce.

Tartar Sauce

  • In a small mixing bowl, add all of the ingredients and mix well to blend.
  • Cover the bowl with plastic wrap and refrigerate for 30 minutes before serving.

Notes

  • Mince the tartar sauce ingredients finely for the best melding of the flavors. 
  • The salmon patties will last in an airtight container in the fridge for 5 to 7 days.
  • This homemade tartar sauce will last up to a week in the fridge.

Nutrition

Calories: 319kcal | Carbohydrates: 2g | Protein: 12g | Fat: 29g | Saturated Fat: 4g | Polyunsaturated Fat: 15g | Monounsaturated Fat: 8g | Trans Fat: 1g | Cholesterol: 68mg | Sodium: 487mg | Potassium: 319mg | Fiber: 1g | Sugar: 1g | Vitamin A: 129IU | Vitamin C: 5mg | Calcium: 23mg | Iron: 1mg

You might also like:
A bowl of cilantro lime cauliflower rice garnished with chopped herbs, a lime wedge, and cilantro, with a hand holding a spoon and another hand holding the bowl. Lime slices and cilantro are nearby.Cilantro Lime Cauliflower Rice
A hand lifts a slider from a tray of baked sandwich sliders topped with sesame seeds, next to half an orange and a striped napkin on a white surface.Hawaiian Roll Breakfast Sliders
A bowl of roasted Brussels sprouts with bacon sits on a white tiled surface, surrounded by scattered Brussels sprouts, serving utensils, and two small plates with servings.Balsamic Roasted Brussels Sprouts with Bacon
Mushroom burgers.Mushroom Burger
BBQ baby back ribs.BBQ Baby Back Ribs
Rotisserie chicken salad.Rotisserie Chicken Salad
Egg roll in a bowl in a pan.Egg Roll Bowl
Lemongrass chicken.Lemongrass Chicken

  • Page 1
  • Page 2
  • Go to Next Page »

Primary Sidebar

Welcome, glad you’re here!

Hi, I’m Lena Gladstone, the recipe developer and food photographer behind Lena’s Kitchen. Here you will find approachable food recipes to share with the whole family. Keto friendly, weeknight dinners all made with fresh ingredients. Click here to learn more!

Let’s Connect

Craving More Easy Recipes?

Subscribe for weekly ideas in your inbox.


More like this

Grilled Salmon Kabobs

Three plates with sub sandwiches filled with mixed salad, potato chips on the side, and two glasses of orange drink on a white tiled surface.

Chopped Sandwich Recipe

Panko chicken on a bed of greens.

Panko Chicken

A bowl of hummus topped with spiced ground meat, pickled onions, pine nuts, fresh herbs, and a hand holding a spoon, with side dishes visible around the bowl.

Hummus with Meat

Extra Crispy Air Fryer Wings with celery and homemade ranch sauce on plate being picked up with hand. lenaskitchenblog.com

Air Fryer Wings

LENASKITCHEN PICKLED ONIONS

Pickled Onions Recipe

Grilled Skirt Steak

Steelhead Trout Recipe

RECIPE CATEGORY

Craving More Easy Recipes?

  • Facebook
  • YouTube
  • Instagram
  • Pinterest

Home
Recipes
Contact
Shop

FAQ
Privacy Policy
Accessibility

Copyright © 2026 · Site Credits · Sitemap

Rate This Recipe

Your vote:


A rating is required
A name is required
An email is required